You will see that a multi cavity silicone mold can save money. It works well for vacuum casting when you need many good parts. Cost, output, and efficiency are important for picking your mold. The total cost depends on your mold design. It also depends on how complex your prototypes are. The quality you want matters too. Silicone molds are flexible for making things. They are good for saving money and getting parts fast. Always pick the right mold for your project needs. This helps you get the best results. Key Takeaways Single cavity molds work well for small batches…
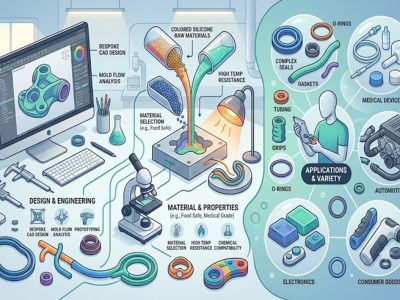
You see custom silicone parts in many things you use every day. These parts are special because silicone bends easily, lasts a long time, and can handle heat and chemicals. Many businesses use silicone because it has special features: The silicone product market keeps getting bigger as businesses want more custom silicone parts for their own needs. Silicone is used in medical devices, implants, seals, gaskets, and car parts, which shows it can do many jobs. Industry Significance Medical Devices Used for tubing, catheters, implants, and tests because it stays strong in heat and does not break down with chemicals.…
When you start making silicone molds, you will notice that the silicone mold parting line is crucial in the casting process. You must consider where to place the silicone mold parting line, as this decision facilitates the removal of your prototype from the silicone mold. It also contributes to achieving a smooth and aesthetically pleasing surface. A well-thought-out design allows you to create prototypes that function effectively and possess the correct size and shape. If you aim for strong or high-quality prototypes, careful planning of your silicone mold and tooling is essential. Crafting custom silicone molds enables better quality checks…
A typical silicone mold used in urethane casting can produce 15 to 30 parts, depending on material, geometry, and casting conditions. Silicone molds for urethane casting usually make 20 to 50 parts, though some last 25 to 300 cycles with the right silicone grade, part shape, and handling. In many shops, silicone tooling averages about 20 to 25 parts before replacement. Your urethane casting mold life depends on geometry, silicone type, resin aggressiveness, cure temperature, and demolding stress. If you want realistic output estimates, you need to judge each of these variables with care. Key Takeaways Silicone molds usually make…

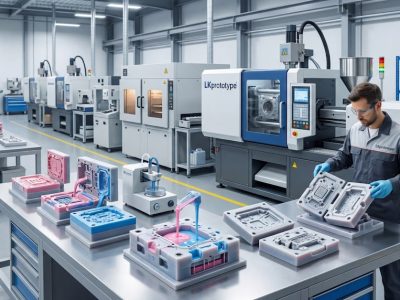
Introduction If you’re an engineer, product designer, or sourcing manager trying to validate a design or run a low-volume pilot, silicone tooling (often used for vacuum/urethane casting) can feel like the “fast middle ground” between one-off prototypes and full production tooling. This guide is written for US-based teams who need a realistic way to estimate: What a silicone mold cost typically looks like (in USD) How many parts you’ll actually get from one mold (yield) What lead time to expect When silicone tooling is the right call—and when aluminum tooling or 3D-printed molds make more sense How to use it:…
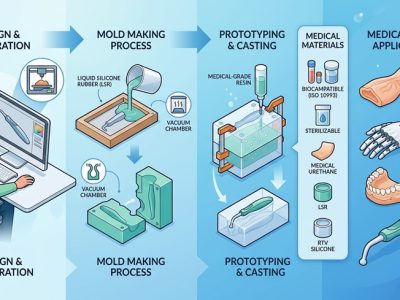
A silicone mold for medical devices helps you make products quickly. You use this method to build accurate prototypes and test new devices. Silicone is flexible and easy to shape. It shows small details well. Medical teams trust silicone because it is safe for people. Silicone molds give clear benefits: AdvantageDescriptionEnhanced DurabilitySilicone molds are strong and resist impacts. They help devices last longer and handle stress.Protection Against Environmental FactorsThey block moisture and chemicals. This keeps important parts safe.Cost EfficiencyThey cut down on labor and parts. This makes manufacturing easier and lowers costs.Compliance with Regulatory StandardsSilicone is safe for patients. This…
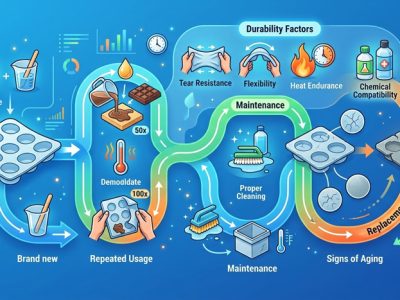
You might ask how long silicone mold life is when you use molds. People use molds for baking, crafts, or big projects. Most silicone molds last between 200 and 3,000 uses. Basic peroxide silicone molds last about 200 times. High-quality platinum silicone molds last over 3,000 times. The chart below shows how different silicone types affect mold life and strength: Mould RangeType of SiliconeLifespan (Baking Cycles)Recommended UsageEntry-levelBasic peroxide silicone200-500 cyclesSometimes used at homeStandardImproved peroxide silicone500-800 cyclesUsed often at homeUpper IntermediatePlatinum silicone1,000 (hot) / 3,000+ (cold)Used by serious hobby bakersSilmaé (Maé Innovation)100% Premium high-quality silicone3,000+ cyclesUsed by professionals in factories If…
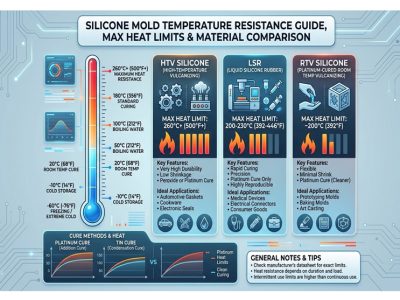
You want to know how hot silicone molds can get. Most silicone molds can handle heat from -60°C to 300°C, which translates to -76°F to 572°F. Premium silicone, known for its silicone mold temperature resistance, works safely at 250°C for extended periods, equivalent to 482°F, and can withstand short bursts up to 300°C. Silicone molds allow you to bake, cast, and create prototypes. You need strong silicone mold temperature resistance to prevent issues in high-heat applications. You can compare silicone with other mold materials, which helps you choose the safest option for your project. Key Takeaways Silicone molds can handle…
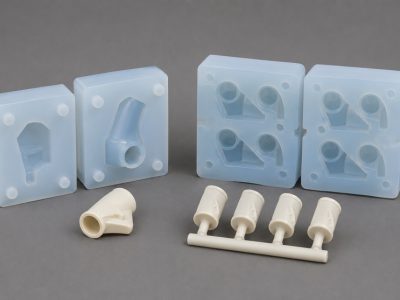
In the world of modern manufacturing, the silicone mold casting process has emerged as a powerhouse for creating high-quality prototypes. Also known as vacuum casting, silicone tooling casting bridges the gap between initial 3D printed models and full-scale injection molding. Whether you are looking for low-volume production runs or functional testing parts, understanding how this process works is essential for optimizing your product development cycle. The silicone mold casting process helps you make detailed copies of a master part. It uses a flexible silicone mold. You can use this process to make prototypes and finished products. Many industries use silicone…
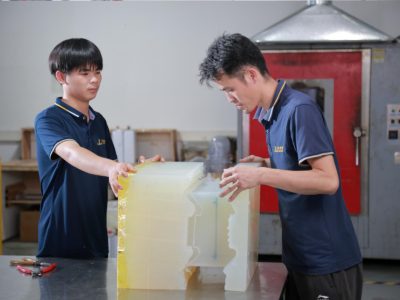
Silicone molding for low volume production is a cost-effective manufacturing solution widely used for prototyping and small batch production. Compared to traditional injection molding, low volume silicone molding offers faster lead times, lower tooling costs, and greater flexibility for custom parts. You can pick silicone molding for low volume production. It is good when you want cheaper ways to make prototypes or custom parts. Silicone molding lets you change things easily and get quick results. You may use methods like compression molding, vacuum casting, or injection molding. These ways are great for making small batches and short runs. Silicone molding…
Want to convert your CAD design into a sample prototype or small-batch production? Upload your files and get a fast and accurate quote.