LKprototype

You can pick from a few main ways to make plastic electronic enclosures in small amounts. These ways are aluminum tooling, P20 pre-hardened steel, rapid tooling inserts, and 3D-printed mold parts. What you pick changes how much it costs, how fast it is, and how good it turns out. Making things in small amounts lets you make test models, change designs, and build short runs. Many methods and materials work for different projects.
Key Takeaways
Pick the best manufacturing method for your project. You can use 3D printing for fast prototypes. CNC machining is good for accuracy. Injection molding works well for bigger batches.
Making small amounts lets you save money and be flexible. You can test your designs and change them. You do not need to pay a lot at first.
Choose materials carefully for your enclosures. Think about strength and heat resistance. Also, check if the material can handle the environment. This helps your enclosure last longer.
Make your enclosure easy to manufacture. Use simple shapes and the right wall thickness. This lowers costs and makes production faster.
Think about growing in the future. Start with methods that let you change things easily. Switch to better processes when you need to make more products.
WHAT ARE PLASTIC ELECTRONIC ENCLOSURES?
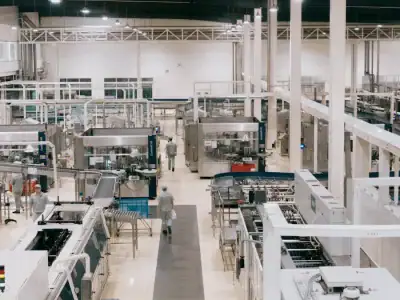
Plastic electronic enclosures help keep electronics safe and neat. You can find these cases in homes and factories. They protect important parts and help devices work well.
COMMON TYPES OF ELECTRONIC ENCLOSURES
There are different types of plastic electronic enclosures. Each type uses its own material for special needs. The table below lists the most common materials and what they do:
Material Type | Key Properties | Applications |
|---|---|---|
Acrylonitrile Butadiene Styrene (ABS) | Tough, impact-resistant, limited UV resistance | Indoor environments |
Acrylonitrile Styrene Acryl Ester (ASA) | UV stability, chemical resistance, antimicrobial properties | Medical, laboratory, food processing equipment |
Combination of Polycarbonate and ASA | Flame resistance, high-temperature durability, weather and chemical resistance | Outdoor or industrial enclosures |
Carbon Neutral Bioplastic | Biodegradable, soft, environmentally certified | Eco-friendly soft case enclosures, consumer goods |
Pick the material that fits where you will use your enclosure. Think about what you need it to do.
KEY FUNCTIONS OF ELECTRONIC HOUSINGS
Plastic electronic enclosures do many important jobs. They keep your devices safe from harm. These cases block things like water, dust, and bumps. They also stop electrical problems, like short circuits. This helps your device work well and keeps people safe. The enclosure keeps tiny parts safe from dirt and wetness.
Tip: The right enclosure makes your device safer and more dependable.
INDUSTRIES THAT USE PLASTIC ELECTRONIC ENCLOSURES
Lots of industries use plastic electronic enclosures. The table below shows where you might see them and what they are used for:
Industry | Typical Applications |
|---|---|
Semiconductor | ESD safety, cleanroom compatibility, flame-retardant properties for sensitive components. |
Medical Devices | Biocompatibility, sterilization resistance, maintaining integrity through sterilization cycles. |
Telecommunications | Heat dissipation, EMI shielding, ensuring signal integrity in data centers. |
Automotive Electronics | Vibration resistance, thermal cycling, reliability in extreme temperature conditions. |
You can find these enclosures in many places, like hospitals and cars. Each industry uses them to solve problems and protect their equipment.
WHY LOW-VOLUME MANUFACTURING MATTERS FOR ELECTRONIC ENCLOSURES
WHAT IS LOW-VOLUME PRODUCTION?
Low volume manufacturing means making only a few parts. You do not make thousands or millions at once. For plastic electronic enclosures, you can make just one or a few thousand. This way uses flexible manufacturing processes. You do not have to buy expensive tools for big batches. You can use 3D printing, CNC machining, or vacuum casting. These ways help you test ideas and change things fast. Low volume manufacturing lets you try new designs without spending a lot. This helps people come up with new ideas.
BENEFITS FOR PRODUCT DEVELOPMENT AND MARKET TESTING
Low volume manufacturing gives you many good things. You can turn your idea into a product quickly. You can test your design and see how it works. Here are some main benefits:
You can make 50 to 1,000 units for testing.
You can see if your product is right for the market.
You can change your design without spending too much.
You can make your enclosure special for different needs.
You can use different ways to make prototypes. For example:
You can use 3D printing to make a model from your CAD file.
You can check the size and shape of your enclosure.
You can find problems early and fix them before making more.
Low volume manufacturing lets you make your product better step by step. You can listen to feedback and keep costs low. This way helps you try new ideas and stay ahead in the market.
Note: Low volume manufacturing lowers tooling costs and helps you get to the market faster.
Benefit | Description |
|---|---|
Lower costs | Cuts down on tooling costs and makes it easier to start, so you can try new ideas. |
Speed | Makes things faster, so you can sell your product sooner than with old ways. |
Flexibility | Lets you change your design or listen to customers without spending a lot. |
Customization | Lets you make special parts without extra cost. |
Control | Makes lead times shorter and helps you make things when you need them. |
WHEN TO CHOOSE LOW-VOLUME MANUFACTURING
Pick low volume manufacturing when you need things fast and want to change them easily. This way works best in these cases:
You need special designs for small batches.
You want to make prototypes for things like aerospace or medical devices.
You have designs that need advanced ways to make them.
Some examples are:
Aerospace parts that need special shapes for safety.
Consumer electronics that must fit special market needs.
Medical devices, like dental implants, that must fit each person.
Low volume manufacturing gives you more control over what you make. You can pick the best way to make your project. This helps you try new ideas and make good products quickly.
BEST MANUFACTURING METHODS FOR PLASTIC ELECTRONIC ENCLOSURES
3D PRINTING FOR RAPID ENCLOSURE PROTOTYPES
You can use 3d printing to make enclosures fast. This way lets you build models in one day. You can test shapes and sizes quickly. 3d printing is good for making prototypes and small groups. You can change your design without spending a lot of money. There are different ways, like SLA and SLS, that help you make strong parts. You can try out many models to see what works best. 3d printing is flexible and saves time.
Tip: 3d printing helps you get your enclosures ready faster.
Advantages | Limitations |
|---|---|
Makes lead times shorter | Not all materials can be used |
Lowers prototyping costs | Some parts might break easily |
Gets products to market sooner | Needs special skills |
Easy to use process |
|
Lets you test many models |
|
Flexible for manufacturers |
|
Supports testing of different ideas |
|
CNC MACHINING FOR FUNCTIONAL ELECTRONIC HOUSINGS
CNC machining helps you make enclosures that fit well. You can use many materials, like plastic or metal. This way does not need expensive tools and is quick. You get strong and high-quality parts for your enclosures. CNC machining is good for making a small number of parts. You can make housings that last a long time. This way lets you make shapes that are hard to do by hand.
Feature | Low Volume CNC Machining | 3D Printing (FDM/SLA) | Low Volume Injection Molding |
|---|---|---|---|
Tooling Cost | Low or none | None | High |
Per-Part Cost | Medium and steady | High but drops a little | Very low |
Lead Time | Fast, just days | Very fast, hours to days | Moderate, weeks for tools |
Materials | Many types | Mostly plastics | Many thermoplastics |
Complexity | High, but some limits | Very high, inside shapes | Medium, needs draft angles |
Tolerances | Very high | Low to medium | High |
VACUUM CASTING FOR LOW-VOLUME PRODUCTION
Vacuum casting lets you make enclosures with cheap tools. You use silicone molds to make the parts. This way is good for both test parts and small batches. You can get good enclosures quickly. Mold prices go from $200 to $1,000. The price for each part depends on size and finish. You can make about 30 enclosures for $58 each. Vacuum casting is flexible and saves money.
Mold costs: $200–$1,000 for silicone molds.
Per-unit price: $10–$100, based on size and shape.
Example: 30 test enclosures cost about $1,742 total.
RAPID TOOLING AND LOW-VOLUME INJECTION MOLDING
Rapid tooling and low-volume injection molding help you make small batches. You pay less at the start and get parts faster. This way is good for 50 to 10,000 units. You can change your design if you need to. Rapid tooling gives you parts in days or weeks. Regular molding takes longer and costs more. Low-volume injection molding helps you sell your product sooner.
Feature | Low Volume Production | Mass Production |
|---|---|---|
Cost | Lower at the start, good for small batches | Higher at the start, good for big batches |
Lead Time | Faster for small batches | Slower, better for large numbers |
Feature | Rapid Molding | Traditional Molding |
|---|---|---|
Lead Time | Days to weeks | Weeks to months |
Cost | Lower | Higher |
MANUFACTURING METHOD COMPARISON OVERVIEW
There are many ways to make enclosures. Each way has its own good points. 3d printing is fast and flexible. CNC machining gives you strong parts and many choices. Vacuum casting saves money and is good for test parts. Injection molding makes strong enclosures for small groups. You can pick the way that fits your project best.
Manufacturing Method | Advantages | Cost Implications | Lead Time |
|---|---|---|---|
CNC Machining | Accurate, many materials, quick, saves money, flexible | No need for expensive tools | Faster than old methods |
3D Printing | Fast models, complex shapes, less waste, custom parts | Saves money by using less material | As fast as one day |
Injection Molding | Same parts every time, many materials, strong, efficient | Cheap molds for small batches | Parts in just a few days |
Urethane Casting | Cheap tools, good quality, quick, flexible | Simple molds save money | Faster than injection molding |
Note: You can use more than one way to get the best enclosures.
3D PRINTING FOR ELECTRONIC ENCLOSURES

FDM, SLS, AND MJF TECHNOLOGY COMPARISON
You can choose from several 3d printing technologies for your electronic enclosures. Each one gives you different results for cost, speed, and part quality.
FDM (Fused Deposition Modeling) works best for quick and affordable prototypes. You can use it when you want to test ideas fast.
SLS (Selective Laser Sintering) gives you better accuracy and a smoother finish. You get strong parts that resist heat and chemicals, but the cost is higher than FDM.
MJF (Multi Jet Fusion) is similar to SLS. It makes flexible and tough parts, which is great for enclosures that need to bend or snap together.
Tip: FDM is the cheapest option. SLS and MJF cost more, but they give you better surface quality and durability.
Technology | Cost | Surface Finish | Durability | Best Use Case |
|---|---|---|---|---|
FDM | Low | Basic | Moderate | Fast prototypes |
SLS | Medium-High | Good | High | Functional enclosures |
MJF | Medium-High | Good | High/Flexible | Snap-fit or flexible parts |
ADVANTAGES OF 3D PRINTING
You can use printing to make complex shapes that are hard to create with other methods. This helps you design a custom-designed enclosure with special features like snap fits, cable channels, or custom vents.
You can test how strong your enclosure is early in the process.
You can check if your buttons and connectors line up right.
You can see if the enclosure keeps your electronics cool.
You can change your design without waiting for new tools.
Printing lets you make low-volume enclosures quickly and at a lower cost. You do not need to wait for expensive molds. You can get your product to market faster and collect feedback before making more.
LIMITATIONS OF 3D PRINTING
Printing does have some limits. You may not get the same strength as with molded parts. Some materials are not available for all 3d printing technologies. The surface might feel rough, and you may need to finish it by hand.
Printing large parts can take a long time.
Some parts may not be as strong as those made with other methods.
You may need special skills to set up and finish your enclosure.
Note: Always check if printing meets your needs for strength, finish, and cost before you choose it for your project.
CNC MACHINING FOR CUSTOM PLASTIC ELECTRONIC ENCLOSURES
HOW CNC MACHINING WORKS
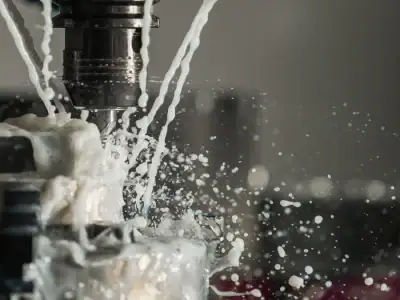
CNC machining shapes plastic blocks into enclosures. The machine uses your digital design to cut the plastic. Sharp tools remove extra material from the block. You can make holes, slots, and other special parts. Computer controls help each part match your design. The finished parts fit together well and work for your project.
Tip: You can fix problems fast by changing your design with CNC machining.
MATERIAL OPTIONS FOR CNC ENCLOSURES
You can choose from many plastics for CNC machining. Each plastic gives your enclosure different features. Here is a table with common choices:
Material | Key Properties | Best Use Cases |
|---|---|---|
ABS | Tough, easy to machine, good for indoor | General enclosures |
Polycarbonate | Strong, clear, impact-resistant | High-strength designs |
Acrylic | Clear, smooth, good for displays | See-through designs |
Nylon | Flexible, wear-resistant | Moving parts in your design |
POM (Delrin) | Low friction, high precision | Tight-fitting designs |
Pick the material that matches what you need. If you want a see-through case, use acrylic. If you need a strong case, pick polycarbonate.
BENEFITS FOR LOW-VOLUME MANUFACTURING
CNC machining has many good points for small batches. You do not need to buy costly molds for your parts. Here are some benefits:
You save money when making only a few parts.
You can use many shapes and plastics for your design.
Each enclosure is made with high accuracy.
You can add holes and threads to your parts.
You can make both test models and finished parts this way.
CNC machining lets you test your design and change it quickly. You can make parts with tight fits, up to ±0.01 mm. This helps your enclosure fit and work as you want.
LIMITATIONS OF CNC MACHINING
CNC machining does not work for every idea. There are some limits:
You cannot make very tricky inside shapes.
You waste more plastic than with molding.
Big parts cost more and take longer to make.
The surface may need extra polishing to look nice.
Note: Always check if CNC machining is right for your design and budget before you begin.
VACUUM CASTING AND RAPID TOOLING SOLUTIONS
HOW VACUUM CASTING WORKS
Vacuum casting helps you make plastic electronic enclosures that look and feel like real products. You start by making a master model, often with 3D printing. You place this model in a box and pour liquid silicone around it. When the silicone hardens, you remove the master model. This leaves a mold you can use to make copies. You pour liquid plastic into the silicone mold. A vacuum pulls out air bubbles, so the parts come out smooth and strong. You can make many copies with one mold. This process gives you a lot of flexibility to test different designs.
IDEAL PRODUCTION QUANTITIES
Vacuum casting works best when you need between 10 and 100 parts. You can use it for prototypes, market samples, or small production runs. If you want to test your enclosure before making thousands, this method is a smart choice. You get parts that look and feel like final products. This gives you flexibility to change your design if you find problems.
RAPID TOOLING VS VACUUM CASTING
You may wonder when to use rapid tooling instead of vacuum casting. Rapid tooling uses metal molds to make plastic parts. These molds cost more at the start, but they last longer. You can make hundreds or even thousands of enclosures with rapid tooling. Vacuum casting costs less at first and works well for small batches. If you need more parts, rapid tooling saves money in the long run. Both methods give you flexibility, but vacuum casting is better for quick changes and small numbers.
COST AND LEAD TIME ADVANTAGES
You want to know how much time and money these methods take. Here is a quick comparison:
Vacuum casting has low upfront tooling costs and faster turnaround times.
You can get 10 to 100 production-like parts in 5 to 10 days.
Rapid tooling has higher initial costs but is more economical for larger production runs.
Lead times for rapid tooling can take about 5 to 25 days.
Tip: Choose vacuum casting for speed and flexibility with small batches. Pick rapid tooling if you plan to make more enclosures and want to save money over time.
INJECTION MOLDING FOR ELECTRONIC ENCLOSURE PRODUCTION
PROTOTYPE INJECTION MOLDING
You can use prototype injection molding when you want to test your design before making many parts. This method lets you create a small batch of end-use parts that look and feel like the final product. You get to check if your enclosure fits your electronics and works as planned. Prototype injection molding uses simple molds, so you do not wait long or spend too much. You can make changes to your design and try again quickly.
Tip: Use prototype injection molding to spot problems early and save money on changes.
LOW-VOLUME INJECTION MOLDING
Low-volume injection molding helps you make between 100 and 10,000 end-use parts. You do not need to invest in expensive tools for this process. You can use it for market testing, pilot runs, or custom orders. This method gives you strong and reliable end-use parts. You can choose from many plastics to match your needs. Low-volume injection molding works well for short runs and lets you move to bigger production later.
PRODUCTION TOOLING OPTIONS
You have several tooling options for injection molding. Aluminum molds work well for low-volume runs and cost less. Steel molds last longer and suit higher numbers of end-use parts. Some companies use rapid tooling to make molds faster. You can pick the right tool based on how many end-use parts you need and how fast you want them. The right tooling helps you control costs and get quality enclosures.
Tooling Type | Best For | Cost | Lifespan (Parts) |
|---|---|---|---|
Aluminum | Low-volume production | Lower | 1,000–10,000 |
Steel | High-volume production | Higher | 50,000+ |
Rapid Tooling | Prototyping, short runs | Lowest | 100–1,000 |
WHEN INJECTION MOLDING BECOMES COST-EFFECTIVE
Injection molding becomes cost-effective when you need many end-use parts with the same design. The cost per part drops as you make more enclosures. If you plan to produce hundreds or thousands of end-use parts, this method saves you money over time. You get high-quality, repeatable results. You also get to use a wide range of plastics for your enclosures. If you want to scale up, injection molding is the best choice for making lots of end-use parts quickly.
Note: Choose plastic injection molding when you want to balance quality, speed, and cost for your end-use parts.
MATERIAL SELECTION FOR PLASTIC ELECTRONIC ENCLOSURES
Picking the right plastic for your enclosure is important. The plastic you choose changes how your product works. Each plastic has its own good points. You should think about how strong it is, how much heat it can take, if it is safe from fire, and how much it costs.
ABS FOR GENERAL-PURPOSE ENCLOSURES
ABS is a good choice for most enclosures. It is strong and does not break easily. ABS is easy to shape into cases. It costs less than many other plastics. People use ABS for things like phones and small gadgets. It works in temperatures from -20 to 80 °C. But ABS does not do well in sunlight, so use it inside.
Tip: Choose ABS if you want a strong and cheap case for everyday things.
POLYCARBONATE FOR IMPACT RESISTANCE
Polycarbonate is very tough and hard to break. You see it in helmets and covers at work. It can handle heat up to 140 °C. Polycarbonate does not get damaged by sunlight, so you can use it outside. It costs more than ABS, but it keeps your electronics safer.
PC-ABS FOR BALANCED PERFORMANCE
PC-ABS mixes polycarbonate and ABS together. You get the strength of polycarbonate and the easy shaping of ABS. This mix does not catch fire easily (UL 94 V-0). It works in both hot and cold places. Use PC-ABS for cases that need to be extra safe or used in hard places.
UL94 V0 FLAME-RETARDANT MATERIALS
If you need your case to be safe from fire, pick plastics with UL 94 V-0. Polycarbonate and PC-ABS can have this rating. These plastics slow down fire and help protect your electronics. Use them for cars, factories, or other risky places.
MATERIAL COMPARISON TABLE
Here is a simple table to help you compare plastics for enclosures:
Material | Impact Resistance | Flame Retardancy | Cost | Temperature Range | Typical Use |
|---|---|---|---|---|---|
ABS | High | UL 94 HB | Low | -20 to 80 °C | Consumer electronics |
Polycarbonate | Superior | UL 94 V-0 | High | -20 to 140 °C | Industrial, outdoor devices |
PC-ABS | Very High | UL 94 V-0 | Moderate | Higher than ABS | Automotive, safety enclosures |
Note: Always pick the plastic that fits your needs for safety, strength, and price.
ELECTRONIC ENCLOSURE DESIGN CONSIDERATIONS
WALL THICKNESS GUIDELINES
You need to choose the right wall thickness for your enclosure. Thin walls can break easily. Thick walls can make your enclosure heavy and waste material. Most plastic enclosures use walls between 1.5 mm and 3 mm. If you use ABS, you can pick 2 mm. Polycarbonate works well at 2.5 mm. You should keep the wall thickness even. Uneven walls can cause warping or weak spots.
Tip: Use a table to check the best wall thickness for each material.
Material | Recommended Wall Thickness |
|---|---|
ABS | 1.5–2.5 mm |
Polycarbonate | 2–3 mm |
PC-ABS | 2–2.5 mm |
SNAP FITS, BOSSES, AND ASSEMBLY FEATURES
You can make your enclosure easy to assemble. Snap fits let you join parts without screws. Bosses help you hold screws or guide pins. You should design snap fits with rounded edges. Sharp corners can break. Bosses need enough thickness to stay strong. You can use ribs to add strength. If you want to open your enclosure often, use clips or latches.
Snap fits: Fast assembly, no tools needed.
Bosses: Hold screws, keep parts in place.
Ribs: Add strength, reduce bending.
VENTILATION AND HEAT MANAGEMENT
Your electronics can get hot. You need to add vents to help air flow. Small holes or slots let heat escape. You can place vents near parts that get warm. If your device needs extra cooling, use a fan or heat sink. You should keep vents away from water or dust. You can use mesh covers to protect your electronics.
Note: Good ventilation keeps your device safe and working longer.
DESIGN FOR MANUFACTURABILITY PRINCIPLES
You should design your enclosure so it is easy to make. Simple shapes cost less and finish faster. Avoid deep pockets or sharp corners. Use draft angles to help parts come out of molds. You can add fillets to reduce stress. If you plan to use CNC machining, keep the design simple. For injection molding, use uniform wall thickness and avoid undercuts.
Simple shapes: Lower cost, faster production.
Draft angles: Help parts release from molds.
Fillets: Reduce stress, prevent cracks.
Remember: Smart design makes manufacturing easier and saves money.
COMPARING MANUFACTURING METHODS FOR LOW-VOLUME ELECTRONIC ENCLOSURES
COST COMPARISON
You might wonder how much each method costs. 3D printing does not need expensive tools to start. This makes it cheaper at first. CNC machining costs more for each part, but it is good for small groups. Vacuum casting is in the middle for price. Injection molding costs a lot at the start, but gets cheaper if you make many parts. If you want to change your design often, 3D printing saves money.
Method | Startup Cost | Cost per Part | Best For |
|---|---|---|---|
Additive | Low | Medium | Prototypes, mass customization |
Medium | Medium | Functional parts | |
Medium | Low-Medium | Small runs | |
Injection Molding | High | Low | Larger batches, mass customization |
LEAD TIME COMPARISON
You may need your enclosures quickly. 3D printing can make parts in just hours or days. CNC machining is also fast for simple shapes. Vacuum casting takes about one week to finish. Injection molding takes longer because you must make molds first. If you want to test ideas fast, 3D printing is best.
QUALITY AND SURFACE FINISH
You want your enclosure to look nice and work well. 3D printing gives good detail, but sometimes needs extra work to look smooth. CNC machining makes smooth parts that fit together tightly. Vacuum casting copies the look of the first model. Injection molding gives the best finish and makes every part the same. If you want to change designs, 3D printing lets you do it without losing quality.
PRODUCTION VOLUME CAPABILITIES
Each way works best for a certain number of parts. 3D printing is good for making 1 to 100 parts. CNC machining works for 1 to 500 parts. Vacuum casting is best for 10 to 100 parts. Injection molding is great for 100 to thousands of parts. If you want every part to be different, 3D printing is the best choice.
BEST APPLICATIONS FOR EACH METHOD
You should pick the method that fits your project. Use 3D printing for test models, special shapes, or when you want each part to be different. Pick CNC machining for strong and exact parts. Choose vacuum casting for small groups that look like the final product. Use injection molding for big batches and the lowest price per part.
Tip: Pick your method based on how fast you need parts, how much you want to spend, how good they must look, and if you want each part to be special.
HOW TO CHOOSE THE RIGHT MANUFACTURING METHOD
EVALUATE PROJECT VOLUME
You should start by thinking about how many enclosures you need. If you only need a few, 3D printing or CNC machining works well. For batches of 10 to 100, vacuum casting is a smart choice. If you plan to make hundreds or thousands, low-volume injection molding saves money as you make more parts. Always match your method to your project size.
DEFINE PERFORMANCE REQUIREMENTS
You need to know what your enclosure must do. Some projects need strong, tough cases. Others need clear or flexible parts. If you want to test many shapes, 3D printing lets you try new ideas fast. CNC machining gives you strong and exact parts. For large, simple shapes, thermoforming or vacuum forming can help you save money.
Tip: Write down what your enclosure must handle, like heat, impact, or water.
CONSIDER DEVELOPMENT TIMELINES
You should check how fast you need your enclosures. 3D printing gives you parts in just a day or two. CNC machining also works quickly for simple designs. Vacuum casting takes about a week. Injection molding takes longer because you need to make molds first. If you want to test your idea fast, pick a method with a short lead time.
BALANCE COST AND QUALITY
You must think about your budget and how good your parts need to be. Some methods cost less at the start but more for each part. Others cost more at first but less as you make more. Use this table to compare your options:
Manufacturing Method | Key Features | Suitable For |
|---|---|---|
Fast turnaround, design flexibility, quick changes without new molds | Prototypes, low-volume runs | |
3D Printing | Rapid iteration of complex geometries, early validation | Complex designs |
Thermoforming / Vacuum Forming | Lower tooling costs, faster setup times, suited for larger enclosures | Medium volumes, budget constraints |
Choose the method that fits your needs and your wallet.
PLAN FOR FUTURE SCALE-UP
You should think ahead. If you want to make more enclosures later, pick a method that lets you grow. Start with 3D printing or CNC machining for testing. Move to injection molding or thermoforming when you need more parts. Planning now helps you save time and money in the future.
Note: The right choice today makes it easier to grow your project tomorrow.
There are lots of ways to make plastic electronic enclosures in small groups. Choosing the best way can help you spend less money. It also helps you get your product ready faster. You should think about what your project needs. You also need to look at how much money you have and when you need your parts.
Check your design and what you want it to do
Look at prices and how long each way takes
Think about how you might make more later
Tip: Try to learn about all your choices and ask people who know a lot. Picking the right way helps you make better products and stay ahead of others.
FAQ
What is the fastest way to make a prototype enclosure?
You can use 3D printing. This method gives you a model in just a day. You can test your design quickly and make changes without waiting long.
Which material should I pick for outdoor enclosures?
Polycarbonate works best for outdoor use. It resists sunlight and impact. You get a strong case that lasts longer outside.
How many enclosures can I make with vacuum casting?
You can make 10 to 100 parts with one silicone mold. This method works well for small batches and testing before larger production.
Can I change my design after starting production?
Yes, you can. If you use 3D printing or CNC machining, you can update your design easily. These methods do not need new molds for each change.
What is the cheapest way to make a few custom enclosures?
Method | Startup Cost | Best For |
|---|---|---|
3D Printing | Low | 1–20 parts |
CNC Machining | Medium | 1–100 parts |
You should pick 3D printing for the lowest cost when you need only a few enclosures.