LKprototype
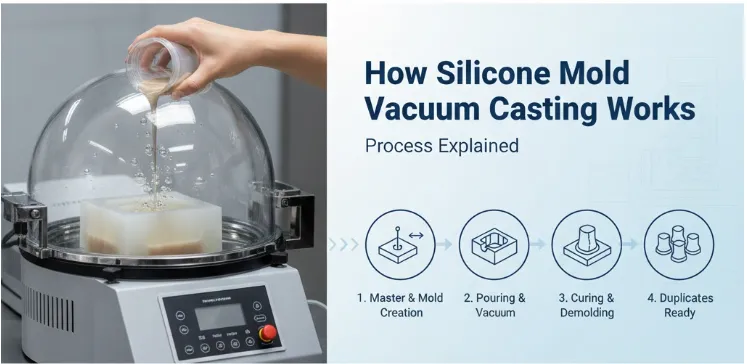
When you use the vacuum casting process explained here, you start with a high-quality master model. You get the surface ready so it is smooth. Then you make a silicone mold that copies every detail of your high-quality master model. You mix and remove air from the silicone. Next, you pour it over the high-quality master model and let it harden. After you check the mold, you fill it with resin using the vacuum casting process explained. This makes sure there are no air bubbles. The vacuum casting process explained makes copies of the high-quality master model. These copies have smooth surfaces and sharp details. They are great for prototypes and parts that are almost ready for production.
Get the surface of your high-quality master model ready.
Make a silicone mold that matches your high-quality master model.
Mix and remove air from silicone for the vacuum casting process explained.
Pour silicone over the high-quality master model and let it harden.
Check the mold before starting the vacuum casting process explained.
Fill the mold with resin using the vacuum casting process explained.
Harden and finish the part to match your high-quality master model.
Key Takeaways
Make sure your master model has a smooth surface. This helps you get the best casting results.
Silicone molds are strong and last a long time. You can use them about 20 times. This saves money.
Follow the vacuum casting steps carefully. This helps stop air bubbles. You will get good prototypes.
Pick the right materials for your project. Different resins have special features for different uses.
Vacuum casting works well for small batches and prototypes. It is fast and gives great detail.
What Is Vacuum Casting?
Overview of Vacuum Casting Process
Vacuum casting helps make parts with lots of detail. People also call it polyurethane casting or urethane casting. This method uses a vacuum to pull liquid plastic into a silicone mold. First, you get a master model ready. Next, you make a silicone mold that matches the model. You mix liquid resin and pour it into the mold. The vacuum takes out air bubbles. It helps the resin fill every space in the mold. This process gives smooth surfaces and sharp edges.
You need special tools for each step. Here is a table that shows what you use:
Stage | Equipment Description |
|---|---|
Vacuum Pump | Makes a vacuum inside the mold. |
Vacuum Chamber | Holds the mold and resin while you inject and cure. |
Injection Molding Machine | Spreads resin evenly for better parts. |
Molds | Shapes the casting, usually made from silicone. |
Heating Equipment | Heats up the mold to cure strong parts. |
Control System | Checks temperature and pressure for good results. |
Auxiliary Tools | Helps mix, prepare molds, and trim finished parts. |
Vacuum casting works well for small batches. You get parts fast and with good quality. It is great for prototypes and custom designs.
Advantages of Using Silicone Molds
Silicone molds have many good points in vacuum casting. You can use each mold about 20 times. This makes them good for making a small number of parts. Silicone is strong and does not tear easily. You can make shapes that are hard to copy without hurting the mold. You can pick from many polyurethane materials. Some are soft, some are hard, and some are clear or colored. This lets you match the look and feel of injection molded parts.
Tip: Silicone molds can copy tiny textures and finishes. You can make parts with fancy designs and smooth surfaces.
Parts made this way are strong and tough. The quality is as good as or better than injection molded or 3D printed parts. You can ship finished parts in about 10 working days. This is much faster than other ways. If you need a few parts or prototypes that look great, vacuum casting with silicone molds is a smart choice.
Step-by-Step Vacuum Casting Process
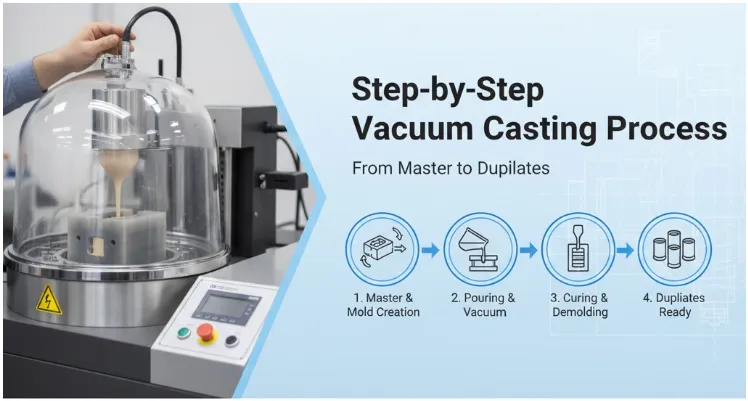
Creating the Master Pattern
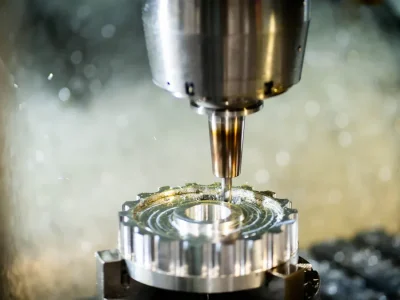
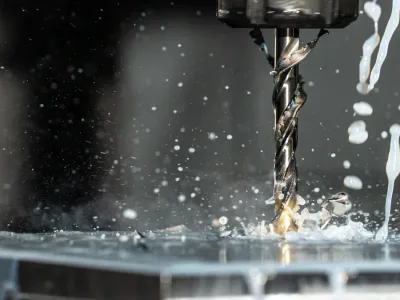
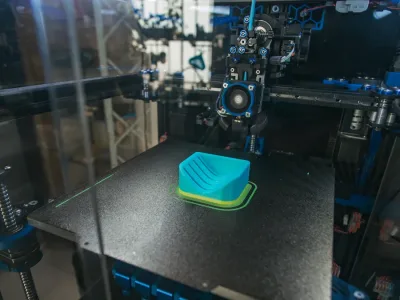
You begin by making a master pattern. This pattern decides the shape and look of each prototype. You can design the part using CAD software. Then, you pick CNC machining or 3D printing to make the master pattern. You polish or grind the surface to fix any flaws. This step matters because the silicone mold copies every detail. Common master pattern materials are polyurethane resins, ABS-like grades, and PC-like resins. These materials help you match real production parts.
Material Type | Properties and Applications |
|---|---|
Polyurethane Resins | Act like thermoplastics, good for covers and strong parts. |
ABS-like Grades | Hard parts, Shore D hardness 78–82. |
PC-like Resins | Tough, clear, Shore D hardness 82–86. |
Soft-touch Elastomers | TPE-like, stretches over 250%, soft-touch uses. |
Clear Resins | Very clear, used for lenses and see-through cases. |
Specialty Options | Can resist heat, be safe for food, stop fires, conduct electricity, or be filled with foam. |
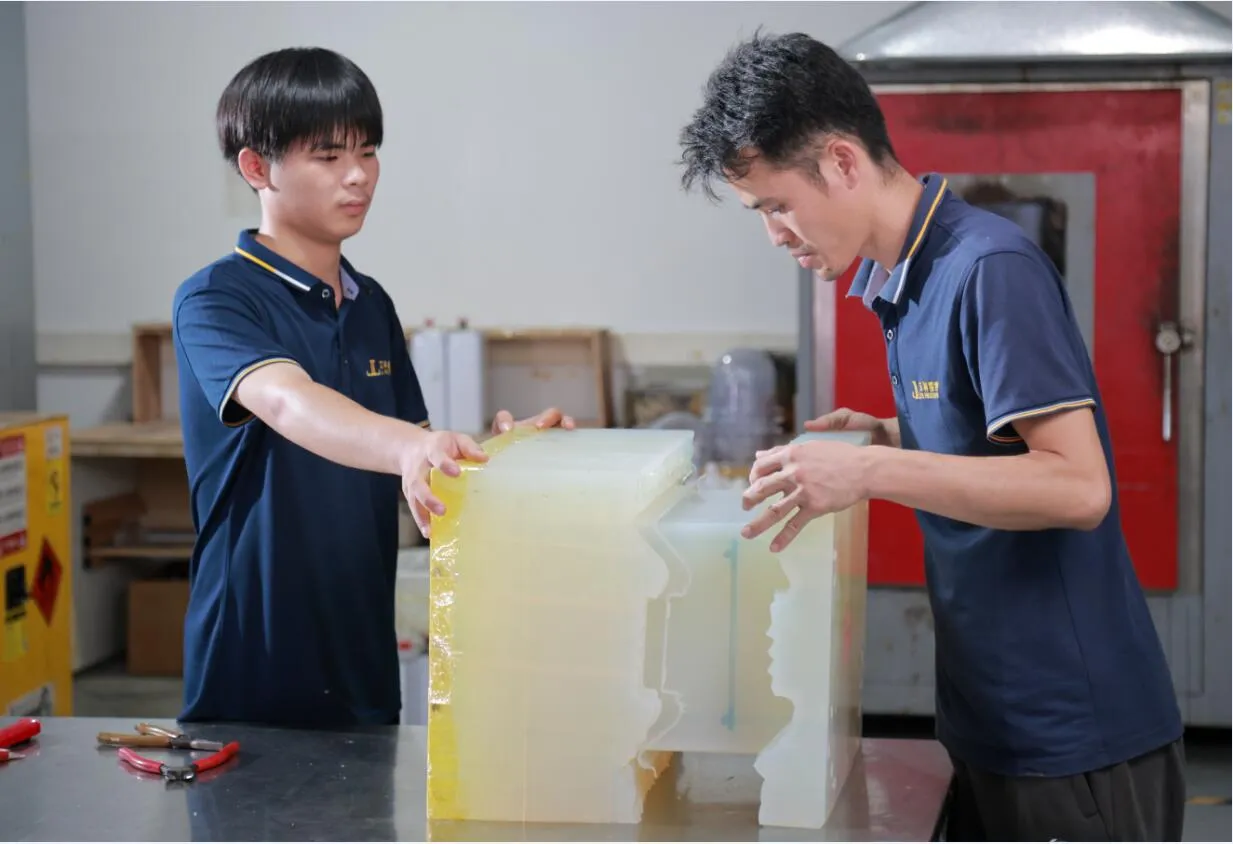
Making the Silicone Mold
Next, you make the silicone mold. Put the master pattern in a casting box. Pour liquid silicone over the pattern. Cure the silicone in a warm oven. The mold copies every detail, even tiny textures. Good gate design and even wall thickness help stop problems. Thick parts may shrink more, so keep walls between 0.75 mm and 1.5 mm for small prototypes.
Tip: Silicone molds are great for copying tiny details and tricky shapes. You get smooth surfaces with little extra work.
Pouring and Vacuuming Resin
Now, you mix the resin for casting. Use a vacuum chamber to take air out of the mold and resin. Pour the resin into the silicone mold while under vacuum. This step stops air bubbles and makes sure resin fills every space. You get smooth surfaces and sharp edges. This process works well for prototypes with fine details or raised text.
Evidence Description | Impact on Quality and Consistency |
|---|---|
The vacuum process removes trapped air in the material. | Gives the best finish. |
The vacuum casting process creates high-quality prototypes and parts. | Material fills the mold well. |
The final product is close to the master model. | Copies the original details for better quality. |
Curing and Demolding
After pouring, you cure the resin. Put the mold in an oven for controlled curing. Cure times and temperatures depend on the resin type. Polyurethane resins cure in minutes or hours. Full cure takes 24–72 hours. Warmer temperatures make curing faster. Once cured, you take the part out of the mold. Remove sprues and finish the prototype as needed.
Resin Type | Initial Cure Time | Full Cure Time | Temperature Impact |
|---|---|---|---|
Epoxy Resins | 24 to 72 hours | Up to 7 days or 2 weeks | Warmer temperatures make curing faster. |
Polyurethane Resins | Minutes to hours | 24-72 hours | Colder temperatures slow curing. |
Polyester Resins | 2-8 hours | 24-48 hours | Best curing temperature is 20-30°C. |
UV Resins | Seconds to minutes | N/A | N/A |
Tips for Small Batch and Prototype Casting
You can get great results in small batch and prototype casting by following these tips:
Keep wall thickness between 1–1.5 mm to stop warping and sink marks.
Add a draft angle of 1–2 degrees on vertical walls to make demolding easier.
Use ribs for strength instead of thick walls. Rib thickness should be less than 60% of the main wall.
Design bosses with wall thickness not more than 60% of the main wall.
Use practical tolerances of ±0.1 mm per 30 mm. Only use tighter tolerances for important features.
Note: Keeping wall thickness the same is important for the vacuum casting process. If thickness changes, your prototype can get weak spots or deform.
You can make prototypes with tiny details and smooth surfaces. The vacuum casting process lets you make small batches fast and with good accuracy.
Applications and Benefits
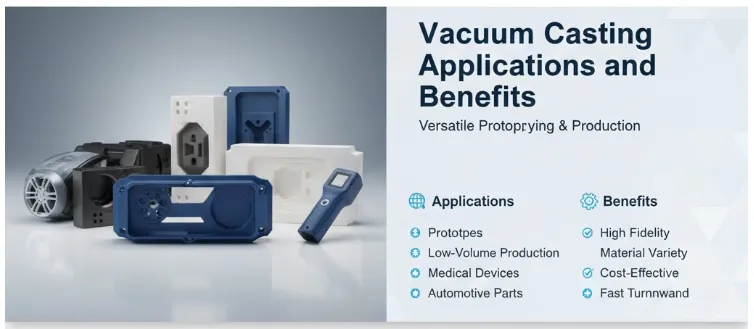
Prototype Development (Medical, Electronics, Automotive)
Vacuum casting is used to make prototypes fast in many fields. This process helps you build models that look like real products. In medicine, you can make special tools for each patient. In electronics, people use casting to make cases and switches. Car engineers use it to test inside parts and small details. The table below shows how different industries use vacuum casting:
Industry | Application Description |
|---|---|
Medical | Making exact parts for patients, like custom medical tools and supports. |
Building detailed samples and small batches, like inside car parts that work. | |
Electronics | Making a few parts and samples, like custom cases and tiny switches. |
You can see that vacuum casting helps new ideas grow in these areas.
Custom Parts and Low-Volume Production
Vacuum casting lets you make custom parts and small groups of items fast. You can make up to 50 pieces quickly. This is good for testing and trying out ideas. You can pick from many materials to match what you need. You can also make more than one working model from the same mold. This saves you time and money. Here are some main benefits:
You get parts with lots of detail and smooth sides.
You can pick soft or hard materials for your parts.
You can change your design without spending a lot.
You can make many working models for tests.
Tip: Vacuum casting helps you move from testing ideas to making more parts.
Benefits Compared to Traditional Casting
Vacuum casting has many good points over old casting ways. It costs less because you use silicone molds, not steel ones. You get parts faster, making 40–60 pieces in just a few days. The parts you make are high quality, with sharp details and smooth finishes. The table below shows how vacuum casting and old casting are different:
Aspect | Vacuum Casting | Traditional Casting |
|---|---|---|
Cost | Lower costs because of silicone molds | Higher costs because of steel molds |
Speed | Makes 40–60 parts fast in days | Takes longer to make parts |
Part Quality | Very accurate and high quality | Quality can change with the method |
Vacuum casting is great for making samples, custom parts, and working models. This way of casting works for tricky shapes and many types of materials. You get a good mix of speed, price, and quality for your needs.
Vacuum Casting vs. Vacuum Die Casting
Key Differences Between Processes
You may wonder how vacuum casting and vacuum die casting are different. Both use a die to shape things, but they work in different ways. Vacuum casting uses liquid resins and silicone molds. Vacuum die casting uses melted metals and strong steel dies. The table below shows the main differences:
Aspect | Vacuum Casting | Die Casting |
|---|---|---|
Materials | Uses liquid resins like polyurethane and silicone. | Employs molten metals in robust steel molds. |
Production Volume | Ideal for short runs and prototypes. | Cost-effective for large-scale manufacturing. |
Cost | Minimal tooling costs. | High upfront investment in steel tooling. |
Surface Finish | Excels in replicating details and textures. | Ensures smooth surfaces with high tolerances. |
Mechanical Properties | Less strong, versatile in coloration and flexibility. | Superior strength, thermal resistance, and stability. |
Applications | Functional prototypes and cosmetic parts. | High-volume production of durable components. |
Vacuum die casting makes parts that are very strong and can handle heat. You use it when you need lots of parts that last a long time. Vacuum casting gives you more freedom to change your design. It works well for making a few parts or testing ideas. High vacuum die casting and ultra-high vacuum die casting make even stronger parts with fewer problems. Both methods give smooth surfaces and sharp details. Vacuum die casting is better for metal parts.
Choosing the Right Method for Your Project
Think about a few things before you choose a process. Here are some tips to help you:
Production Volume: Use vacuum casting for small or medium batches. Use vacuum die casting for making lots of parts.
Budget Constraints: Vacuum casting costs less to begin. Vacuum die casting costs more because of steel dies.
Design Flexibility: Vacuum casting lets you change designs easily. Vacuum die casting is best for designs that stay the same.
Also, look at these points:
Volume: Decide how many parts you want.
Precision: Think about how exact your parts need to be.
Material Properties: Pick the best material for your needs.
Surface Quality: Choose the finish you want for your parts.
If you want to test ideas or make a few parts, vacuum casting is a good choice. If you need thousands of strong metal parts, vacuum die casting or high vacuum die casting is better. Ultra-high vacuum die casting is best for parts that must be very strong and have no defects. Always pick the casting process and die type that fits your project.
Technical Specs, Limitations & Design Considerations
Part Size, Wall Thickness & Complexity
When you plan a casting project, you need to know the limits for part size and wall thickness. Silicone mold casting works best for parts with a minimum wall thickness of 1.5 mm. You can go down to 0.75 mm in areas that do not carry loads. The largest part you can make with this casting method measures 1900 x 900 x 750 mm. The maximum volume for a single casting is 10 liters. You can usually get up to 20 copies from one mold. The table below shows these specs:
Specification | Value |
|---|---|
1.5 mm (0.75 mm in non-load-bearing areas) | |
Maximum Part Dimensions | 1900 x 900 x 750 mm |
Maximum Volume | 10 liters |
Typical Quantities | 1 to 20 parts |
Complex shapes work well with silicone mold casting. You can add fine details and textures. You should keep wall thickness even to avoid weak spots.
Accuracy, Surface Finish & Tolerances
Casting with silicone molds gives you good accuracy and smooth surfaces. You can expect a typical accuracy of ±0.010 inch plus ±0.003 inch for each inch of part length. If you use a premium master, you can reach a tolerance of ±0.05 mm. The surface finish ranges from Ra 0.8 to 1.6 µm for non-mirror masters. The table below shows these details:
Aspect | Specification |
|---|---|
±0.010 inch base + ±0.003 inch/inch | |
Best-case Tolerance | ±0.05 mm for premium masters |
Surface Finish Range | Ra 0.8–1.6 µm for non-mirror masters |
You get sharp edges and smooth surfaces with this casting process. You can use casting for parts that need fine details.
Lead Time and Volume Considerations
You can finish a casting project quickly. The average lead time for casting is 7 to 15 business days. If you need a medium batch of 20–30 parts, you can complete the casting in about 10 days. Casting works best for small to medium batches, usually between 5 and 100 units.
You get fast results for prototypes and small production runs.
Casting lets you test designs before moving to mass production.
You save time compared to other casting methods.
Tip: Use casting when you need parts fast and do not want to wait for long tooling times.
Common Limitations and How to Overcome Them
You may face some challenges with casting. Air bubbles can form in silicone molds. You can fix this by pouring carefully, using compressed air, or placing the mold in a vacuum chamber. Pressure also helps remove bubbles. The table below shows common problems and solutions:
Challenge | Strategy to Overcome |
|---|---|
Air bubbles in silicone molds | Careful pouring methods |
Application of compressed air | |
Use of vacuum chamber | |
Use of pressure |
You can avoid most casting problems by following these steps. You get better results and higher quality parts.
Note: Always check your casting setup before starting. This helps you catch problems early and improve your casting process.
FAQ / Common Questions
Can Vacuum Casting Reproduce Fine Details?
Vacuum casting can copy tiny details and textures very well. Silicone molds pick up even the smallest features from your master model. You get smooth surfaces and sharp edges with little extra work. Many people use vacuum casting for prototypes and small batches. The results look almost like injection molding. You do not need to do much extra work after casting, unlike 3D printing.
Aspect | Vacuum Casting | 3D Printing |
|---|---|---|
Detail Reproduction | Captures fine details and textures | Often requires post-processing |
Surface Finish | Exceptional smooth finishes | Variable, often rough |
Material Properties | Closer to injection-molded plastics | Limited to specific materials |
Vacuum casting can copy very tiny details.
It works well for working prototypes and small batches.
The process spreads material evenly, so details come out clear.
Minimum Wall Thickness and Rib Guidelines
There are some easy rules for wall thickness and ribs in vacuum casting. These rules help stop problems like warping or sinking.
Make walls at least 1 mm thick for most parts.
For smaller parts, you can sometimes use thinner walls.
Ribs should be thinner than the main wall.
Rib thickness should be less than 60% of the wall.
Rib height should be less than three times its thickness.
Tip: If you follow these rules, your casting will be strong and look nice.
Suitable Materials for Silicone Mold Vacuum Casting
You can pick from many materials for silicone mold vacuum casting. Each one has special features. Some are strong, some bend easily, and some can handle heat or chemicals. Here is a table with common materials and what they do:
Material | Properties |
|---|---|
Heicast 8263 | High impact resistance |
Heicast 8150 | Flame retardant properties |
Sika PX223 HT | Simulates rigid plastic |
Sika PX 5690 | Simulates soft plastic |
Sika PX 5210 | High durability |
Sika PX 527 | Versatile applications |
Heicast 8400 | Excellent surface finish |
Heicast T0387 | Good flexibility |
Sika UP 4280 | High temperature resistance |
Pelnox UR-2180 | Good chemical resistance |
UX50 | Suitable for detailed casting |
Sika PX331 | High strength and toughness |
You can choose the best material for your project. Vacuum casting lets you try different materials before making lots of parts. This is why many industries like using it.
You can use casting to make good prototypes fast. It also works for small batches. The process is great for tricky designs. You save money when you use casting. Many car companies pick casting for inside parts and lights. It gives exact results quickly. If you want to try new ideas or need special parts, use vacuum casting.
Benefit | Description |
|---|---|
Cost-effectiveness | Vacuum casting costs much less than 3D printing or injection molding. |
Design complexity | The process works well for hard designs, so it is flexible. |
Can you reuse silicone molds for vacuum casting?
You can use silicone molds about 20 times. After that, they start to wear out. The number of uses depends on the mold’s shape and the resin you pick. Always look at your mold for cracks or damage before you use it again.
What is the fastest way to cure cast resin?
You can make resin cure faster by using a warm oven. Most polyurethane resins get hard in just a few hours. If you use more heat, the resin will cure even quicker. Always read and follow the instructions from the resin maker.
Which materials work best for vacuum casting?
You can pick from many different materials. Here is a simple table to help you choose:
Material Type | Best Use |
|---|---|
Polyurethane Resin | Strong prototypes |
ABS-like Resin | Hard, durable parts |
Clear Resin | Lenses, see-through |
Soft Elastomer | Flexible items |
How do you avoid air bubbles in cast parts?
Tip: Mix the resin slowly so you do not trap air. Use a vacuum chamber to pull out any bubbles. Pour the resin gently into the mold. These steps help you get smooth parts with no bubbles.