LKprototype
 Want to know how to make a CAD file for 3D printing? This guide will take you through the steps—from choosing CAD software to preparing your design for printing. Get ready to bring your ideas to life.
Key Takeaways
Selecting appropriate CAD software is crucial for effective 3D modeling, with options available for both beginners and advanced users.
Understanding basic 3D printing concepts, such as file formats and material properties, is essential for creating compatible and successful CAD designs.
Adhering to fundamental design principles, along with thorough preparation and testing of CAD models, enhances the likelihood of achieving quality 3D prints.
Selecting the Right CAD Software
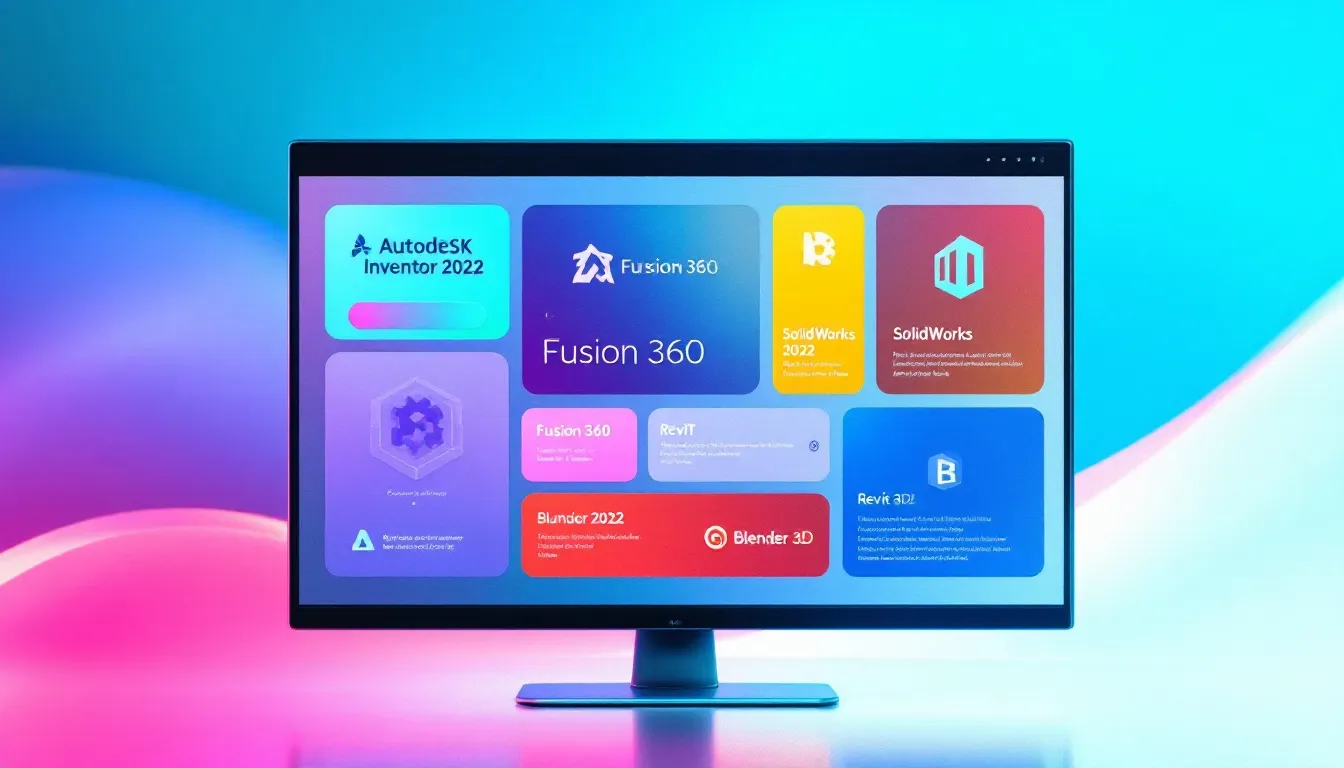
Selecting the appropriate CAD software is crucial for effective 3D modeling. The proper program can significantly simplify the design process, while an ill-suited choice may lead to unnecessary complications. With numerous choices available, from complimentary tools such as Tinkercad to sophisticated programs like Fusion 360, it’s imperative to pick a solution that matches your specific needs and skill level.
Novices might find that user-friendly and cost-free software offers an ideal entry point into CAD. Conversely, experienced users could be inclined towards premium options because they offer more complex features and greater functionality. In deciding on a CAD tool, one should let their individual requirements and competence determine their selection.
Below are some alternatives worthy of consideration in this context.
Top Free CAD Programs
Individuals embarking on their exploration of computer-aided design will find Tinkercad to be an excellent starting point. Its straightforward, easy-to-grasp interface coupled with the convenience of cloud-based access makes it particularly accessible for novices. Its capabilities are primarily limited to elementary 3D modeling and might not suffice for more complex projects.
For those in pursuit of more advanced design tools, alternatives like FreeCAD and Blender provide a richer set of features. FreeCAD is praised for its parametric modeling functionality which permits users to modify their models by altering specific parameters retrospectively but requires one to scale a somewhat steeper learning curve.
Conversely, Blender offers comprehensive 3D modeling and animation tools that may present complexity in terms of use for beginners due to the depth of features available. Each program presents distinct advantages designed to suit various levels from beginner proficiency to expert skill sets.
Leading Paid CAD Software
In the realm of high-end CAD programs, Fusion 360 by Autodesk stands out as a prominent choice. It’s a versatile cloud-based CAD software that encompasses CAD, CAM, and CAE functionalities all in one platform. This tool is particularly appreciated for its cohesive approach to merging design and production workflows.
SolidWorks sets itself apart as another formidable piece of software broadly utilized within mechanical engineering and industrial design sectors. Its broad range of design tools coupled with robust parametric modeling abilities makes it an ideal selection for sophisticated professional use.
AutoCAD, also developed by Autodesk, delivers superior capabilities for both two-dimensional and three-dimensional designs geared towards achieving precise detail. The program’s vast array of drafting features serves various fields such as architectural design and mechanical engineering applications – proving exceedingly beneficial when manipulating a specific dwg file.
These premier paid options in CAD software furnish advanced instruments pivotal to augmenting processes within the scope of designing and manufacturing industries.
Understanding Basic 3D Printing Concepts

Before embarking on creating designs for 3D printing using CAD, it’s crucial to comprehend some key principles. A solid knowledge of the fundamentals of 3D printing is imperative for generating productive and well-functioning CAD models. The distinct characteristics inherent in various materials must be considered when crafting CAD models due to their impact on design methodology.
To prepare a CAD model for the process of 3D printing, it’s necessary to adapt your work so that it aligns with specific printing requirements by modifying both format and measurement units accordingly. This entails choosing appropriate file types while also taking into account the distinctive properties of different materials, which will be elaborated upon in subsequent segments.
The conversion of CAD models into formats suitable for 3D printing is facilitated by slicing software which meticulously breaks down these models into individual layers ready for fabrication.
Common File Formats: STL, OBJ, and More
The STL file format is a fundamental element in the realm of 3D printing, renowned for its straightforward approach and capacity to depict the surface geometry of three-dimensional objects. Opting for an STL file is crucial when ensuring compatibility with your 3D printer. These files are noted for their simplicity and broad acceptance within the community dedicated to 3D printing, thereby solidifying them as the go-to choice across numerous applications.
Nevertheless, if a project demands more intricate detail, one might consider employing the OBJ file format as an excellent substitute. In contrast to STL files, OBJs encompass advanced features such as texture mapping and color data that facilitate rendering highly detailed 3D models accurately. Recognizing what each of these file formats has to offer can significantly assist in choosing appropriately based on the specific needs of any given project.
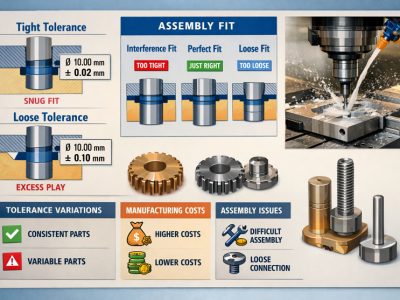
Material Properties and Their Impact on Design
The array of materials available for 3D printing, including PLA and ABS, come with distinct characteristics that influence design choices significantly. PLA is favored for its user-friendliness and biodegradable nature, which makes it particularly appealing to novices. Nevertheless, when durability is paramount, materials such as ABS are preferable despite needing a heated print bed to reduce warping and enhance adhesion during the printing process.
Making an informed selection of material is essential for obtaining the intended results from your 3D prints. Though PLA offers convenience in use, ABS provides enhanced resilience but necessitates more controlled printing environments. A thorough comprehension of these material traits enables you to choose resources that best match the objectives and limitations specific to your project.
Essential Design Principles for 3D Printing
To ensure the effectiveness of your 3D printing projects, it’s crucial to embrace core design strategies. Streamlining intricate designs can greatly improve the precision of models created with CAD software, while adhering to geometric constraints guarantees that measurements and alignments remain consistent during the designing phase.
Incorporating essential concepts such as forming watertight meshes, steering clear of overhangs, and using flat surfaces is vital for dependable 3D printing outcomes. We will delve into these ideas extensively in subsequent sections to offer an in-depth guide on refining your designs for the 3D printing process.
Ensuring Watertight Meshes
Ensuring a leak-proof mesh is critical for the success of 3D printing since it guards against potential leaks and mistakes throughout the print process. The presence of holes in the mesh or incorrect orientation of face normals may affect how well the finished item works. It’s vital to employ CAD software capabilities and tools specifically designed to detect and correct such defects.
Frequent checks on your 3D model for any mesh problems prior to exporting are instrumental in averting complications down the line. Performing trial prints as part of design validation can affirm that your creation will function according to plan, circumventing likely issues during printing and maintaining its structural integrity.
Avoiding Overhangs and Bridges
When crafting models that feature overhangs, it’s imperative to deliberate thoroughly to guarantee a triumphant print outcome. Overhangs ought to be crafted with inclines of no more than 45 degrees for optimal stability while printing. Adhering to this angle threshold aids in achieving successful layer adhesion and eliminates the necessity for extraneous supports.
Whenever designing requires the inclusion of overhangs or bridges, integrating sufficient supports becomes essential in upholding structural integrity throughout the printing process. Adopting this strategy reduces the likelihood of failures during printing and ensures that the quality of the end model is upheld.
Designing with Flat Surfaces
Including flat surfaces within your designs can markedly boost the stability of prints while enhancing their adhesion to the print bed. Such surfaces diminish the chances of warping and guarantee proper adherence, which leads to an improved quality in the finished print.
It is vital to integrate flat surfaces into your designs as a measure against warping, thereby securing stable prints. This concept holds especially true for expansive or intricate models where maintaining structural integrity is imperative.
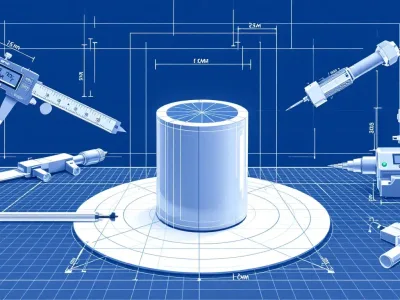
Preparing Your CAD Model for Export
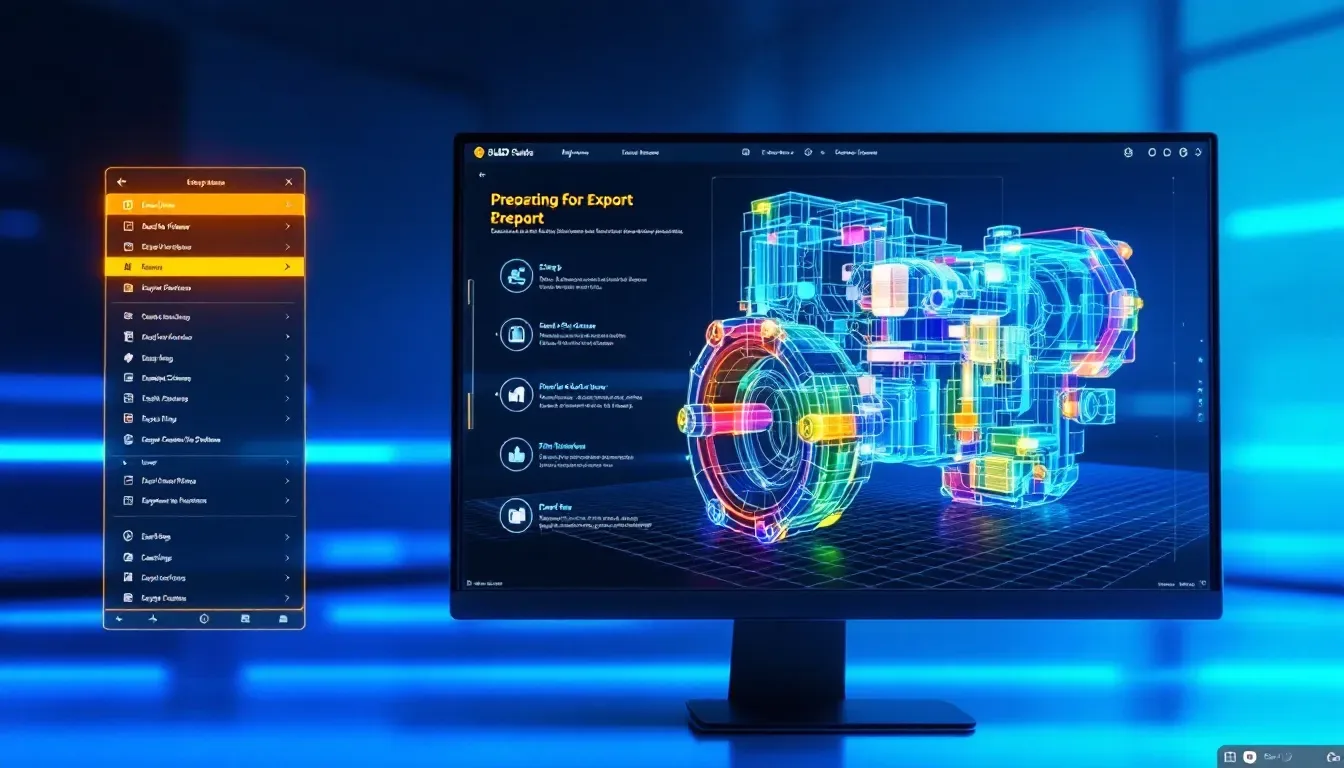
It is essential to guarantee that your CAD model is devoid of errors to achieve a triumphant 3D print. A well-optimized model diminishes the likelihood of printing mishaps and enhances the quality of the end result.
The procedure encompasses scrutinizing for mistakes and refining the model in preparation for printing, which will be elaborated on in subsequent subsections.
Checking for Errors and Optimizing the Model
It’s critical to detect and rectify any flaws within your CAD model to prevent failures during printing. Frequent problems that need attention before exporting include non-manifold edges, intersecting geometries, and inverted normals. Employing tools designed for analyzing geometry can pinpoint issues such as openings or parts that don’t align properly in the models.
To effectively fix these mistakes, mesh repair programs are valuable resources. These applications will guarantee your model is impermeable and ready for export. Taking this step ensures that your design remains intact throughout the process of printing.
Exporting to STL File Format
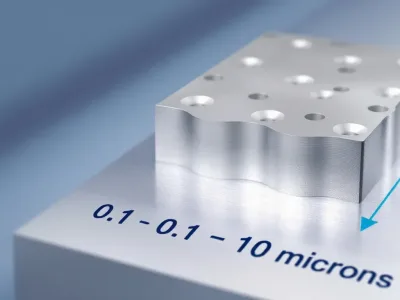
The STL format stands as the most prevalent choice for 3D printing due to its proficiency in encapsulating the geometry of 3D models. High-precision settings are crucial when converting a model into an STL file, as they uphold the model’s accuracy throughout the export process.
To strike a balance between maintaining quality and managing file size, setting a deviation tolerance close to 0.01 mm and an angle tolerance around 5° is advisable. Adhering to these guidelines during export guarantees that the intricate details of the model are retained, making it optimal for subsequent 3D printing applications.
Using Slicing Software to Prepare for Printing
After completing your CAD model, the subsequent phase involves employing slicing software to get it ready for 3D printing. Selecting suitable slicer software is essential in effectively transforming your STL file into a series of printable strata. Renowned options for this slicing software include Cura, PrusaSlicer, and Simplify3D, each presenting distinct features and advantages.
Tweaking print configurations within your selected slicing software is vital to align your model with the specific material you’ll be using as well as the type of printer at hand. Proper setup through effective slicing ensures enhanced quality in printed results while mitigating potential complications throughout the printing operation.
The following details how one might go about picking an appropriate slicer and tailoring print settings accordingly.
Choosing the Right Slicer Software
Selecting the appropriate slicing software is crucial for achieving high-quality results in your printed model. PrusaSlicer, which is known for its sophisticated features like adjustable support structures and its optimization for use with Prusa printers, stands out as a popular choice. Simplify3D caters to professionals and dedicated enthusiasts by providing extensive support choices and refined control over printing parameters.
It’s important to take into account your particular requirements when picking out slicer software, including compatibility with your printer and the specific outcomes you aim to achieve through printing. Each piece of software offers unique advantages. Making an informed selection that matches your project needs will help ensure superior print quality.
Configuring Print Settings
Adjusting the print settings in your slicer software is crucial for obtaining optimal results from 3D printing, ensuring minimal mistakes. Critical adjustments include setting the correct layer height, adjusting print speed, infill density, and regulating temperature—all tailored to suit the particular model and printing material.
By fine-tuning these parameters with precision, you not only guarantee that the model will be printed with appropriate quality and robustness, but also mitigate typical printing complications. This attention to detail fosters a more efficient printing operation and enhances the quality of your finished pieces. It may be necessary to alter output dimensions within the software to secure superior outcomes.
Running a Test Print and Post-Processing
It’s essential to conduct a test print before embarking on a complete scale model production. This preliminary step can uncover various problems, including alignment errors, material anomalies, or improper configuration settings that might undermine the final output’s quality. Tackling these issues at an early stage is beneficial for conserving both time and materials.
The aesthetic and practical characteristics of your printed model can be substantially improved through post-processing practices such as sanding, painting, and assembling. In upcoming subsections, we will delve into these techniques thoroughly to guide you toward obtaining optimal outcomes from your printing endeavors.
Conducting a Test Print
Conducting a test print is essential for spotting potential design errors or improper configurations prior to executing a complete print run. This initial measure confirms that there’s an opportunity to refine and perfect the end result through necessary tweaks.
Implementing a trial print can conserve both time and materials by preemptively tackling issues before progressing to full-scale production. It guarantees that the ultimate output aligns with anticipated standards in quality, performance, and ensures that the output preview remains consistent.
Post-Processing Techniques
Standard methods for post-processing include activities such as sanding to achieve smoothness on surfaces, applying paint for visual improvements, and assembling different parts to form complex models. Actions aimed at removing layer lines and enhancing the finish of 3D printed items often involve techniques like sanding or vapor smoothing.
Sophisticated procedures such as vapor smoothing make use of solvents in their vapor state to refine and even out the exterior surface of prints. In contrast, chemical metal plating can increase both durability and electrical conductivity by depositing a metallic coating onto the print. Utilizing these post-processing approaches alongside appropriate tools and instructional guides can elevate your 3D printed creations to a level that reflects professional craftsmanship.
Ready to Start Your First CAD Design?
Now that you understand the 3D printing process—from selecting CAD software to post-processing techniques—you’re ready to start your first CAD design. Selecting the right CAD software is key to creating effective 3D models; evaluate both free and paid options based on your skill level.
Understanding fundamental 3D printing concepts like file formats, material properties, and printer types is vital for effective CAD design. Applying key design principles, preparing your CAD model for export, and correctly using slicing software ensure successful prints.
Armed with this knowledge, dive into your first 3D printing project and bring your ideas to life!
Summary
In this guide, we’ve discussed the fundamental procedures for becoming proficient in using CAD software for 3D printing. This includes choosing appropriate CAD software, grasping the basics of 3D printing, creating designs with essential principles in mind, getting your CAD model ready and exporting it correctly, employing slicing software to prepare the print file and executing trial prints, all these stages are vital to attain excellent results from your 3D prints.
Adhering to these instructions will arm you with the necessary tools to approach any 3D printing task confidently. Keep in mind that converting an idea into a tangible form is a process filled with educational moments. Lean into this journey by trying out various methods and continuously honing your abilities. Wishing you joy in both designing and printing!
Frequently Asked Questions
What is the best free CAD software for beginners?
Tinkercad is the best free CAD software for beginners, offering a user-friendly interface and easy cloud-based access. Its simplicity makes it an ideal starting point for those new to CAD design.
Why is STL the preferred file format for 3D printing?
STL is the preferred file format for 3D printing due to its ability to accurately represent the geometry of 3D models and its broad compatibility with slicing software.
This makes it a reliable choice for diverse 3D printing applications.
How can I avoid print failures due to mesh errors?
To avoid print failures due to mesh errors, ensure your mesh is watertight by thoroughly checking and repairing any errors in your CAD software.
This proactive approach will significantly enhance print success.
What are the benefits of running a test print?
Conducting a trial print can be advantageous since it enables early detection of potential problems such as misalignment and flaws in the material, which saves time and resources throughout the manufacturing process.
What post-processing techniques can improve the quality of my 3D prints?
To improve the quality of your 3D prints, consider techniques such as sanding, painting, vapor smoothing, and metal plating, as these can significantly enhance both the appearance and functionality of your models.