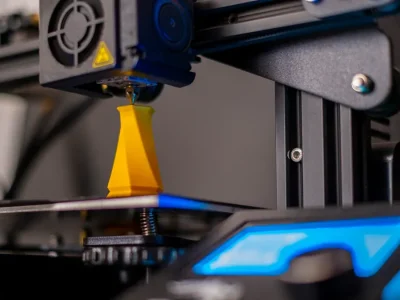
LKprototype
 When a resin 3D print is done, the work isn’t finished. Post-Processing Techniques are essential to make your prints stronger and look better. These steps also ensure that prints are safer to handle. For example, cleaning with ethanol lowers harmful resin chemicals. Curing helps prints last longer by making them tougher. Washing prints well enhances their appearance too. Every step is important if you want great-looking designs. Don’t skip these steps—Post-Processing Techniques help your prints look professional and amazing.
Key Takeaways
Take off supports slowly to make the print look better. Use proper tools to avoid breaking it.
Clean your print with alcohol to remove extra resin. This makes it safer and improves how it looks.
Use UV light to cure your print and make it stronger. Follow the suggested time for the best outcome.
Sanding fixes rough spots and gets the surface ready for paint. Start with rough sandpaper, then use smoother ones for a shiny finish.
Use primer before painting to help the paint stick well. Always clean the surface first for the best results.
Removing Supports
Taking off supports is one of the first things to do after printing. Doing it right makes your print look smooth and neat. Let’s talk about the tools, steps, and tips to get this done.
Tools for Support Removal
You don’t need expensive tools to remove supports, but the right ones help a lot. Here are some useful tools:
Flush Cutters: These cut supports close to the print without harm.
Needle-Nose Pliers: Use these to pull off bigger support pieces easily.
Craft Knife or Hobby Blade: Great for cutting small bits in tight spaces.
Sandpaper or Files: These smooth out marks left after removing supports.
Having these tools ready makes removing supports easier and faster.
Techniques for Clean Removal
Taking off supports needs care to avoid breaking your print. Follow these simple steps:
Start With Easy Areas: Begin with supports that are easy to reach. Use cutters or pliers gently.
Work on Harder Spots: For tricky areas, use different tools and go slow.
Be Gentle: Rushing can damage your print. Take your time.
Trim Small Bits: Use a craft knife to cut tiny leftover supports.
Smooth the Surface: Sand the area to remove rough spots after cutting.
Try Water-Soluble Supports: These dissolve in water and leave a clean finish.
Adjust Settings: Change slicer settings to reduce support density for future prints.
These steps help you remove supports neatly and improve your process.
Tips to Avoid Damage
Removing supports can be tricky, especially with fragile prints. Use these tips to keep your model safe:
Don’t Pull Too Hard: If a support is stuck, try a smaller tool or a new angle.
Use Good Lighting: Bright light helps you see better and avoid mistakes.
Practice First: Test on a scrap print before working on your final model.
Plan Ahead: Think about support placement during design to make removal easier.
These tips help protect your print and keep it looking great.
Pro Tip: Wash your print well after removing supports. Leftover resin can ruin the surface or weaken the model. Use ethanol or isopropyl alcohol for the best results.
Taking off supports is an important step in post-processing. Doing it carefully makes your print look polished and ready for the next steps.
Washing the Print
After removing supports, you need to wash your resin print. Washing gets rid of uncured resin and prepares the surface for the next steps. Let’s explore cleaning solutions, washing steps, and drying tips.
Cleaning Solutions for Resin Prints
Picking the right cleaner improves your print’s quality. Here’s what to know:
Key Points | Details |
|---|---|
Why Washing Matters | |
Risks of Over-Washing | Too much washing can weaken the print. |
Best Practices | More research is needed for dental resin cleaning. |
Most people use isopropyl alcohol (IPA) to clean resin prints. It removes uncured resin and leaves a smooth surface. If you don’t have IPA, ethanol or special resin cleaners work too. Don’t wash too much, or your print might lose strength.
Step-by-Step Washing Process
Washing doesn’t have to be hard. Follow these simple steps:
Weigh the Print: Check the weight before washing to track resin removal.
Set Up Your Station: Prepare your cleaning area with good airflow.
Submerge the Print: Put the print fully into the cleaning solution. Avoid trapping air bubbles.
Wash the Print: Turn on the wash station or gently stir the solution. Wash for 5-10 minutes.
Rinse the Print: Use clean IPA or water to rinse off leftover resin.
Dry the Print: Move the print to a drying spot right after washing.
Studies show ultrasonic washing improves surface smoothness better than hand washing.
Drying the Print Thoroughly
Drying is as important as washing. Leftover cleaner can mess up curing. Here’s how to dry properly:
Air Dry: Leave the print in a clean area to dry naturally.
Use Compressed Air: Blow air on the print to dry faster, especially for detailed parts.
Inspect for Liquid: Check for leftover cleaner. Rinse and dry again if needed.
Drying well helps your print cure evenly and stay strong. Skipping this step can cause sticky spots or uneven curing.
Pro Tip: Wear gloves when washing and drying resin prints. Gloves protect your skin and keep the print clean.
Take your time with washing and drying. These steps are key for making your print look professional and last longer.
Curing the Print
Curing is a key step in resin 3D printing. It makes your print stronger and safe to handle. Without curing, prints can stay sticky or break easily. Let’s look at tools, methods, and tips for curing.
UV Curing Tools and Methods
UV curing is the most common way to cure resin. It uses ultraviolet light to harden the print and make it durable. Here are some tools and techniques:
UV Cure Stations: These machines are made for resin prints. They give even UV light for proper curing.
UV Lamps: These are cheaper and work well for small prints. Check that the lamp matches your resin type.
DIY UV Chambers: Build one using UV lights and shiny surfaces. It’s a low-cost option.
Studies show UV curing can harden up to 89% of resin. Tracking curing time and resin changes helps improve results.
For big prints, turn them so all sides get UV light. Follow the resin maker’s advice for curing time and light strength.
Best Practices for Effective Curing
Curing isn’t just about shining UV light on your print. Use these tips to make sure your print cures fully:
Wash First: Clean off extra resin before curing. Leftover resin can mess up curing.
Dry Well: Make sure the print is dry. Water can ruin curing.
Use a Cure Station: These stations give steady UV light for better results.
Test Times: Try different curing times to find what works best.
Watch Heat: Warm temperatures can speed up curing and make prints stronger.
Research shows curing time and heat affect print strength. Adjust curing steps for your resin type to get the best results.
Making Prints Stronger Through Curing
Curing doesn’t just harden prints—it makes them tougher too. With the right steps, your prints can handle more stress. Here’s how curing improves prints:
Stronger Material: Heating after curing can raise strength from 0.6 MPa to 25 MPa.
Better Stress Resistance: Adding polyurethane during curing can increase stress limits to 2.5–3 MPa.
Higher Tensile Strength: Changing curing settings and print angles can boost tensile strength.
A study found curing at higher heat makes prints stronger and faster to finish. This is great for tough jobs like safety parts.
Curing your print the right way makes it last longer and work better. Take your time, and your prints will turn out great.
Sanding and Smoothing
Sanding is one of the most effective ways to refine your resin 3D prints. It helps remove imperfections, smooth out surfaces, and prepare your print for painting or coating. Let’s dive into the tools, techniques, and tips you’ll need to master this essential step.
Sandpaper Types and Grit Levels
Choosing the right sandpaper is key to achieving a smooth finish. Sandpaper comes in different grit levels, which determine how coarse or fine it is. Here’s a quick guide:
Grit Level | Purpose | When to Use |
|---|---|---|
P400 | Removes support marks and layer lines | Start sanding with this grit |
P800 | Smooths the surface further | Use after P400 for a finer finish |
P1000+ | Polishes the surface for a glossy look | Final step for a professional finish |
For most resin prints, starting with P400 and working up to P800 or P1000 will give you great results. If you’re aiming for a glass-like finish, you can go even finer.
Tip: Wet sanding (using water while sanding) reduces dust and gives a smoother finish. It’s especially useful for resin prints.
Step-by-Step Sanding Guide
Sanding might seem tricky, but it’s easy if you follow these steps:
Start with P400 Grit: Use circular motions to sand down support marks and layer lines. Don’t press too hard—let the sandpaper do the work.
Move to P800 Grit: Once the surface feels smoother, switch to P800 grit. Sand the entire print evenly, checking for any remaining bumps.
Finish with Fine Grit: For a polished look, use P1000 or higher grit sandpaper. This step is optional but makes a big difference for clear or glossy finishes.
Inspect Your Work: Hold the print under good lighting to spot any rough areas. Sand those spots gently until they’re smooth.
Pro Tip: Practice on a test print before sanding your final model. This helps you get a feel for the process and avoid mistakes.
Achieving a Smooth Surface Finish
Sanding not only improves the look of your print but also enhances its functionality. A smoother surface reduces friction and makes coatings or paint adhere better. Here’s what sanding can do for your print:
Improves Surface Quality: Sanding reduces surface roughness (Sa) from 1.394 μm to 0.266 μm, making your print feel much smoother.
Enhances Appearance: Glossiness decreases after sanding, giving your print a matte finish that’s perfect for painting.
Increases Wettability: The contact angle drops from 79.36° to 64.46°, which helps coatings stick better.
If you want a high-gloss finish, consider applying a clear coat after sanding. Coatings like C-SB or C-ABS can boost gloss levels significantly, making your print look professional and polished.
Sanding is one of the most important post-processing techniques for resin prints. With the right tools and a bit of patience, you can transform your print into a masterpiece.
Filling Gaps and Imperfections
Even the best resin 3D prints can have small gaps or surface imperfections. These flaws might seem minor, but fixing them can take your print from good to great. Let’s explore the tools, techniques, and tips for filling those pesky gaps and achieving a flawless finish.
Tools for Filling Surface Imperfections
You don’t need a ton of fancy tools to fix gaps in your prints. A few reliable options can get the job done:
XTC-3D: A clear coating that smooths surfaces. It works best with multiple coats.
Epoxy Resin: Perfect for filling small voids and cracks.
Autobody Filler: Great for larger gaps or joining parts. It sands down easily after drying.
Filler Primer Spray: Ideal for minor imperfections but less effective for deeper gaps.
Sanding Tools: Essential for smoothing out fillers and blending them into the surface.
Each tool has its strengths, so pick the one that fits your project’s needs.
Applying and Sanding Fillers
Filling gaps isn’t just about slapping on some filler. A little care and patience go a long way. Here’s a simple guide to follow:
Tool | Description |
|---|---|
Epoxy Resin | Best for small voids and cracks. |
Autobody Filler | Handles larger gaps and joins parts seamlessly. |
ABS Slurry | A mix of ABS filament and acetone for ABS prints. |
Steps to Apply and Sand Fillers:
Inspect your print after sanding to spot gaps or imperfections.
Use epoxy resin or Bond-O for small gaps. For larger voids, apply autobody filler.
Let the filler dry completely. This ensures it bonds well to the surface.
Sand the filled areas gently with P400 grit sandpaper. Move to finer grits for a smoother finish.
Tip: Always work in a well-ventilated area when using fillers or solvents. Safety first!
Creating a Seamless Finish
Once you’ve filled and sanded the gaps, it’s time to perfect the surface. A seamless finish not only looks professional but also improves the print’s durability. Here’s how to achieve it:
Layer Your Filler: Apply thin layers instead of one thick coat. This gives better control and avoids uneven surfaces.
Wet Sand for Smoothness: Use water while sanding to reduce dust and get a polished look.
Inspect Under Light: Hold your print under bright light to catch any missed spots.
Filling gaps might take some extra effort, but the results are worth it. Your print will look polished, professional, and ready for the next steps in post-processing.
Pro Tip: Combine sanding with a clear coat like XTC-3D for a glossy, glass-like finish. It’s a game-changer for resin prints!
Priming the Surface
Priming is an important step for resin 3D prints. It gets the surface ready for painting and makes the final look more polished. Let’s learn about primer types, how to apply them well, and how to prepare your print for painting.
Types of Primers for Resin Prints
Picking the right primer can improve your print’s finish. Primers help paint stick better and make details stand out. Here are some options:
Plastic Primers: Made for resin and plastic, they help paint bond well.
Automotive Primers: Found in stores, these work great on resin prints.
Filler Primers: These hide small flaws and smooth the surface before painting.
Primers do more than help paint stick. They also highlight fine details, making your print look neat and professional.
Applying Primer Evenly
Applying primer evenly is key for a smooth finish. Uneven primer can cause blotches or missed spots. Follow these tips for good coverage:
Step/Factor | What to Do |
|---|---|
Surface Condition | |
Pre-treatment | Lightly sand and apply thin, even coats. |
Monitoring Methods | Check visually and apply carefully. |
Thin layers work better than thick ones, which can drip or hide details.
Tip: Use spray primer for smooth coverage. Hold the can 6–8 inches away and spray in steady motions.
Preparing for Painting
Getting your print ready before painting is very important. Here’s how to prepare:
Clean the Print: Wipe off dust, oils, or dirt. A clean print helps primer stick.
Sand the Surface: Start with rough sandpaper for big flaws. Use finer sandpaper for smoothness.
Apply Primer: Use a primer made for resin or plastic. This helps paint stick and creates a smooth base.
Sanding makes the surface even and helps paint go on smoothly. A well-prepped print looks better and lasts longer.
Priming may take extra time, but it’s worth it. It helps your paint job look clean and professional.
Painting and Coating
Painting and coating your resin 3D prints make them look amazing. This step turns your print into a polished and professional piece. Let’s learn how to pick the best paints, apply them well, and protect your work with strong coatings.
Choosing Paints and Coatings
The right paint or coating is very important. Not all paints work well on resin. Here’s what to use:
Acrylic Paints: Easy to use, dry fast, and come in many colors. Great for beginners.
Spray Paints: Perfect for smooth coverage, especially on big prints. Choose ones made for plastic or resin.
Epoxy Coatings: Add a shiny, protective layer. Best for prints needing extra strength.
UV-Resistant Coatings: Protect prints from sunlight, stopping fading or yellowing.
Tip: Test your paint or coating on a small hidden spot first. This avoids mistakes.
Techniques for Professional Paint Finish
A great finish needs more than good paint—it’s about how you use it. Try these tips:
Mix resin by pouring one part into another and stirring well.
Use bright light to check for missed spots.
Remove bubbles with a heat gun, moving quickly.
Nick’s Tips:
Warm resin bottles to 85°F to reduce bubbles.
Spray water around your workspace to keep dust down.
Use a heat gun on large areas for a smooth look.
Nichola’s Tips:
Let paint dry fully before adding resin.
Clean the surface well for better sticking.
Warm resin bottles in warm water for easier mixing.
Pro Tip: Be patient. Let each paint layer dry completely before adding more. This avoids smudges or uneven spots.
Protective Coatings for Durability
Coatings do more than make prints look good—they protect them too. Studies show coatings improve durability. Here’s how:
Water Resistance: Special coatings block water, helping prints last in humid places.
Adherence Strength: Coatings like ZnO stick well to resin, so they don’t peel.
Abrasion Resistance: Coated prints resist scratches and wear better after tests.
If your print will face tough use, pick a strong epoxy or nanocomposite coating. These protect your print while making it look great.
Tip: Apply coatings in thin, even layers. Thick layers can drip or take longer to dry.
Painting and coating take effort, but the results are worth it. With the right steps and materials, your resin prints will look fantastic and last a long time.
Post-processing helps make resin 3D prints look professional. Each step is important for making prints stronger, better-looking, and more useful.
Removing Supports makes your print smooth and neat.
Washing cleans off uncured resin, making it safer to handle.
Curing hardens the material and helps it last longer.
Sanding smooths the surface for a perfect finish.
Filling Gaps fixes flaws for a seamless appearance.
Priming gets the surface ready for paint to stick well.
Painting and Coating protect the print and make it look great.
Research shows steps like curing and glazing improve strength and durability. They also make prints safer for uses like dental work.
Take your time with each step. Try different tools and methods to see what works best. With practice, you’ll get really good at post-processing and make amazing resin prints every time.
FAQ
What happens if I skip curing my resin print?
Your print will stay sticky and fragile. Curing hardens the resin, making it durable and safe to handle. Without curing, your print might break easily or fail to hold its shape over time.
Can I use regular sandpaper for resin prints?
Yes, you can! Just make sure to choose the right grit. Start with P400 for rough spots and move to finer grits like P800 or P1000 for a smooth finish. Wet sanding works even better for resin prints.
How do I avoid bubbles when applying coatings?
Warm your resin slightly before use. This reduces viscosity and helps bubbles escape. You can also use a heat gun or blowtorch to pop bubbles after applying the coating. Work quickly but carefully for the best results.
Is it okay to skip priming before painting?
Skipping primer isn’t ideal. Primer helps paint stick better and makes colors pop. It also smooths out minor imperfections. If you want a professional finish, always prime your print first.
What’s the best way to clean resin prints without IPA?
If you don’t have isopropyl alcohol, try ethanol or a dedicated resin cleaner. These work well to remove uncured resin. Just avoid over-washing, as it can weaken your print.
Pro Tip: Always wear gloves when handling resin prints to protect your skin and keep the print clean.