LKprototype
When you use urethane casting post processing, your parts look better and work better. Surface quality is important in many ways. In industries like cars, electronics, and packaging, a smooth urethane casting surface finish helps with sticking, lasting longer, and printing. You often get great surfaces from urethane casting with little extra work. If you learn about different finishing methods, you can pick the best one for your project.
High-quality surfaces make products work better and look nicer.
Smooth finishes help things stick, stay clear, and last longer.
Cars and electronics need smooth casting for the best results.
Key Takeaways
Urethane casting post processing makes parts look and work better.
Picking the right finishing method, like matte or shiny, makes the surface better for certain uses.
Simple finishing methods, like trimming and sanding, save money for prototypes. Advanced methods work better for final parts.
Checking quality during finishing helps stop problems like bubbles and rough spots.
Planning well and talking with suppliers helps you get the finish you want and not spend too much.
URETHANE CASTING POST PROCESSING OVERVIEW
WHAT IS URETHANE CASTING POST PROCESSING
When you finish a urethane casting part, you do special steps. These steps help the part look better and work better. Urethane casting post processing means you take away extra material. You also smooth rough spots and add coatings or textures. This helps you get the best urethane casting surface finish for your project. These steps make sure your part is good for its job. You can make a part shiny, matte, or textured. You can also make it feel nice and last longer.
COMMON URETHANE CASTING FINISHING METHODS
There are many ways to finish a urethane casting. Each way gives a different look and feel. The most common finishing methods are matte, semi-gloss, high-gloss, and textured finishes. You can see how each finish works in the table below:
Finish Type | Description | Applications |
|---|---|---|
Matte/Frosted | Non-reflective, soft look with a gentle texture. | Good for checking parts and products that need a softer look. |
Semi-Gloss | Smooth, a little shiny surface that looks nice. | Great for prototypes and parts people use often. |
High-Gloss | Shiny surface that shows shapes and details. | Used for models and fancy products that need to look very nice. |
Textured | Rough surface that helps you hold it better and makes it strong. | Good for things you touch, like handles and grips. |
You can pick the best urethane casting surface finish for what you need. For example, you may want a high-gloss finish for a model or a textured finish for a handle.
ROLE OF POST PROCESSING IN SURFACE QUALITY
Post processing steps let you control how the surface looks and feels. Good finishing takes away marks from the mold and makes the surface smooth or textured. You can make your casting look better, feel better, and be stronger. A good urethane casting surface finish helps your part do its job well. It also makes your part look nice and match your design. If you use the right finishing method, your part will stand out for quality and appearance.
MAIN URETHANE CASTING POST PROCESSING METHODS

TRIMMING AND FLASH REMOVAL
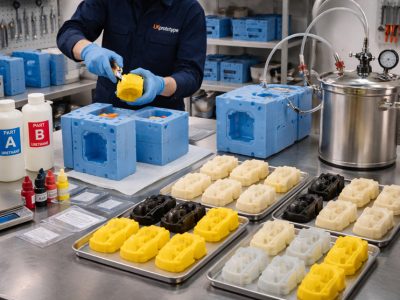
When you remove a urethane casting from the mold, you often see thin edges or extra material called flash. You need to trim this flash to get a clean part. Trimming and flash removal is one of the first steps in urethane casting post processing. You can use simple tools like a scalpel or a sharp knife.
With polyurethane resin, the flashing (as the excess is called) is particularly easy to remove, but trimming and sanding is made even easier by the addition of Fillite. My preferred method is to scrape with a scalpel, in the direction away from the blade edge, because I find this easier to control.
This step helps you get a better urethane casting surface finish and prepares the part for the next process.
SANDING AND SURFACE SMOOTHING
Sanding makes the surface of your urethane casting smooth and ready for painting or coating. You start with rough sandpaper and move to finer grits. Here is a simple sanding process:
Start with 120 grit sandpaper for severe imperfections, then move to 220 grit.
Sand with 320 grit to remove prominent protrusions.
Use 400 grit for finer sanding.
Follow with 600 grit, possibly using water for wet sanding.
Finish with 800 grit for a smooth, translucent surface.
This method gives you a high-quality urethane casting surface finish and removes marks from the mold.
POLISHING FOR HIGH GLOSS FINISH
If you want a high-gloss finish, you need to polish the surface after sanding. You use polishing compounds and soft cloths. Polishing makes the surface shiny and clear. This step is important for models and parts that need to look their best. You can show off details and get the best urethane casting surface finish for your application.
PAINTING AND COATING TECHNIQUES
Painting and coating protect your urethane casting and make it look better. You can spray paint, dip, or brush on coatings. These methods add color and shield the surface from scratches. A good paint job improves the quality and durability of your casting. You can also use special coatings for extra strength or a unique look.
TEXTURING AND SURFACE TREATMENT OPTIONS
You can add a textured finish to your urethane casting for better grip and style. Textured finishes hide fingerprints and make the part last longer. They also protect against scratches and scuffs. You can create different vacuum casting surface finishes by changing the mold or using special treatments. This gives you more options for your design.
VACUUM CASTING FINISHING METHODS AND APPLICATIONS
DIFFERENCES BETWEEN BASIC AND ADVANCED FINISHING
You can pick basic or advanced finishing for your urethane casting parts. Basic finishing means you do easy steps like trimming flash and sanding rough spots. You use basic finishing when you want fast cleanup and do not need a perfect look. Advanced finishing has more steps. You polish the surface, paint the part, or add special coatings. Advanced finishing gives you the best urethane casting surface finish. You see this quality in products that must look really nice and last longer. The choice depends on what you need and how much detail you want.
Tip: If you want your casting to look special, advanced finishing helps you get better quality and appearance.
FINISHING FOR PROTOTYPE VS END USE PARTS
You use different finishing methods for prototype parts and end-use parts. Prototype parts need some urethane casting post processing to take off flash and clean up mold lines. You do not worry much about how they look. End-use parts need more finishing. You paint them, polish them, and make sure the surface matches the design. You check every detail because these parts go to customers.
Here is a table that shows the differences:
Type of Part | Finishing Requirements | Aesthetic Considerations |
|---|---|---|
Prototype Parts | Need some finishing to remove extra flash and clean up the part. | Not much focus on looks. |
End-Use Parts | Finished and painted to match how they should look, especially for customers. | High focus on looks and being exact. |
You can also see these points in a list:
Prototype parts need only a little extra finishing.
End-use parts often need a lot of finishing to look good.
SELECTING THE RIGHT FINISHING METHOD
You pick the right finishing method by thinking about your mold, the urethane material, and what you will use the part for. If you need a strong part for testing, basic finishing works well. If you want a part that looks and feels great, advanced finishing gives you the best urethane casting surface finish. You check the surface and decide if you need painting, polishing, or texturing. You match the finishing to your design and what the part needs to do. You get the most from urethane casting when you choose the finish that fits your needs.
SURFACE QUALITY IN URETHANE CASTING

NATURAL SURFACE FINISH FROM SILICONE MOLDS
When you use silicone molds in urethane casting, you get a high-quality finish right away. You do not need much extra work to make your parts look good. Silicone molds capture fine details from the master pattern. This means your parts can have smooth or textured surfaces, just like you want. You can see the look and feel of real consumer products. Here are some things you notice with silicone molds:
They give you a clean and smooth surface.
You see sharp details and clear lines.
You get parts that look ready for use.
Urethane casting lets you make rigid or flexible plastic parts. You do not need expensive tools to get a great finish. You can choose from many cosmetic options for your project.
IMPORTANCE FOR FUNCTION AND APPEARANCE
Surface quality matters for both how your part works and how it looks. A good urethane casting surface finish helps your part do its job. For example, a smooth finish can help parts move easily in machines. A textured finish can give you a better grip on tools. You want your parts to look nice and work well. When you pick the right finish, you make your product stand out. You also make sure it lasts longer and stays clean.
Tip: Always match the surface finish to the part’s use. This helps you get the best results for your application.
SURFACE QUALITY EXPECTATIONS
You should expect urethane casting to give you a surface finish that fits your needs. Different industries want different finishes. For example, conveyor systems need smooth surfaces to reduce friction. Industrial tools need textured surfaces for better grip. Urethane casting post processing helps you meet these needs. You can use your parts for testing, showing customers, or real use. The finish you choose makes your part ready for its job. Urethane casting gives you the flexibility to match the quality and look you want for each application.
HOW FINISHING METHODS AFFECT SURFACE QUALITY
EFFECTS OF TRIMMING AND SANDING
You start making your urethane casting look better after taking it out of the mold. Trimming and sanding help you get rid of extra pieces and rough spots. These steps make your part look neat and ready for the next step. Here is what trimming and sanding do:
You cut off flash and sharp edges from the mold.
You smooth out bumps and lines made during vacuum casting.
You get the part ready for polishing or painting.
After the urethane is cured, you trim and sand it to fit your design. These steps help you get the surface quality you want for your project.
IMPACT OF POLISHING AND COATING
Polishing and coating make your casting shiny and protect it. You can use these steps to make your part look clear, glossy, or even safer. The table below shows how different urethane types change with polishing and coating:
Urethane Type | Surface Quality Improvement |
|---|---|
High Temp Rigid Urethane | Sanding, polishing, or painting for a smooth and nice look |
Rigid Clear Urethane Plastic | Polishing, buffing, or coating for a clear and shiny surface |
Rigid Flame Retardant Urethane | Painting or powder coating for better looks and safety |
Rigid General Purpose Urethane | Sanding, polishing, or painting for a smooth and good finish |
You can pick the best way to finish your casting based on how you will use it and how you want it to look.
SURFACE TREATMENTS AND FINAL APPEARANCE
Surface treatments change how your casting feels and looks. You can pick glossy, textured, or matte finishes to match your style. Each finish gives you different good things for your mold and project. The table below explains what each type does:
Surface Finish Type | Visual Appeal | Tactile Feel | Functional Benefits |
|---|---|---|---|
Glossy | Shows small details and shines | Smooth | Good for designs with details and easy to clean |
Textured | Adds roughness and style | Better grip | Hides fingerprints and makes it last longer |
Matte | Modern and soft look | Soft touch | Less glare and works well in special places |
You can use urethane casting post processing to get the surface you need. The right finish helps your casting look great and work well for any job.
URETHANE CASTING SURFACE FINISH OPTIONS
When you use urethane casting, you can pick from many finishes. Each finish makes your part look and feel different. You can choose gloss, matte, or textured finishes. These choices help you match your part to what you need. Here is a table that shows the main types of urethane casting surface finish:
Finish Type | Description | Applications |
|---|---|---|
Dull Finish | Rough and not shiny. Good for inside parts. | Internal components |
Matte Finish | Smoother than dull, with a soft look. Used for inside or simple outside parts. | Internal and subtle external parts |
Semi-Gloss Finish | Smooth and a little shiny. Good for parts that need to slide. | External and internal components |
Gloss Finish | Very smooth and shiny. Best for parts that must look nice. | External parts where looks matter |
Custom Finishes | Made special for unique looks or jobs. | Various, based on specific needs |
GLOSS FINISH
A gloss finish makes your part shiny and smooth. This finish bounces light and shows mold details. You see this finish on fancy prototypes and custom urethane parts. Gloss finishes are good for outside parts that must look great. They make your part look special and impress people.
Tip: Pick a gloss finish if you want your product to stand out and look its best.
MATTE FINISH
A matte finish gives your part a soft look with little shine. The surface feels smooth but not slippery. This finish works for inside parts and some outside parts. Matte finishes hide fingerprints and small marks. You can use this finish for a modern style without much shine. Many people like matte for urethane casting surface finish.
TEXTURED FINISH
A textured finish adds grip and style to your part. You can make different patterns by changing the mold or using special steps. Textured finishes work well for handles, tools, and things people use. They hide wear and help your part last longer. You also get more design choices with custom finishes. Textured finishes are common in factories and custom urethane parts.
COMPARING DURABILITY, GRIP AND CLEANING
You should think about how tough and easy to clean each finish is. Every finish type has different good things for grip, cleaning, and quality. Here is a table to help you compare:
Finish Type | Durability | Grip | Ease of Cleaning |
|---|---|---|---|
Satin | Protects like semi-gloss | Not too slippery, safer | Needs cleaning every week |
Semi-gloss | Lasts as long as satin | More slippery | Wipes clean easily, needs cleaning often |
Matte | Hides scratches well | Not much grip | Easy to keep clean |
Gloss | Shows scratches easily | Slippery surface | Cleans fast but needs care |
Textured | Hides wear, very strong | Best grip | May need extra cleaning |
You can use good steps for quality finish and checking your parts. Always pick the finish that fits your part and mold. Urethane casting post processing lets you make custom finishes for any project.
Note: Picking the right urethane casting surface finish helps you balance looks, how it works, and cost.
FACTORS AFFECTING CASTING SURFACE FINISH QUALITY
MATERIAL SELECTION AND RESIN TYPE
You need to choose the right material for your casting project. The type of urethane you pick changes how your part looks and feels. Some resins have low viscosity. These flow better and fill small spaces in the mold. You get fine details and a smooth urethane casting surface finish. If you use rigid or flexible urethane, you will see differences in the final quality. Clear polyurethane resin works best when you want a transparent part. This choice makes your product look clean and bright.
Low viscosity polyurethane helps you capture tiny details.
Rigid or flexible urethane changes the feel and look of your part.
Clear resin gives you a see-through finish for special projects.
MOLD QUALITY AND TOOLING
The mold you use shapes the surface of your casting. High-quality silicone molds give you sharp details and smooth finishes. These molds can even copy colors and textures from the master part. Over time, silicone molds lose their sharpness. You may see changes in texture and size. This can make it hard to keep your parts looking the same. Aluminum molds last longer and keep their shape. You get the same finish and size every time you cast a part.
Silicone molds start strong but wear out with use.
Good molds help you control quality and reduce waste.
Aluminum molds keep their finish and size for many uses.
PROCESS CONTROL AND CURING CONDITIONS
You must watch the process closely during urethane casting post processing. Temperature changes during curing can change how strong your part is. If you control the pressure, you can stop bubbles from forming inside the casting. This gives you a better finish and fewer defects. The time you let the part cure also matters. If you rush, your part may not be strong. If you wait too long, you might see changes in the surface or shape. Always match your process to the needs of your application.
Keep temperature steady for strong, reliable parts.
Use the right pressure to avoid bubbles and get a smooth surface.
Let the part cure for the right amount of time for best results.
COST OF URETHANE CASTING FINISHING
BASIC VS ADVANCED FINISHING COST
You need to know how much urethane casting post processing will cost before you start your project. The price can change a lot based on the finish you want. Here is a simple breakdown:
Urethane casting starts at $20 for each part.
The mold costs between $250 and $1,500.
Each part usually costs between $20 and $50. You can make 25 to 50 parts from one mold.
If you add paint or graphics, the price can go up to $100 for each part.
Basic finishing, like trimming and sanding, costs less. Advanced finishing, such as painting or adding graphics, costs more. You should pick the finish that matches your application and budget.
COST DRIVERS IN SURFACE TREATMENT
Many things can change the cost of urethane casting surface finish. The main cost drivers include the type of urethane you use, how complex your part is, how many parts you need, the mold cost, and how you plan your post-processing steps. If you choose a simple design, you can save money. If you talk to your supplier early, you can avoid surprises. Picking the right material for your casting also helps control costs. Good planning gives you better quality and keeps your project on track.
Tip: Always think about your surface needs and plan your finishing steps early. This helps you avoid extra costs later.
HOW TO OPTIMIZE FINISHING COST
You can use smart strategies to keep your finishing costs low without losing quality. The table below shows some ways to save money and still get a great finish:
Strategy | Description |
|---|---|
Design Optimization | Make your part shape simple. This lowers mold costs and reduces waste. |
Material Efficiency | Measure part volume and design gates well. This helps you use less urethane and save money. |
Early Finishing Planning | Plan your finishing steps before you start. This stops extra costs from popping up later in the casting process. |
If you follow these steps, you can get the best value for your urethane casting project. You will have a surface that fits your needs and a finish that matches your application.
COMMON DEFECTS IN CASTING FINISHING AND HOW TO AVOID THEM
AIR BUBBLES AND SURFACE VOIDS
You may see air bubbles or small holes on your casting. These defects happen when air gets trapped in the urethane. Air bubbles can make your part weak and look bad. To avoid this, always mix the urethane slowly. Use a vacuum chamber to remove air before pouring. Pour the urethane into the mold from one spot. This helps air escape. If you follow these steps, you get a smooth urethane casting surface finish.
UNEVEN FINISH AND SCRATCH MARKS
You might notice uneven spots or scratch marks on your casting. These problems often come from sanding too hard or using rough tools. Always start with a fine grit sandpaper. Move to a smoother grit as you go. Sand in one direction for the best results. Clean the part before each new step. This keeps the surface even and free from marks. If you take your time, you get a better finish.
PAINT ADHESION ISSUES
Paint may not stick well to your urethane casting if the surface is dirty or oily. You should wash the part with soap and water. Dry it with a clean cloth. Use a primer made for urethane. This helps the paint stick better. Test the paint on a small area first. If it peels, clean the part again. Good prep gives you a strong and lasting color.
QUALITY CONTROL METHODS
You need to check your casting for defects before using it. Look for bubbles, cracks, or rough spots. Use a checklist to inspect each part. Measure the size and shape to make sure it matches your design. If you find a problem, fix it before moving on. Quality control helps you get the best results from urethane casting post processing.
Tip: Careful work at each step helps you avoid most defects in urethane casting.
HOW TO CHOOSE URETHANE CASTING FINISHING SERVICES
KEY CAPABILITIES TO LOOK FOR
You want the best results for your casting project. Start by checking what the finishing service can do. Look for these key capabilities:
Experience with urethane casting and different surface finishes.
Ability to handle both small and large orders.
Skilled workers who know how to trim, sand, and paint.
Quality control steps at every stage.
Fast turnaround times for your parts.
A good service will show you samples of their work. You can ask for pictures or even visit their shop. This helps you see the real quality of their urethane casting surface finish.
QUESTIONS TO ASK SUPPLIERS
Before you choose a supplier, ask important questions. This helps you avoid problems later. Here are some questions you can use:
Question | Why It Matters |
|---|---|
How do you control quality during finishing? | Ensures you get good parts every time |
What types of urethane do you use? | Some urethane works better for your needs |
Can you match my design or color? | Makes sure your part looks right |
How long does the finishing process take? | Helps you plan your project |
What is your experience with custom finishes? | Shows if they can handle special jobs |
Tip: Always ask for a clear price quote before you start. This helps you plan your budget.
CUSTOM FINISHING REQUIREMENTS
You may need a special look or feel for your casting. Tell the supplier about your custom finishing needs. You can ask for a certain texture, gloss, or color. Some projects need a unique surface for better grip or style. The supplier should listen to your ideas and give advice. Good communication helps you get the right urethane casting post processing for your project.
You can also ask for a test part before making a big order. This lets you check the finish and make changes if needed. You want your urethane casting to look and work just right.
BEST PRACTICES FOR HIGH QUALITY SURFACE FINISH
PROCESS STANDARDIZATION
You get better results if you always use the same steps. Standardizing your process helps you avoid mistakes. It also keeps your casting surface smooth. Write down each step you do. Teach your team to use the same tools and ways. This makes urethane casting post processing faster and more reliable.
Tip: Make a checklist for every casting job. Mark off each step as you finish it.
PROTOTYPING AND TESTING
You should make a prototype before a big project. Prototyping lets you see how your casting will look and feel. Test your prototype for strength, color, and surface quality. If you find a problem, you can fix it before making many parts. This saves time and money. Try different urethane materials to see which one gives the best urethane casting surface finish.
Make one or two test parts first.
Look at the surface for bubbles or rough spots.
Change your process if you see any problems.
DOCUMENTATION AND SPECIFICATION
Good records help you do well again next time. Write down the urethane type, mold details, and curing time. List the tools and finishing steps for each casting. Give clear details for the surface finish you want. Share this with your team and supplier. This helps everyone know what to expect.
What to Document | Why It Matters |
|---|---|
Urethane type | Makes sure you use the right material |
Mold details | Helps keep casting the same |
Finishing steps | Matches the surface you want |
Curing time | Makes the part better |
You can get high-quality urethane casting every time if you follow these best practices.
FAQ
WHAT IS URETHANE CASTING FINISHING
Urethane casting finishing means you improve the look and feel of your casting parts. You do this after you remove the part from the mold. You can trim, sand, polish, or paint the part. These steps help you get the right urethane casting surface finish for your project. You make your part smooth, shiny, or textured. You also make sure your part works well and lasts longer.
HOW TO IMPROVE SURFACE FINISH IN CASTING
You can get a better surface by following a few simple steps. First, use a clean and high-quality mold. This gives your casting a good start. Next, mix the urethane slowly to avoid bubbles. Trim and sand the part after you take it out of the mold. You can polish the part for a glossy look or add a coating for extra protection. Always check your work as you go. Small changes can make a big difference in the final result.
Tip: Take your time with each step. Careful work gives you the best finish.
WHAT FINISHING METHODS ARE USED FOR PROTOTYPES
For prototypes, you often use basic finishing methods. You trim off extra material and sand rough spots. Sometimes, you add a quick coat of paint. These steps help you see how the part will look and feel. You do not need advanced finishing for most prototypes. You focus on making the part fit and work for testing.
Here is a quick list of common methods:
Trimming
Sanding
Light painting
HOW MUCH DOES CASTING FINISHING COST
The cost of urethane casting post processing depends on what you need. Basic finishing, like trimming and sanding, costs less. Advanced finishing, such as painting or special coatings, costs more. You might pay $20 to $50 for each part with basic finishing. If you want a custom look, the price can go up to $100 per part. Always ask your supplier for a price before you start.
Finishing Type | Typical Cost per Part |
|---|---|
Basic (trim/sand) | $20 – $50 |
Advanced (paint/coat) | Up to $100 |
You can choose the right finishing based on your budget and needs.
You should pick the best urethane casting surface finish for your project. Urethane casting lets you choose how your part looks and works. Most parts only need a little post processing to look nice. If you want great results, talk to experts or suppliers. They can help you find what fits your needs. With the right urethane and finishing, your parts will be strong and last a long time.
Tip: Ask questions about casting and surface choices before you begin your project.