LKprototype
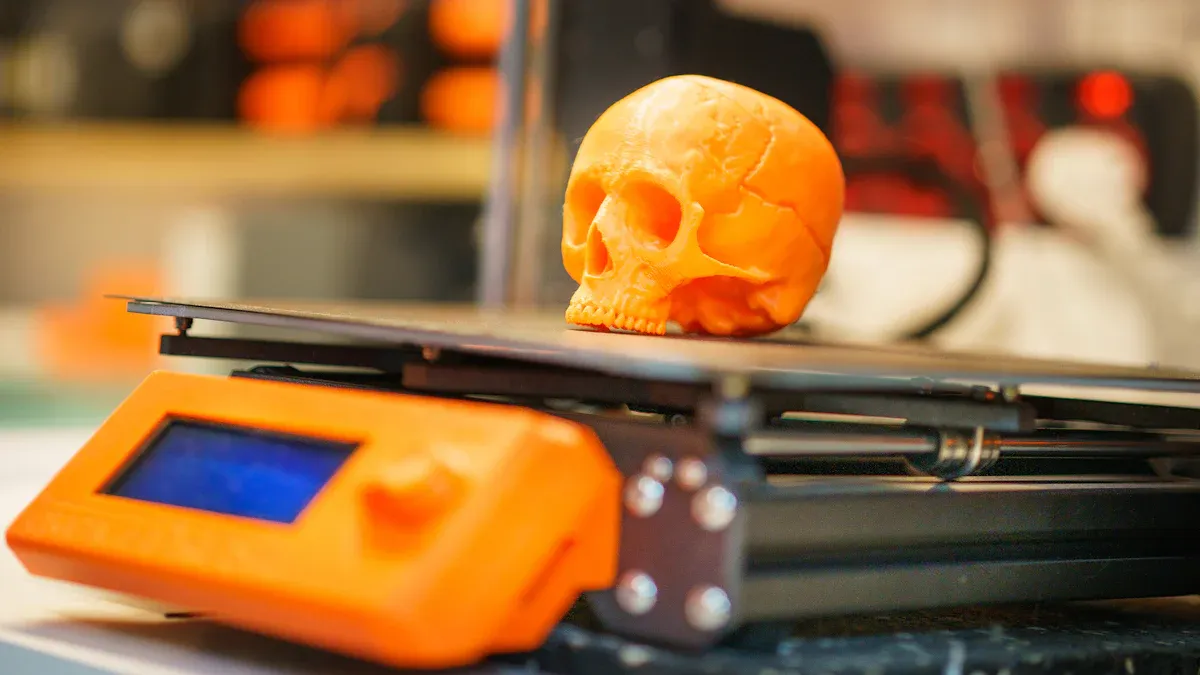
You should choose the best prototyping method for your project by considering how many parts you need, how quickly you need them, the material you want, and your budget. Urethane casting over 3D printing prototyping offers a smoother finish and stronger parts for small to medium quantities. It’s ideal if you want parts that resemble injection molding. On the other hand, 3D printing is fast and can create complex shapes quickly. Many companies now combine both methods, using 3D printing to create tools for urethane casting. This approach speeds up the process and reduces costs for custom parts.
Key Takeaways
Pick urethane casting for small or medium batches. It makes strong parts that look smooth, like injection-molded ones.
Choose 3D printing for fast, single parts or tricky shapes. It is good when you need to change designs quickly.
You can use both methods together. First, 3D print a master pattern. Then, use it to make molds for urethane casting. This saves time and money.
Think about how many parts you need, your budget, and the finish you want. 3D printing costs less for a few parts. Urethane casting is cheaper for bigger batches.
Urethane casting has more material choices and lasts longer. It is great for testing and making real-looking prototypes.
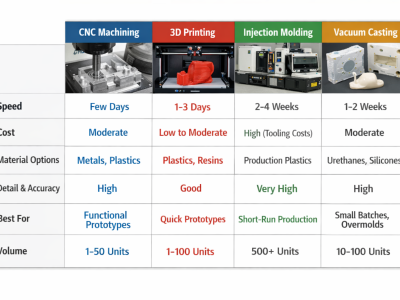
Quick Comparison
At-a-Glance Table
You need to pick the best prototyping method for your project. The table below shows how urethane casting and 3D printing prototyping are different. New technology has improved both methods. 3D printing prototyping is not just for prototypes anymore. You can use it for small or medium production runs. It works fast, makes complex shapes, and saves material. Urethane casting uses new tools too. You can make molds with patterns from 3D printing prototyping or CNC machines. This makes the process quicker and less expensive. Now, both methods work for more types of projects.
Feature | Urethane Casting | 3D Printing Prototyping |
|---|---|---|
Speed | Fast for small batches (days) | Very fast for single parts (hours) |
Cost | Low setup cost, best for 10–100+ parts | Low for one-offs, scales with volume |
Material Options | Wide range, mimics real plastics | Many plastics, some metals/resins |
Surface Finish | Smooth, close to injection molding | May need post-processing |
Strength | Strong, good for functional testing | Varies by material and process |
Design Complexity | Good, but limited by mold design | Excellent, handles complex shapes |
Volume Suitability | Best for low to medium runs | Best for prototypes, now scales up |
Best Use Cases | Functional prototypes, short runs, testing | Rapid prototyping, custom parts |
Tip: You can use both methods together. Make a master pattern with 3D printing prototyping for urethane casting. This saves time and money, especially for special or detailed parts.
New improvements give you more options. You can choose the method that fits your speed, budget, and quality needs. Both urethane casting and 3D printing prototyping now work for more projects, from quick samples to small production runs.
Urethane Casting Over 3D Printing Prototyping
Urethane Casting: Overview
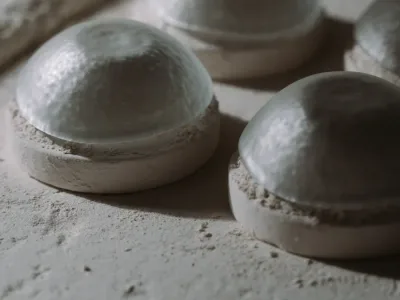
Urethane casting starts with a master pattern. This pattern is often made using high-resolution 3D printing. A silicone mold is made from the master pattern. Liquid urethane is poured into the mold to make each part. The parts have a smooth surface and are strong. Urethane casting is best for making 10 to 1,000 parts. You can pick from many urethane materials that act like real plastics. This process helps move from fast prototyping to regular manufacturing.
There are many reasons to pick urethane casting over 3D printing prototyping:
The surface finish is very smooth. It can be matte, semi-gloss, or shiny.
The parts are strong and last long, like injection-molded parts.
You can make working prototypes, sales samples, and models for approval.
Tooling costs are lower and you get parts faster than with injection molding.
It is easier to make more parts for small or medium batches.
Note: Urethane casting gives you parts that are ready to use. It is faster and cheaper than old tooling methods.
3D Printing: Overview
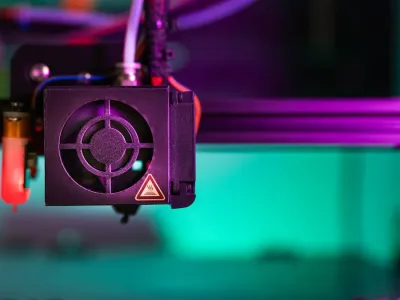
3D printing makes parts by building them layer by layer. It uses digital files to do this. You can make complex shapes quickly and waste less material. 3D printing is best for making 1 to 100 parts fast. You can use many plastics, resins, and some metals. But 3D printing often leaves lines on the parts. You may need to finish the parts after printing. The strength of the parts depends on the material and process.
You might choose 3D printing when you need:
Fast changes to designs or just one prototype.
Shapes that are hard to make with molds or machines.
Lower costs when you only need a few parts.
Core Differences and Where Urethane Casting Excels
When you look at urethane casting over 3D printing prototyping, you see big differences in how they work, how fast they are, cost, materials, and what they are used for.
Process: Urethane casting uses a mold made from a master pattern. 3D printing makes each part straight from a digital file.
Speed: 3D printing can make one part in a few hours. Urethane casting makes small batches in a few days. The parts from urethane casting look better.
Cost: Urethane casting has low tooling costs. It gets cheaper when you make more parts. 3D printing is cheapest for just one part but costs more for bigger batches.
Material Options: Urethane casting has many materials that act like real plastics. 3D printing also has many choices, but the strength and finish can change.
Typical Use Cases: Urethane casting over 3D printing prototyping is best for design parts, testing ideas, checking performance, sales samples, and models for approval. 3D printing is great for quick samples and tricky shapes.
Here is a simple table for batch sizes:
Manufacturing Method | Typical Batch Size Range |
|---|---|
Urethane Casting | 1 to 200 units (up to 1,000 in some cases) |
3D Printing | 1 to 100 units |
Pick urethane casting over 3D printing prototyping when you need:
Parts that look nice and are strong.
Production runs that are too big for 3D printing, like 10 to 1,000 parts.
Prototypes or samples that must look and feel like the final product.
Urethane casting over 3D printing prototyping is best for making small to medium amounts of parts. The finish and strength are better. It is great for testing and showing samples to customers.
Urethane Casting
Process
First, you make a master pattern for urethane casting. You can use 3D printing or CNC machining to make this pattern. Then, you pour liquid silicone over the pattern. This makes a soft mold. After the silicone hardens, you take out the pattern. Now, the mold is ready to use. You mix urethane resin and pour it into the mold. The resin fills all the small spaces. When the urethane hardens, you open the mold. You take out the finished part. You can use the mold again and again. Most molds make 20 to 50 parts before wearing out.
When to Use
Pick urethane casting when you need strong, detailed parts fast. It is good for prototyping and making a small number of parts. Use it for:
Making prototypes and short production runs.
Creating parts that look like injection-molded products.
Projects that need design changes without spending a lot.
Launching products quickly or for short-term needs.
Consumer and medical products that need soft tooling.
Urethane casting helps you make tricky shapes. You do not have to worry about draft angles or undercuts. It also works for parts with walls that are not the same thickness.
Pros and Cons
Here are the main good and bad points of urethane casting:
Aspect | Pros | Cons |
|---|---|---|
Surface Finish | Smooth finish, like injection molding. Many colors possible. | Mold wears out after many uses. |
Material Range | Many urethane materials to pick from. Hard and soft types. | Not all materials are as strong as metal molds. |
Part Strength | Parts are strong and last long. Good for testing and use. | Mold can bend, so tight fits are harder. |
Cost & Speed | Cheaper and faster than injection molding for small batches. | Not good for making lots of parts at once. |
Design Flexibility | Makes complex shapes and undercuts easy. | Mold does not last forever and only makes a set number. |
Tip: Urethane casting is a quick and cheap way to test your designs before making lots of parts.
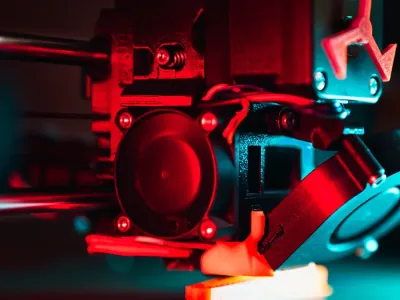
3D Printing
Process
You start the 3d printing process by designing a digital model with CAD software. This model shows exactly what you want to make. Next, you slice the model into thin layers and send the instructions to the printer. You prepare the printer by loading the right material and making sure the build plate is level. The printer then builds your part layer by layer. After printing, you remove the part and clean it. You may need to sand, polish, or coat the surface to get the finish you want. Finally, you test the part and decide if you need to make changes.
Tip: 3d printing lets you quickly test and improve your designs. You can print, check, and change your model in just a few days.
When to Use
Choose 3d printing when you need parts fast or want to try out new ideas. It works best for:
Rapid prototyping and quick design changes
One-off prototypes or custom parts
Projects with complex shapes or internal features
Low-volume production, usually under 100 units
Industries like medical, electronics, robotics, automotive, and aerospace
You do not need to pay for molds, so you save time and money. 3d printing is perfect for projects that need fast results or frequent updates.
Pros and Cons
Here are the main strengths and weaknesses of 3d printing:
Pros | Cons |
|---|---|
Makes complex shapes and detailed parts | Surface finish can be rough; may need extra work |
Fast turnaround for prototypes | Parts may have weak spots between layers |
No need for expensive molds | Some materials are brittle or warp easily |
Great for small batches and custom items | Not all materials are as strong as molded plastics or metals |
Easy to change designs and print again | Printed parts may not be suitable for heavy loads |
3d printing gives you design freedom and quick results. You can make parts with channels, holes, or lattice structures that are hard to mold.
You may notice tiny lines or rough spots on the surface. Some materials, like PLA, can break easily, while others, like ABS, may warp.
You often need to sand or coat the part to make it smooth.
3d printing works best for testing ideas, making custom parts, or producing small batches without high costs.
Comparison Factors
Cost
When you think about cost, the number of parts matters. If you only need a few parts, like 5 or 10, 3d printing is cheaper. You do not have to pay for a mold. Each part costs less because you skip making a mold. But if you need more parts, urethane casting saves money. The mold cost spreads out over many parts. This makes each part cheaper as you make more.
Here is a table that shows how the price per part changes:
Production Volume | 3D Printing Unit Cost (approx.) | Urethane Casting Unit Cost (approx.) |
|---|---|---|
5 parts | $18 - $35 | $57 - $70 |
10 parts | $21 - $33 | $57 |
20 parts | $20 - $32 | $48 |
50 parts | $18 - $30 | $41 |
100 parts | $17 | $30 |
500 parts | $15 | $25 |
1000 parts | N/A | $23 |
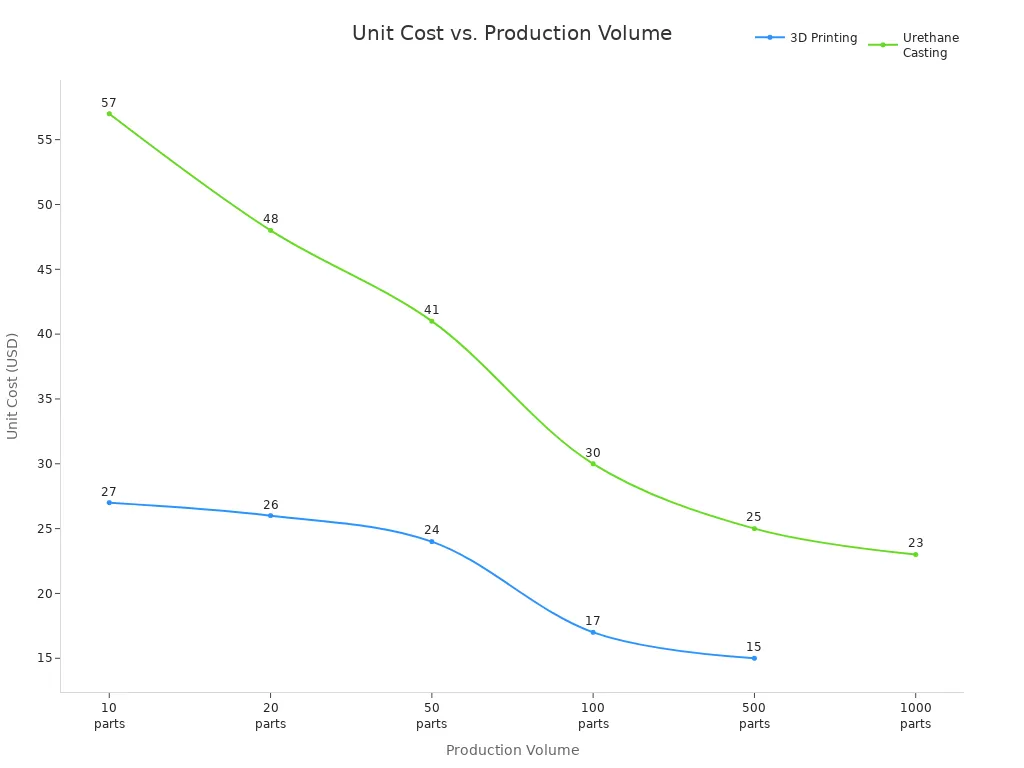
You can see that urethane casting is cheaper for bigger batches. The mold for casting costs between $250 and $1,500. But this cost is shared if you make many parts. If you only want a few, 3d printing is best. If you need 50 or more, urethane casting saves money.
Tip: Always count how many parts you need before picking a method. This helps you spend less.
Speed
Speed is important if you need parts fast. 3d printing can make one part in just 24 hours. You send your file to the printer, and it starts right away. This makes 3d printing the fastest for one or two parts.
Urethane casting takes longer. First, you make a master pattern and a silicone mold. Making the mold takes 1 to 2 weeks. After that, you can make many parts each day. Here is a table to compare:
Process | Lead Time for Initial Parts | Lead Time for Subsequent Parts |
|---|---|---|
Urethane Casting | As low as 7 days | About 2 weeks |
3D Printing | As little as 24 hours | N/A |
If you need just one or two parts quickly, pick 3d printing. If you want a batch and can wait, urethane casting works well.
Quality
You want your parts to look nice and work well. Urethane casting gives a smooth finish, almost like injection molding. The silicone mold copies every detail from the pattern. This makes the parts look sharp and clean. Urethane parts are also accurate, but they shrink a little as they cure.
3d printing can make tricky shapes, but the surface is often rough. You might see lines or bumps from printing. Some types, like SLA or DLP, make smoother parts. But most still need sanding or coating to look their best. Even with extra work, the finish is not as good as urethane casting.
Note: If you want parts that look and feel like the real thing, urethane casting is better for quality.
Volume
How many parts you need helps you choose the right method. 3d printing is best for one part or a very small batch. You do not need a mold, so you can print just one if you want. Urethane casting is better for 20 to 100 parts. Each silicone mold can make about 20 to 35 parts before it wears out.
Production Method | Minimum Production Volume | Maximum Production Volume | Mold Shot Count per Mold | Lead Time to First Shot |
|---|---|---|---|---|
Urethane Casting | ~20 units | ~100 units | 20-35 shots (up to 35+) | As low as 3 days |
3D Printing | 1 unit | N/A | N/A | N/A |
If you need just a few samples, use 3d printing. If you need dozens or up to a hundred, urethane casting is a better deal.
Material Options
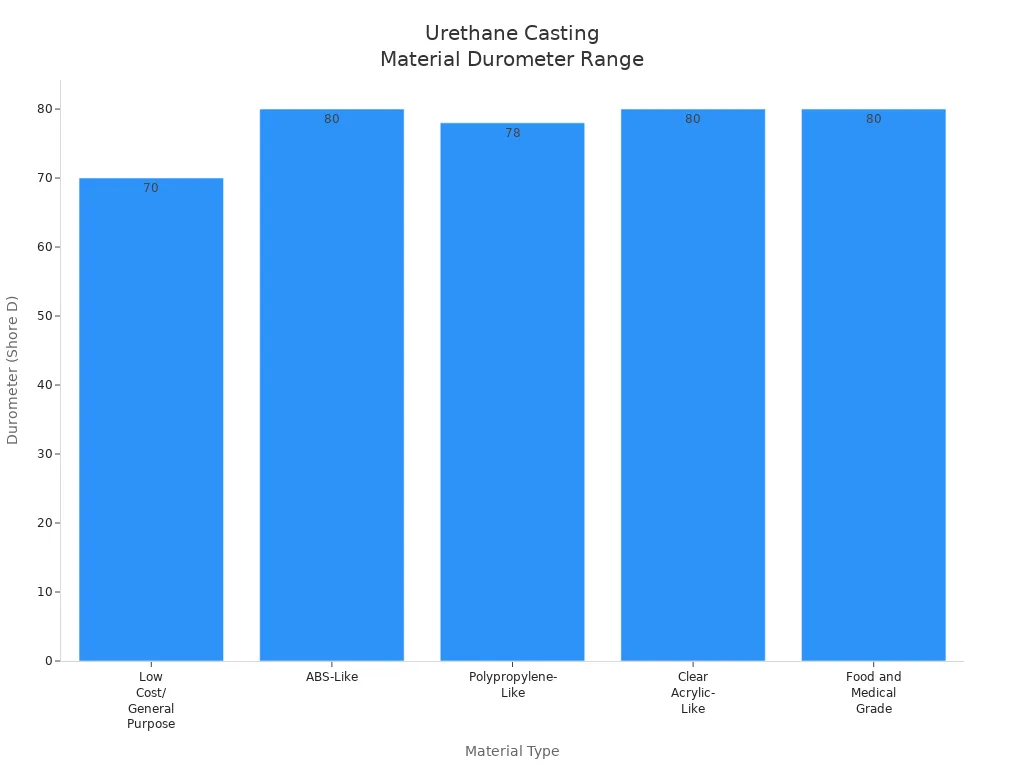
Urethane casting gives you lots of material choices. You can pick urethane that acts like ABS, polypropylene, clear acrylic, or even food-safe and medical-grade plastics. Some urethane can handle high heat or chemicals. This is good if you need special parts.
Here is a table showing some urethane casting options:
Material Type | Description | Durometer Range | Special Properties |
|---|---|---|---|
Low Cost/General Purpose | Fast-curing rigid urethane, general use | 70D | Low cost, not for high-stress applications |
ABS-Like | Tough, rigid, similar to ABS plastic | 80D | High rigidity, not flexible |
Polypropylene-Like | Flexible and tough, mimics polypropylene | 78D | Flexible, not for high rigidity |
Clear Acrylic-Like | Clear resin with high UV stability | 80D | Expensive, slow curing, may need multiple molds |
Food and Medical Grade | Biocompatible, food-safe urethane | 76D-85D | Medical and food industry applications |
High Heat | Resin with high heat resistance (up to 345°F) | N/A | Extremely rigid, not flexible |
3d printing has many plastics and some metals, but not as many choices as urethane casting. Most 3d printing materials do not have the same special features. If you need a part with a special finish or property, casting gives you more options.
Application Fit
You should pick the method that fits your project. Urethane casting is best for strong, good-looking parts in small batches. You can use it for show models, testing, jigs, fixtures, and some finished products. It works well for parts that look like they were injection molded. You can add inserts, use different finishes, or make parts with thick walls and undercuts.
3d printing is great for quick prototypes, custom parts, and tricky shapes. You can make one part or a few, and you do not need a mold. But there are limits on part size and surface finish.
Here is a table to help you decide:
Application Aspect | Urethane Casting Suitability | 3D Printing Suitability |
|---|---|---|
Material Properties | High strength, flexibility, weatherability, chemical resistance; mimics production-grade injection molded plastics | Limited material properties; often less durable or flexible |
Surface Quality | Superior surface finish, custom textures, high polish, color matching | Surface finish limited by layering; less polish and texture options |
Quantity | Moderate quantity prototypes; low annual volume products; cost-effective short-run production | Best for very low quantities or single prototypes due to cost and speed |
Part Size | Suitable for larger parts beyond 3D printing size limits | Limited by build chamber size |
Geometry | Handles unique geometries not suited for injection molding (thick walls, undercuts) | Excels at complex geometries but with size and finish limitations |
Process Flexibility | Allows secondary operations, inserts, multiple finishes, multi-shot materials | Limited post-processing; fewer options for multi-material or multi-finish parts |
Speed | Once mold is made, multiple parts can be produced daily | Fast turnaround for single parts or masters; no mold required |
Cost | Higher initial mold cost but lower per-part cost for multiple copies | Lower upfront cost but higher per-part cost for multiple units |
Use Cases | Prototypes for show models, testing, jigs, fixtures, specialized machine components, low volume production | Rapid prototyping, master patterns for molds, complex one-off parts |
Tip: Many companies use both methods together. You can 3d print a master pattern and use it to make a silicone mold for urethane casting. This gives you the speed of 3d printing and the quality of casting.
Decision Guide
Scenarios
You may wonder which method fits your project best. Here are some real-world situations to help you decide:
You need a batch of show models for a trade event. Urethane casting gives you parts with a smooth finish and strong build. These parts look and feel like final products, which impresses investors and customers.
Your team wants to test how a part works under stress. Urethane casting creates durable parts with properties close to production plastics. You can check fit, function, and even run life tests.
You must deliver samples quickly for early prototyping. Urethane casting offers a fast turnaround, often in 2–4 weeks. You get accurate parts with low shrinkage, so your design matches the final product.
You need to customize hardness, color, or add metal inserts. Urethane casting allows you to adjust finishes and embed hardware, which is hard to do with 3D printing.
You want to refine your design over several rounds. Urethane casting is cost-effective for small runs and repeated testing.
Urethane casting works well when you need realistic, durable, and accurate parts fast. It often outperforms 3D printing for functional testing and presentation models.
Flowchart
You can use this simple flowchart to guide your choice. Start at the top and follow the questions:
Question | If Yes | If No |
|---|---|---|
Do you need only 1–5 parts, or quick design changes? | Go to next question | |
Do you need 10–100+ parts with a smooth finish? | Choose Urethane Casting | Go to next question |
Do you need parts for functional or life testing? | Choose Urethane Casting | Go to next question |
Do you need complex shapes with internal features? | Choose 3D Printing | Go to next question |
Do you need custom colors, hardness, or inserts? | Choose Urethane Casting | Choose 3D Printing |
Experts suggest you match your method to your project stage. If you need speed, appearance, or strong parts for testing, urethane casting is often the best choice. For quick samples or complex shapes, 3D printing works well.
Choosing between urethane casting and 3D printing depends on your project’s needs. Use this table to review the most important factors:
Factor | 3D Printing | Urethane Casting |
|---|---|---|
Quantity | 1–50 units | 5–250 units |
Surface Finish | Basic | Detailed, smooth |
Cost | High per part | Lower per part (batch) |
Speed | Fast for few parts | Fast after mold made |
Think about how many parts you need, the finish, and your budget.
Talk with experts to match the right method to your goals.
You can request a quote or upload your CAD files to get started.
FAQ
What is the main difference between urethane casting and 3D printing?
Urethane casting uses a mold to make parts, while 3D printing builds parts layer by layer from a digital file. You get smoother finishes with casting. You get faster results with 3D printing.
Can I use both methods for one project?
Yes, you can. You may 3D print a master pattern and then use it to make a silicone mold for urethane casting. This approach gives you speed and high-quality parts.
How strong are urethane cast parts compared to 3D printed parts?
Urethane cast parts usually have better strength and durability. You can use them for functional testing or as end-use parts. 3D printed parts may be weaker, depending on the material and print method.
Which method is better for making complex shapes?
3D printing handles complex shapes and internal features very well. You can print designs that are hard or impossible to mold. Urethane casting works best for shapes that do not need complicated internal details.
How do I choose the right method for my budget?
Tip: If you need only a few parts, 3D printing costs less. For larger batches, urethane casting saves money per part. Always count your parts and compare prices before you decide.