LKprototype
You need to know how to choose the best prototyping method for your project. Your goals, materials, how many you need, budget, and time all matter. Matching the method to your needs helps users get better feedback. Picking the right way lets users see ideas come to life. It helps users agree on choices. It also lets users spot problems early.
Cost Effectiveness | Lead Time | Material Compatibility | |
|---|---|---|---|
3D Printing | Cost changes with amount; cost stays the same for small numbers | Quick setup, slower for big batches | Works with many materials, good for tricky shapes |
CNC Machining | Not great for very small batches; better for bigger batches | Fast after setup is done | Uses many materials, very accurate |
Vacuum Casting | Best for very small batches; not as good for big batches | Quick mold setup, slower making parts | Mostly uses polyurethane, good for samples |
Injection Molding | Best for big batches; takes longer at first to make molds | Fast after molds are ready | Works with many plastics, good for lots of uses |
Before you begin, make sure you know your project’s goal. This step helps users get the feedback they want. It also makes understanding how to choose the best prototyping method easier.
Key Takeaways
Make sure you know your project goals. This helps you pick the best prototyping method.
Think about what kind of prototype you need. Choose between functional or visual prototypes. Pick based on what you need to test.
Look at your budget and how much time you have. Each method costs different amounts and takes different times. Pick the one that works for you.
Pick your materials carefully. The material changes how your prototype works. It also decides which method you can use.
Use the decision guide to help you choose. Ask important questions to match your method with your project goals.
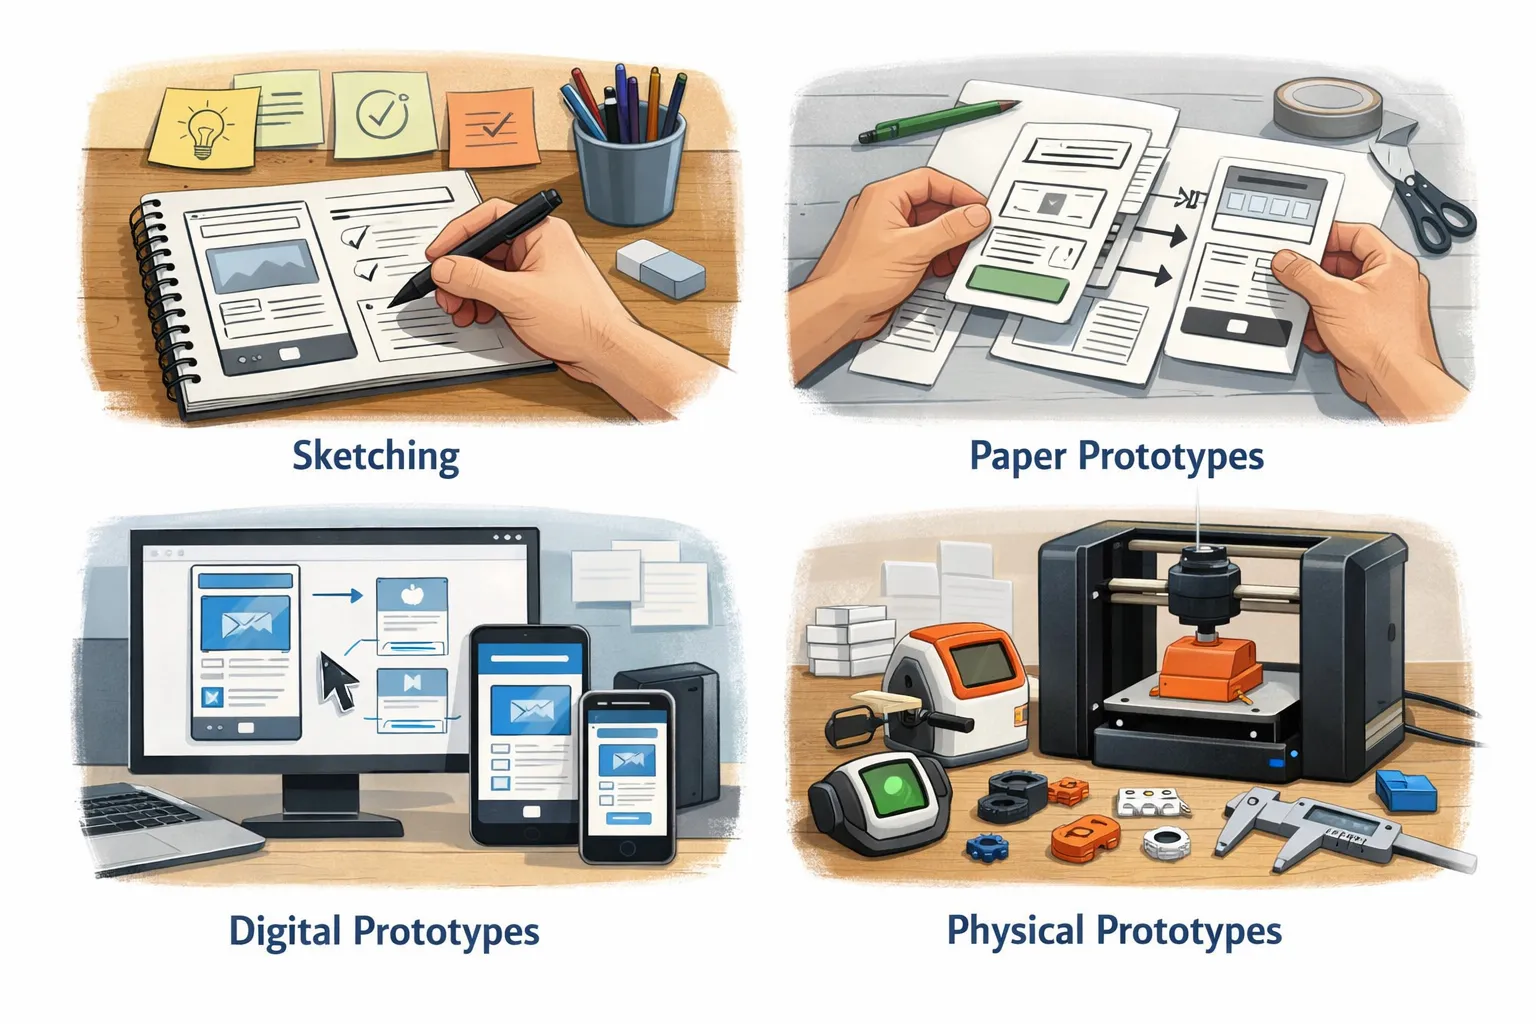
Define Project Purpose and Prototype Type
Functional vs Visual Prototypes
You have to pick what your prototype will show. Will it show how your product works, or just how it looks? This choice helps you pick the right prototyping method. If you want to see how something works, you need a functional prototype. If you only want to show the shape or style, a visual prototype is enough. Who will look at your prototype also matters. Some people want to know how a product feels and works. Others care more about how it looks.
Prototype Type | Purpose | Characteristics |
|---|---|---|
Visual Prototype | Focuses on looks and how people use it | Shows size and appearance, but does not work |
Functional Prototype | Checks if design ideas work and if product performs well | Shows how it works and looks, but may be made in a different way or size |
End-use considerations
Think about how you will use your prototype. If you want to test how it works, check if it can handle stress, heat, or movement. Make sure it fits with other parts and works as you planned. The table below shows what you should test:
Testing Category | Description |
|---|---|
Performance Testing | Checks if the prototype works under load, heat, and moving fluids |
Durability Testing | Tests if it can last through use, wear, and tough conditions |
Dimensional Accuracy and Fit | Makes sure parts are the right size and fit together well |
Material choices implications
The material you pick changes what you can do with your prototype. You might start with one material and switch to another to save money or get better results. For example:
A team making a smartwatch case changed from machined aluminum to polycarbonate. This let them make more prototypes and try new designs.
A car part maker switched from polypropylene to glass-reinforced ABS. This stopped the part from warping and helped it keep its shape.
Aerospace engineers chose carbon-fiber-reinforced polymer for a satellite part. It worked better in tough places than aluminum.
Your budget also matters. Spend money on the most important things. You can make your design simpler or use different prototyping methods at different times to get the best results.
Overview of Prototyping Methods
CNC Machining Overview
CNC machining is good for making strong, exact parts fast. It uses machines that are controlled by computers. These machines cut metal or plastic. You can change your design quickly. CNC machining works with many materials. It is fast for making parts. Sometimes, you get leftover pieces you cannot use. Some shapes are hard to make with CNC machining. The table below shows what is good and bad about CNC machining:
Advantages | Disadvantages |
|---|---|
Makes very exact parts | Makes extra waste |
Costs less to set up | Cannot make every shape |
Works with many materials | |
Easy to change designs | |
Fast enough for making parts |
Vacuum Casting Overview
Vacuum casting is best for making a few parts at a time. You use a silicone mold and pour in liquid plastic. This way works well for medical tools and car parts. It is also good for testing new products and making electronics. Here are some things you can make with vacuum casting:
Medical and dental tools
Equipment holders
Car parts
Electronics for people
Vacuum casting gives you smooth and detailed parts. But you cannot use it to make lots of parts at once.
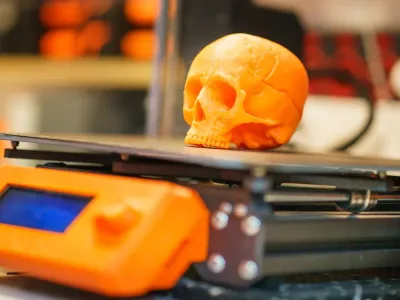
3D Printing Overview
3D printing is great for testing ideas quickly. It builds parts one layer at a time from computer files. You can use it for tools, medical models, and checking if parts fit. 3D printing helps you make models, working samples, and small batches. You can also use it for teaching and showing ideas. The table below lists what you can do with 3D printing:
Application Type | Description |
|---|---|
Tools and holders | Used in cars and making tools fast. |
Medical models and guides | Shows body parts for doctors to plan and practice. |
Testing products | Checks how buttons and covers look and feel. |
Small batches of many types | Makes a few of each kind to test. |
Short runs and bridge parts | Makes some parts while waiting for big tools. |
Teaching and showing models | Used for lessons, ads, and showing to investors. |
Idea models and shape studies | Lets people see and test new ideas fast. |
Working samples | Makes parts that move to test how they work. |
Checking fit and assembly | Makes sure parts go together before making lots. |
3D printing helps you finish designs faster and saves money on tests.
Injection Molding Overview
Injection molding is best when you need lots of the same part. You make a mold and fill it with melted plastic. This way is good for making many parts at once. You can make thousands or even millions after you have the mold. Prototype injection molding helps you find mistakes before making lots of parts. Other ways work better for making just a few parts or changing designs fast. Injection molding is the best for making many parts.
Prototyping Methods Compared (Quick Reference Table)
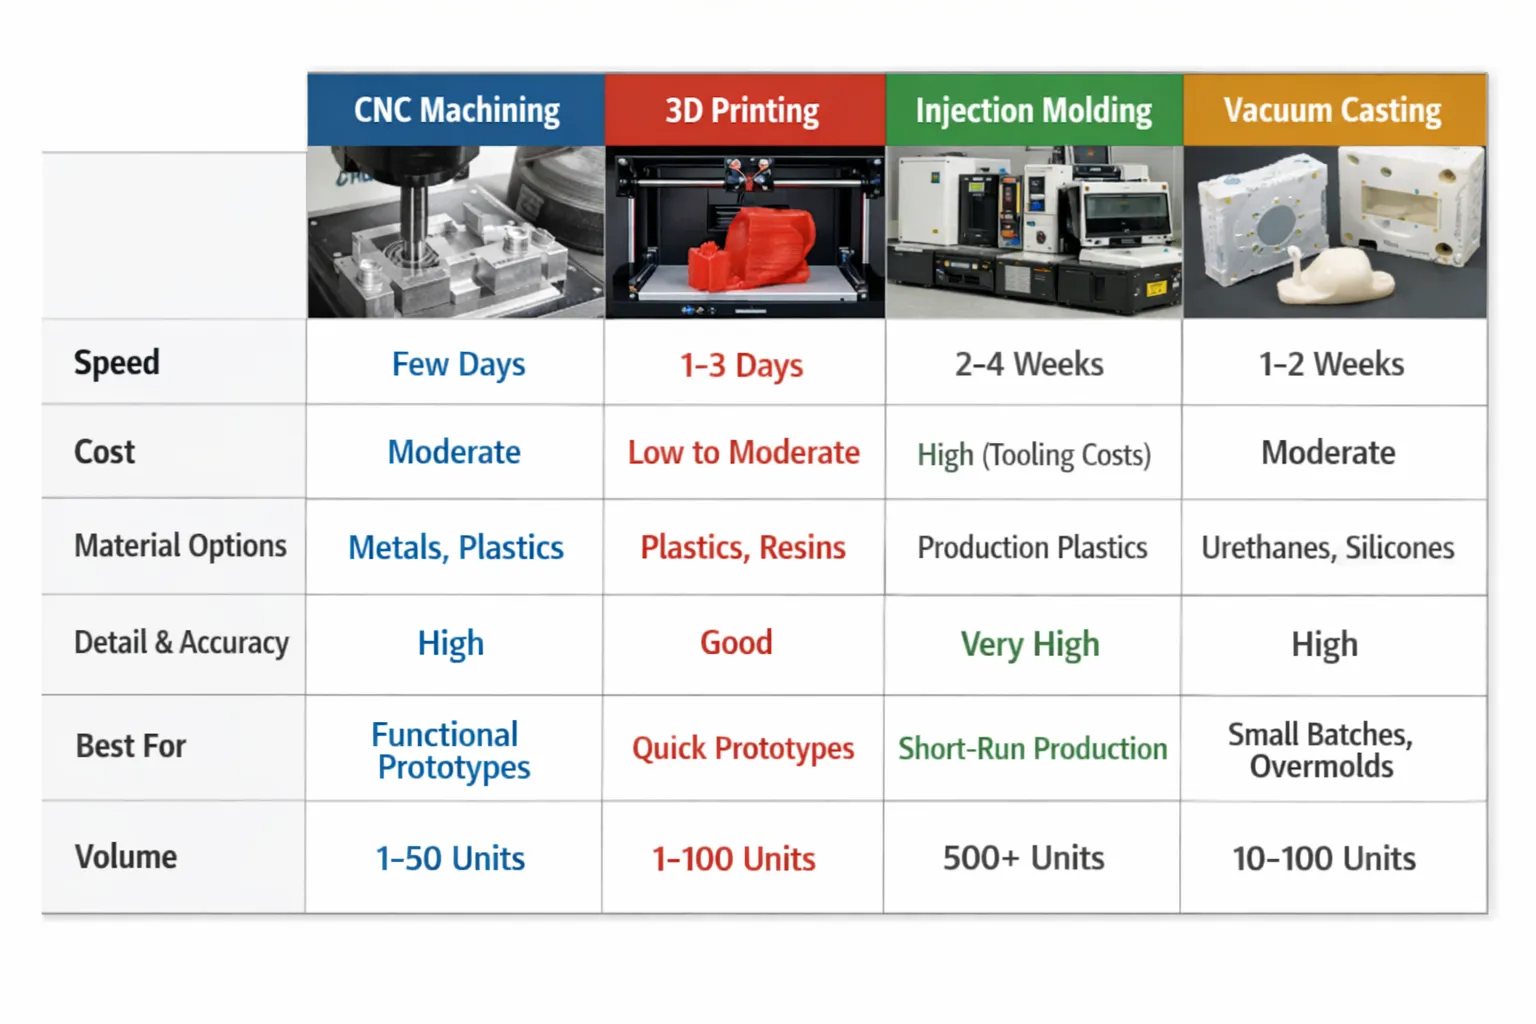
Picking the right prototyping method helps you save time and money. You should look at cost, speed, accuracy, and materials before you choose. This part gives you a quick guide to help you pick the best rapid prototyping process for your project.
Cost Comparison by Method
You want to know how much each rapid prototyping method costs. Some methods are better for making a few parts. Other methods save money when you make many parts.
Method | Cost for Small Batches | Cost for Large Batches | Notes |
|---|---|---|---|
3D Printing | Low | Medium | Good for one-offs and design changes |
Medium | High | Best for strong, exact parts | |
Low | High | Great for a few samples | |
Injection Molding | High (setup) | Low | Best for mass production |
Tip: If you only need a few prototypes, 3D printing and vacuum casting cost less. If you need thousands of parts, injection molding gives you the lowest price for each piece.
Lead Time Comparison
Speed is important in rapid prototyping. You want your parts fast so you can test and fix your design.
3D printing can give you parts in a few days.
CNC machining usually takes three to seven days for simple parts.
Vacuum casting needs about one week for first parts. Hard jobs take seven to fifteen business days.
Rapid injection molding takes ten to fifteen days or more, depending on mold difficulty.
Note: 3D printing and CNC machining are best when you need quick feedback. Vacuum casting and injection molding take longer but work well for bigger projects.
Tolerance & Accuracy Analysis
You need to know how close your rapid prototyping parts match your design. Tolerance and accuracy affect how well parts fit and work.
Process | Tolerances | Accuracy |
|---|---|---|
Injection Molding | High (±0.1 mm) | Very high |
Vacuum Casting | Moderate (±0.2 mm) | High |
3D Printing | Variable (±0.5 mm) | Moderate to high |
CNC Machining | Very high (±0.05 mm) | Excellent |
If you need tight fits or working parts, CNC machining and injection molding give you the best results.
Material Compatibility Matrix
You must pick the right material for your rapid prototyping project. Each method works with different materials and has its own limits.
Method | Compatible Materials | Limitations |
|---|---|---|
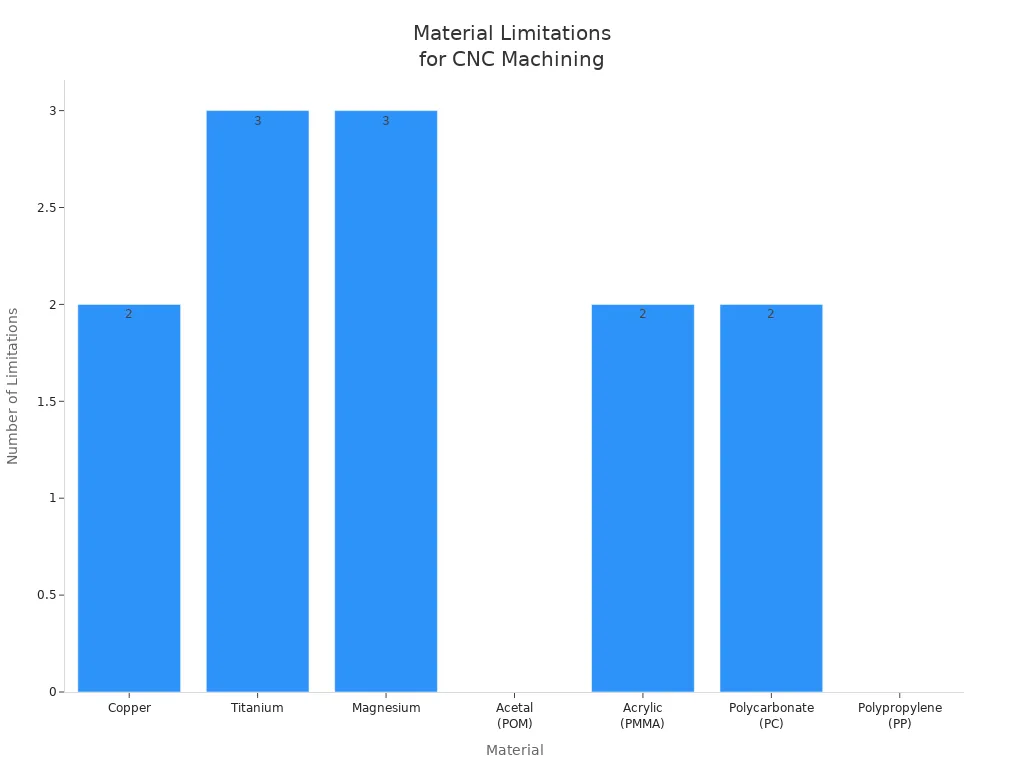
CNC Machining | Metals (copper, titanium, magnesium), plastics (acetal, acrylic, polycarbonate, polypropylene) | Some metals are hard to machine or expensive. Plastics may crack or scratch. |
Injection Molding | Engineering-grade thermoplastics, elastomers | Needs strong molds. Limited to certain plastics. |
Vacuum Casting | Polyurethane resins | Mold wears out fast. Lower performance than injection molding. |
3D Printing | Plastics, resins, some metals | Material choices depend on printer type. |
You can use rapid prototyping to test different materials before final production. Try a few options to find the best fit for your needs.
Rapid prototyping lets you test ideas, change designs, and pick the best materials. You can use different prototyping methods at each stage to get the best results.
Decision Guide for the Best Prototyping Method
Step-by-Step Selection Questions
You want to pick the best prototyping method for your project. Start by asking yourself some important questions. These steps help you focus on what matters most.
What is your prototype’s main goal? Decide if you need to test how it looks, fits, or works.
What do you want your prototype to do? Think about strength, stress, heat, and how the surface should look.
Which process fits your needs? Pick the prototyping process first, then choose the material.
Is your design simple or complex? Some methods work better for easy shapes.
How exact does your prototype need to be? High accuracy may limit your choices.
What materials do you need? Each method works with different materials.
How much time do you have? Some methods are faster than others.
What is your budget? Cost can change your options.
Will you need more parts later? Some methods are better for making more parts in the future.
Does your prototype match the final product’s needs? Make sure your choice fits what you want in the end.
Tip: Always check if your prototyping method matches your project’s timeline and budget.
Here is a table to help you compare important things:
Factor | Description |
|---|---|
Design Complexity | Harder designs can change which method you pick. |
Required Accuracy | How exact you need your part affects your choice. |
Material Properties | Some materials only work with certain methods. |
Time Constraints | If you need parts fast, you have fewer choices. |
Budget Limitations | Your money can decide which method you use. |
Environmental Impact | Being green is more important every year. |
Method Selection Flowchart
You can use a simple flowchart to help you choose the best method. Follow each step to narrow down your options:
Do you need only a few prototypes?
Yes: Try 3D printing or vacuum casting.
No: Go to the next step.
Does your design need to be very exact or strong?
Yes: Choose CNC machining.
No: Go to the next step.
Do you need thousands of parts?
Yes: Pick injection molding.
No: Go to the next step.
Is your budget small and time short?
Yes: Use 3D printing for rapid prototyping.
No: Look at your needs and pick the best method.
Note: Always match your prototyping method to your project’s purpose, material, and future plans.
You can use this guide to make smart choices and get the most from prototyping methods.
Additional Considerations
Material and Surface Quality
You want your prototype to look like the real product. The way it feels and looks is important. Each prototyping method gives different results for surfaces.
CNC machining and injection molding make parts with smooth surfaces. They also give sharp details.
Vacuum casting is good for models you want to show. It makes pieces shiny and detailed. Your prototype will look real.
3D printing helps you test ideas fast. You can try many designs. The surface is not always smooth. You might need to fix it to look better.
If you want to show your prototype to customers, pick a method with the best surface quality.
Scalability and Future Production
Think about making more products in the future. Your prototyping method should let you go from a few samples to many finished items. Keep these things in mind:
Design for manufacturing helps you avoid problems later.
The material you choose changes how your product works and how easy it is to make.
You need to know if you can make enough items.
Managing your supply chain keeps your project moving.
Quality control checks if every part is good.
Make clear plans for time and money. Change them as your project gets bigger.
If you pick the right prototyping process now, you can save time and money later.
Design Iteration and Flexibility
Rapid prototyping helps you improve your design quickly. You can change things, test new ideas, and get feedback fast. You can test and fix your design many times. You can change your design when you learn new things. Models help you share ideas and get feedback from users. You find problems early and fix them before making lots of products.
Rapid prototyping lets you make working prototypes that look and act like the final product.
You get feedback fast and can change your design easily.
You can test your design many times to make it better.
Pick a prototyping method that lets you change things quickly. This helps you keep making your design better until it is ready to sell.
Frequently Asked Questions About Prototyping Methods
Which prototyping method is fastest?
You want your prototype done fast. Rapid injection molding is a quick way to make one working prototype. This method lets you test your design in real life early. You can go from an idea to user testing without waiting long. Rapid injection molding helps you move from a prototype to making lots of parts.
Which prototyping method is cheapest?
If you only need a few parts, try urethane casting. This method keeps costs low for small batches. Here are some reasons why urethane casting saves money:
The mold costs from $250 to $1,500.
You can make 25 to 50 parts with one mold.
Urethane casting is faster and cheaper than injection molding for small jobs.
You can use urethane casting to test your product with a few samples before making more.
What prototyping method offers the best tolerance?
You need tight tolerances when parts must fit together well. Some prototyping methods are more accurate than others.
Tolerances | |
|---|---|
Projection Micro Stereolithography (PµSL) | ± 10 µm (0.01 mm) to ± 25 µm (0.025 mm) |
PolyJet | ± 0.05-0.1 mm for 100 mm |
SLA and DLP | ± 0.2% (± 0.1 mm) |
DMLS | ± 0.2% (± 0.1 – 0.2 mm) |
Pick these methods if you need parts with very exact sizes.
How to choose between CNC and 3D printing?
You need to pick the method that fits your project. CNC machining is best for high accuracy and tight fits. Use CNC when you need strong parts for cars or planes. 3D printing is good for making tricky shapes and testing ideas fast. You can use 3D printing for quick changes and new designs.
Criteria | CNC Machining | 3D Printing |
|---|---|---|
Production Volume | Medium to high | Low or one-off |
Design Complexity | Simple to moderate | Highly complex |
Tolerances and Properties | Tight, strong | Good for quick changes |
Material Options | Metals, strong plastics | Flexible, hard-to-machine |
Cost and Lead Time | Higher cost, slower | Lower cost, faster |
Pick CNC machining for strong, exact parts.
Pick 3D printing for fast changes and tricky shapes.
Tip: Always make sure your prototyping method matches your project’s needs and plans.
You can pick the best prototyping method by following easy steps. First, think about your goals. Test your ideas before making final parts. Do not skip user feedback or use fake content. These mistakes waste time and hurt your project.
If you do not set clear goals, you waste time.
If you rush, you might miss better ideas.
Using real content and making things interactive helps you get good feedback.
Always ask users and people in charge what they think.
If you want help from experts, check the table below. It shows how talking to professionals can help your project do well.
Benefit | Description |
|---|---|
Tailored Strategies | Experts give you plans that fit your project’s needs. |
Adherence to Industry Standards | They make sure your prototypes follow rules and are correct. |
User-Focused Design Principles | They use ideas that make your prototype easy and fun to use. |
Optimized Material and Process Selection | They help you pick the best materials and ways to make your prototype. |
Comprehensive Documentation | They guide you with paperwork and rules so you can start making your product smoothly. |
Take time to think about what you need. Use the decision guide. You can ask experts for help with your next project.