LKprototype
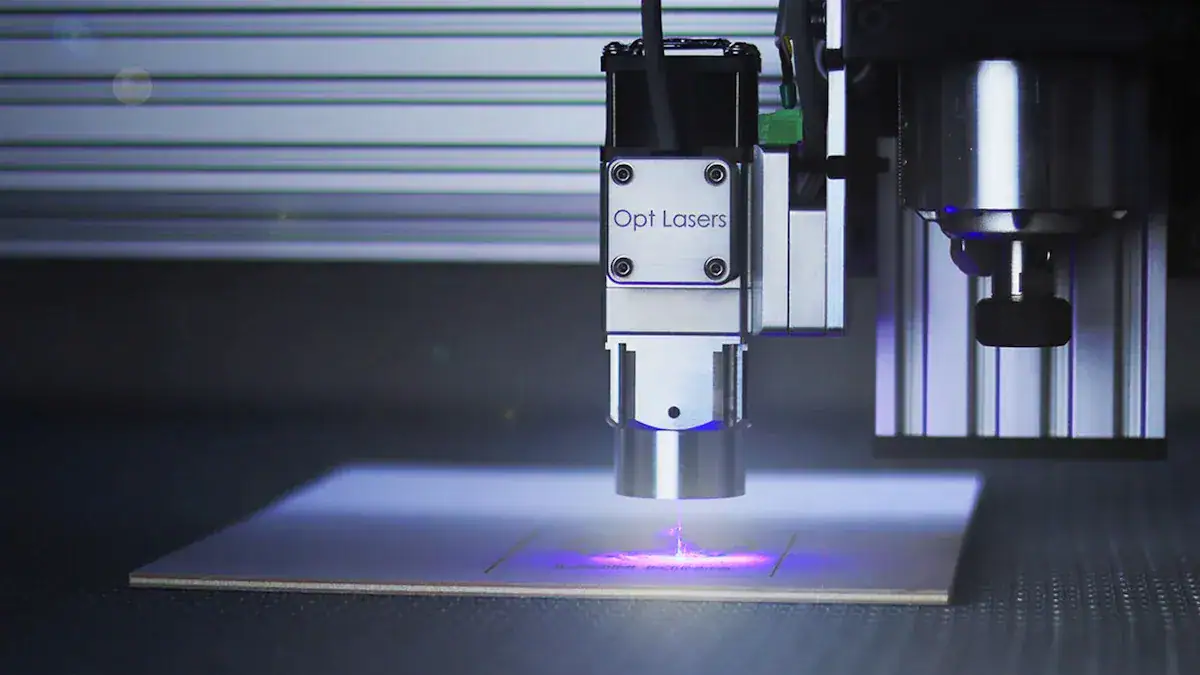
Acrylic is a great material for acrylic CNC machining. It is affordable and can be used in many ways. It is easy to work with and looks clear and shiny, making it perfect for industries that require precise work. Acrylic is a good choice when you need a strong, see-through material at a low cost.
Accuracy and speed are very important when performing acrylic CNC machining. Its density is 1.18 g/cm³, and its strength is 70 MPa. These features help you achieve excellent results without damaging the material. Acrylic also allows 92% of light to pass through, making it ideal for applications like signs and displays.
Learning to machine acrylic well through acrylic CNC machining has many benefits. It reduces waste, speeds up production, and provides smooth finishes. Whether cutting, engraving, or shaping acrylic, you can achieve great results with the right tools and methods.
Key Takeaways
Acrylic is a strong and clear material used in CNC machining. It is affordable and works well for many purposes.
Use sharp tools made of carbide. Set the right spindle speed and feed rate to cut cleanly and avoid melting.
Polishing and finishing make acrylic parts look better and last longer. You can use flame polishing or buffing for this.
Do not use dull tools or cut too deep at once. These mistakes can ruin the quality of your work.
CNC machining with acrylic is common in industries like cars and healthcare. It helps make accurate and useful parts.
Material Properties and Why Acrylic Works Well for CNC Machining
Important Features of Acrylic
Acrylic, also called PMMA, is light and strong. Its density is 1.18 g/cm³, making it simple to work with. Acrylic is very clear, letting 92% of light pass through. This gives it a shiny, glass-like look. It has a tensile strength of 70 MPa, so it can handle stress without breaking. Acrylic also blocks UV rays, making it good for outdoor use. But, it doesn’t resist chemicals well and can break down with some solvents.
Reasons Acrylic is Great for CNC Machining
Acrylic’s special features make it great for CNC machining. Its light weight makes it easy to shape, even for tricky designs. Its clear and smooth surface is perfect for signs and displays. Acrylic comes in two main types: cast and extruded. Cast acrylic is clearer and resists scratches better. Extruded acrylic is cheaper and easier to machine. These choices let you pick the best type for your project. Acrylic is affordable, flexible, and gives precise, high-quality results.
Problems and Limits of CNC Machining Acrylic
Acrylic has some downsides when used in CNC machining. The process can take a long time, slowing production. Machining creates waste, which lowers material efficiency. Acrylic doesn’t handle chemicals well, so it can’t be used with many solvents. It also doesn’t last long under temperature changes, which can weaken it over time.
Problem or Limitation | Explanation |
|---|---|
The process can be slow, reducing how fast products are made. | |
Waste material is created | Machining leaves behind waste, which lowers material usage. |
Poor chemical resistance | Acrylic breaks down when exposed to common solvents. |
Weak under temperature changes | Acrylic doesn’t hold up well when temperatures go up and down repeatedly. |
Knowing these issues helps you plan better. You can pick the right methods to solve these problems when working with acrylic.
CNC Machining Processes for Acrylic
Cutting Techniques for Acrylic
Cutting acrylic needs care and the right tools. Sharp cutters with strong edges stop melting and give smooth finishes. Carbide bits are the best choice for this job. Starting the cut with a ramping method helps avoid damage.
Keep an eye on cutting depth and direction. The tool's spin direction affects accuracy. Use the correct feed rate and spindle speed for clean cuts. High spindle speeds, like 15,000-20,000 RPM, work well. Low feed rates, around 500-1500 mm/min, stop melting. Shallow cuts of 0.5mm or less reduce heat and protect the material.
Extruded acrylic is more fragile and can crack easily. Cast acrylic is stronger and resists scratches better. It is the top choice for most CNC acrylic projects.
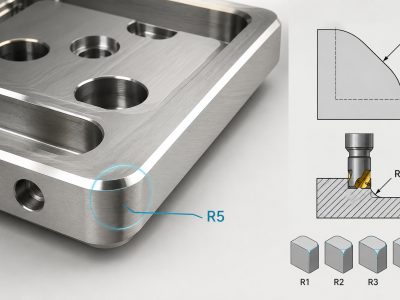
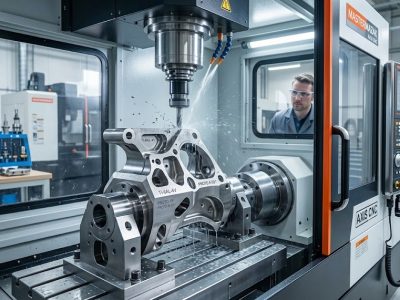
Milling Acrylic with CNC Machines
Milling is great for making detailed acrylic shapes. Control the cutting depth to avoid cracks. A good rule is to cut half the bit's diameter deep. This lowers stress on the acrylic.
Using the right angles helps too. A 5-degree rake angle and 2-degree clearance angle work best. Spindle speed and feed rate also matter. For milling, use about 18,000 RPM. Adjust feed rates between 75-300 IPM based on thickness and design.
Follow these tips for high-quality results. Milling is flexible and can make many acrylic parts, from useful items to decorations.
Engraving Acrylic for Precision Designs
Engraving is perfect for detailed designs in acrylic. Advanced machines can be very precise, with tolerances of ±0.01 mm. This is great for custom parts.
Laser engraving is another option. It makes clean edges without touching the material, so less finishing is needed. CNC routers with CAD software help create accurate and neat designs.
Engraving is popular for signs and custom gifts. It’s easy to make detailed designs with CNC machines. By learning engraving, you can create amazing acrylic parts for many uses.
Polishing and Finishing CNC-Machined Acrylic Parts
Polishing and finishing are key steps in working with acrylic. These steps improve how the product looks, lasts, and works. Taking time to finish properly turns rough pieces into polished, professional parts.
Why Polishing and Finishing Are Important
Polishing and finishing do more than just make things look nice.
Polished acrylic parts look high-quality and professional.
Smooth surfaces help reduce friction, which is important for moving parts.
Polishing protects the surface from damage caused by the environment.
Removing flaws lowers stress, making the part last longer.
These reasons show why polishing and finishing are so important for great results in CNC-machined acrylic.
Ways to Polish Acrylic
There are different ways to polish acrylic, depending on the tools and finish you want.
Flame Polishing: A flame melts the surface slightly, making it smooth and shiny. It’s great for edges but needs care to avoid overheating.
Buffing: A buffing wheel with polish removes scratches and flaws. This method works well for flat surfaces and gives a mirror-like shine.
Sanding: Start with rough sandpaper for deep scratches, then use finer ones for smoothness. Wet sanding stops heat and protects the material.
Chemical Polishing: Some chemicals can smooth the surface by dissolving it a little. Be careful and work in a well-ventilated area.
Each method has its benefits. Flame polishing is fast, while buffing gives clear, shiny results.
Tips for Great Finishing
Follow these tips for the best results:
Use clean tools to keep the surface free of dirt.
Apply even pressure when sanding or buffing to avoid uneven spots.
Practice on scrap acrylic before working on the final piece.
Keep a steady hand during flame polishing to prevent warping.
By learning these methods, you can create smooth, polished acrylic parts that look professional and meet high standards.
Best Practices for Acrylic CNC Machining
Picking the Right Tools for Acrylic CNC Machining
Choosing good tools is key for working with acrylic. Use tools made for plastics to stop cracks or chips. Carbide-tipped or diamond-coated tools stay sharp and keep heat low.
Tool shape matters too. Single or double flute tools help remove chips and lower heat. Polished cutting edges make smoother cuts and need less finishing later.
The tools you use affect your results. Correct spindle speed and feed rate stop overheating and give clean cuts. Check the table below for the best settings:
Material | Spindle Speed (RPM) | Feed Rate (IPM) |
|---|---|---|
Acrylic | 18,000 | 60 |
Acrylic | 15,000 | 80 |
Using the right tools and settings improves accuracy, saves material, and gives steady results.
Setting Feed Rates and Speeds for Acrylic
Setting feed rates and spindle speeds correctly is very important. Good settings help cut acrylic well and keep the surface smooth. High spindle speeds, like 15,000-20,000 RPM, work best. Pair these with feed rates of 60-80 IPM to stop melting.
Balancing speed and feed rate is crucial. Proper feed rates make surfaces smoother, protect tools, and reduce extra finishing. Here are tips:
Use slower speeds for thick acrylic to avoid heat.
Raise feed rates a bit for softer acrylic to cut faster.
Change settings based on tool size and cutting depth for accuracy.
Good settings make cutting acrylic safer and more efficient. Following these tips helps you get professional results.
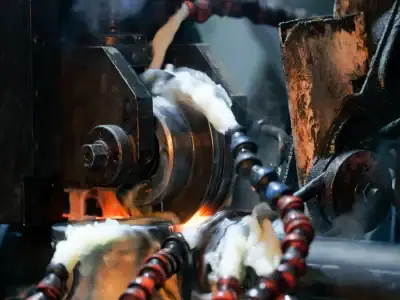
Cooling and Lubrication Tips for Acrylic
Cooling and lubrication keep acrylic safe during machining. Acrylic melts easily, so controlling heat is important. Air cooling works well and avoids moisture problems. Compressed air clears chips and cools the cutting area.
For harder jobs, try a misting system. It mixes air with a little lubricant to lower heat and friction. Pick lubricants safe for acrylic to avoid damage.
Tips for cooling and lubrication:
Use air cooling for simple cuts and engraving.
Use misting systems for deep cuts or long jobs.
Clean chips often to stop overheating.
Cooling and lubrication protect acrylic and make tools last longer. These methods help you get smooth finishes and consistent results.
Avoiding Common Mistakes in Acrylic CNC Machining
Mistakes in acrylic CNC machining waste material, damage tools, and ruin finishes. Knowing these errors and how to fix them saves time and effort.
Mismanaging Feed Rates and Speeds
Wrong feed rates or spindle speeds can cause melting or cracks. Use spindle speeds near 18,000 RPM for smooth cuts. Match this with feed rates of 75-300 IPM to avoid heat. Change settings based on the acrylic’s thickness and type.
Tip: Test your settings on scrap acrylic before starting your main project. This helps prevent costly errors.
Using Dull or Improper Tools
Dull tools create heat that melts acrylic and ruins edges. Use sharp carbide-tipped or diamond-coated tools made for plastics. These tools stay cool and cut smoothly. Polished edges also reduce extra finishing work.
What to Avoid:
Using tools meant for wood or metal.
Ignoring worn-out cutting edges.
Cutting Too Deep in a Single Pass
Deep cuts stress the material, causing cracks or rough edges. Keep cuts shallow, no deeper than half the tool’s diameter. Multiple passes improve edge quality and protect the material.
Note: Shallow cuts also help tools last longer by reducing strain.
Neglecting Cooling Systems
Heat melts acrylic, so cooling is very important. Air cooling clears chips and keeps the material cool for simple jobs. Mist cooling adds lubricant to reduce heat for harder tasks.
Cooling Method | Best Use Case |
|---|---|
Air Cooling | Simple cuts and engraving |
Mist Cooling | Deep cuts or long machining jobs |
Clean chips often to stop overheating and keep things running smoothly.
Skipping Tool Maintenance
Not maintaining tools leads to bad results and uneven cuts. Check tools often for wear and replace them when needed. Clean cutting edges to keep them sharp and accurate.
Reminder: Taking care of tools improves results and makes them last longer.
Avoiding these mistakes helps you make high-quality acrylic parts. Focus on accuracy, good settings, and tool care for better results every time.
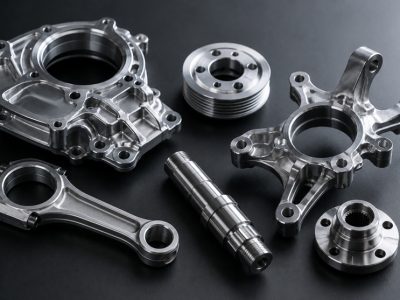
Applications of Acrylic in CNC Machining
CNC-Machined Acrylic Parts in the Automotive Industry
Acrylic is important in making car parts. It’s used for things like light covers, dashboards, and trims. Its clear and strong nature helps create stylish designs for cars. CNC machining makes sure these parts are accurate and fit perfectly.
Because acrylic is lightweight, it helps cars use less fuel. Its UV resistance keeps parts like headlight covers clear even in sunlight. Acrylic parts are also tough, making them good for safety-related uses.
Use of Acrylic in Medical Devices and Equipment
Medical tools need materials that are strong, light, and easy to clean. Acrylic works well for this, so it’s used in things like incubator panels and surgical trays.
CNC machining makes these parts quickly and with great accuracy. Acrylic’s clear surface helps doctors see patients or equipment better. It also resists chemicals, so it’s safe to clean with medical cleaners.
CNC machining can make detailed designs for special medical tools. This helps create new and better equipment for healthcare.
Consumer Goods and Electronics Made from Acrylic
Acrylic is widely used in electronics and everyday items. In 2023, it made up 54.9% of this market. It’s light, so it’s great for making phone cases, electronic covers, and aquariums.
Acrylic is clear and blocks UV rays, making it a good glass replacement for screens and covers. It’s also strong and resists damage, making it last longer. Its resistance to electricity and chemicals makes it safe for electronics.
CNC machining helps create detailed designs for custom products. It also reduces waste and supports eco-friendly production by using recycled materials.
Tip: Acrylic’s strength and flexibility make it perfect for many creative products.
Acrylic CNC Machining for Signage and Displays
Acrylic is a top choice for making signs and displays. It is clear, strong, and lightweight, making it great for indoor and outdoor use. CNC machines can turn acrylic sheets into detailed, attractive designs that grab attention.
Why Acrylic is Great for Signs
Acrylic looks like glass but doesn’t break easily. It lets light pass through, which is perfect for glowing signs. You can pick from many colors and finishes to fit your design. CNC machining makes sure every cut and engraving is exact, giving your signs a polished look.
How to Make Acrylic Displays
CNC machines help create detailed designs for displays. You can carve logos, cut letters, or shape panels easily. For glowing displays, CNC machines make grooves for LED lights. This spreads light evenly and makes the display look better.
Tip: Choose cast acrylic for signs. It is clearer and resists scratches better than extruded acrylic.
Advantages of CNC Acrylic Signs
Strong: Acrylic signs last long and handle sunlight and weather well.
Customizable: CNC machines let you make designs that match your brand.
Affordable: Acrylic is cheap, and CNC machining reduces waste, saving money.
By learning CNC machining, you can create amazing acrylic signs and displays that stand out.
Challenges and Solutions in Acrylic CNC Machining
Handling Heat and Avoiding Cracks
Managing heat is very important when machining acrylic. Too much heat can melt or crack the material, ruining your work. To stop this, adjust cutting settings. Use spindle speeds of 15,000-20,000 RPM and moderate feed rates to lower heat.
Cooling systems help a lot too. Air cooling works for simple cuts. Mist cooling, which adds lubricant, is better for harder jobs. Picking the right type of acrylic also matters. Cast acrylic is stronger and less likely to crack than extruded acrylic.
Tip: Clear chips often to avoid overheating and keep cuts smooth.
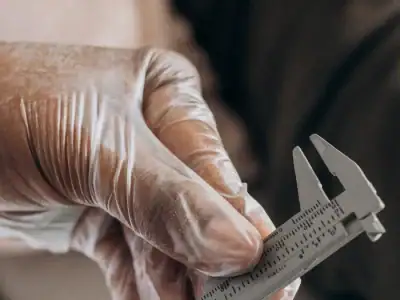
Keeping Accuracy in Fast CNC Machining
Fast CNC machining needs precise work. Use materials with good strength and stability. Acrylic is great because it machines well and doesn’t absorb much water. But its flexibility and heat expansion need careful control.
Set feed rates and spindle speeds carefully. Keep tolerances between 5 μm and 500 μm for accurate cuts. Check your CNC machine often to ensure it stays accurate. Tools like laser scanners can confirm your parts meet standards.
Note: Test settings on scrap acrylic before working on your final piece to avoid mistakes.
Getting Smooth Finishes and Quality Control
Smooth finishes are key for acrylic parts, especially in medical and electronic uses. Polishing methods like flame polishing and buffing make parts shiny and functional. For example, optical parts need a mirror finish with an Ra value under 0.2 μm.
Other methods, like brushing or vibratory finishing, remove flaws and improve looks. Check parts during and after machining to ensure quality. This saves time, reduces waste, and improves production speed.
Tip: Plan your finishing steps early to get the best results.
Acrylic CNC machining is precise and efficient. It helps make high-quality parts. Learning the right tools, speeds, and cooling methods gives great results. Many industries, like cars, healthcare, and signs, use acrylic because it’s useful and flexible.
Use these tips in your projects. Avoid mistakes, take care of tools, and plan well. With practice, you can master acrylic CNC machining and create amazing parts every time.
FAQ
What type of acrylic is best for CNC machining?
Cast acrylic is the top choice for CNC machining. It stays clear, resists scratches, and handles stress better. Extruded acrylic costs less but cracks more easily. For the best results, pick cast acrylic.
How do you prevent acrylic from melting during machining?
Run spindle speeds between 15,000-20,000 RPM and use low feed rates like 60-80 IPM. Cooling methods, such as compressed air or misting, help manage heat. Shallow cuts also keep the material from melting.
Tip: Clear chips often to stop heat from building up.
Can you engrave detailed designs on acrylic?
Yes, CNC machines can make very detailed designs with tight tolerances of ±0.01 mm. Laser engraving is another option. It creates clean designs without touching the material, making it perfect for precise work.
What tools should you use for acrylic CNC machining?
Use tools made for plastics, like carbide-tipped or diamond-coated ones. These tools stay sharp and keep heat low. Single or double flute tools are great for removing chips and making smooth cuts.
How do you achieve a polished finish on acrylic parts?
Polish acrylic using flame polishing, buffing, or wet sanding. Flame polishing makes surfaces shiny, while buffing removes scratches. Wet sanding with fine-grit sandpaper smooths the surface without causing heat damage.
Note: Practice polishing on scrap acrylic before working on your main piece.
Start your project with LKprototype
LKprototype company simplifies procurement for custom manufacturing, Suitable for making your products or prototypes with a variety of materials, such as metal or plastic, silicone rubber, from 3D Printing to CNC Machined Parts and Vacuum Casting , with a focus on speed and efficiency. Our platform provides instant quotes. With LKprototype, You can connect with the team to communicate your project to ensure quality and on-time delivery.
Start with an instant quote and experience how our technology and expertise can make custom part procurement faster and easier.