LKprototype
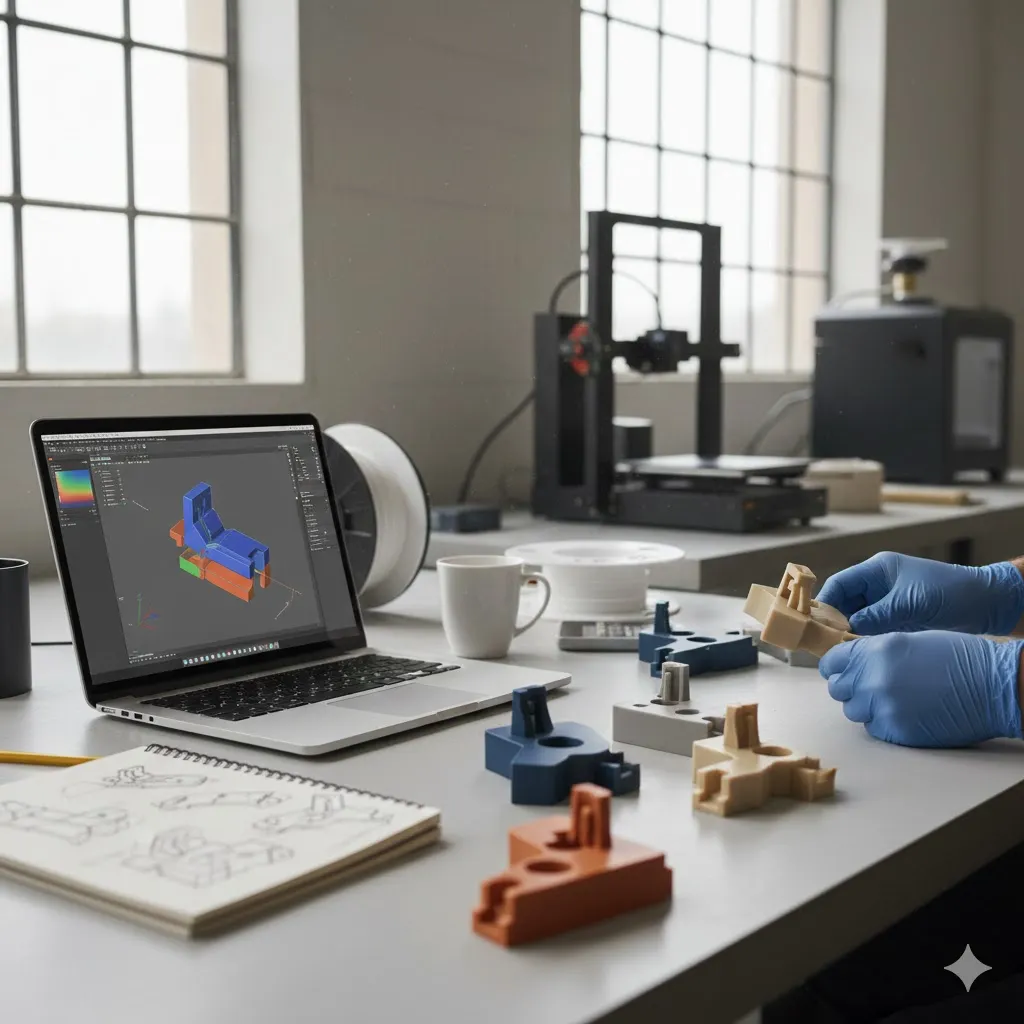
You can make snap-fits for polyurethane cast parts by seeing how the material bends and returns to shape. Vacuum casting snap fit design uses flexible polyurethane. This material does not wear out fast and can be used many times. You should look at how the snap-fit works. Check how strong the material is. Try not to have weak spots that can break. If you learn about stress points and fit tolerances, you can make joints that are strong and work well.
Key Takeaways
Pick flexible polyurethane for snap-fits. It bends without breaking and lasts a long time when used often.
Do not use sharp corners in your designs. Use fillets to lower stress and stop parts from breaking.
Try out your snap-fit joints with prototypes. Make sure they fit, are strong, and last before making many.
Make snap-fit arms at least 5 mm wide. This helps keep your joints strong and steady.
Change tolerances for shrinkage. Leave tiny gaps so parts fit well after they cool down.
Snap-Fit Joints and Types
Snap-Fit Mechanics
You use snap-fit joints to connect two parts without screws or glue. These joints rely on flexible features that bend when you push the parts together. After assembly, the features return to their original shape and hold the parts tightly. You need to understand how the material bends and how much force it can handle. Polyurethane works well for snap-fit joints because it bends easily and does not crack under repeated use. You should check how much the joint flexes and make sure it does not stretch too far. If you design the joint with the right amount of flexibility, you get a strong connection that lasts.
Common Snap-Fit Types
You can choose from several types of snap-fit joints. The most popular type is the cantilever snap-fit. This design uses a long arm that bends and snaps into a groove. You also see annular snap-fit joints, which use a circular ridge that snaps into a matching groove. Another type is the torsional snap-fit, which twists to lock the parts together. Each type works best for different shapes and sizes. You should pick the type that matches your part’s needs. If you use the right snap-fit joints, you make assembly faster and easier.
Design Mistakes to Avoid
You need to avoid common mistakes when designing snap-fit joints for polyurethane cast parts. Many people use sharp corners, which cause stress and make the joint break. You should use fillets to smooth out corners and reduce stress. Some designs use a constant cross-section for the cantilever arm. This causes uneven strain and leads to failure. You should taper the arm to spread the strain evenly. Clips that are too narrow do not hold well. You should make clips at least 5 mm wide for strength. The table below shows these mistakes and how to fix them:
Design Mistake | Explanation |
|---|---|
Sharp Corners | They concentrate stress at the root of cantilever joints, leading to failure. Fillets should be used to reduce this concentration. |
Constant Cross-Section Areas | These designs experience uneven strain distribution, leading to quicker failure. Tapering the cantilever improves performance. |
Insufficient Width of Clips | Clips should be at least 5 mm wide to ensure strength and stiffness for high load-bearing applications. |
Tip: Always check your snap-fit joints for these mistakes before making your final design. Careful planning helps you avoid weak spots and ensures your parts last longer.
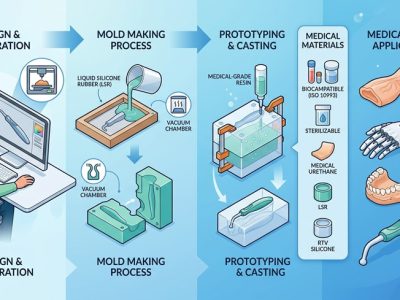
Vacuum Casting Snap Fit Design
Material Properties of Polyurethane
When you start vacuum casting snap fit design, you need to know about polyurethane. Polyurethane comes in different types. Each type acts in its own way. Flexible polyurethane bends without breaking. This makes it good for snap-fit joints. Rigid polyurethane is stronger but does not bend much. You should pick the right material for your part. The table below shows how each type is different:
Polyurethane Type | Key Features | Ideal Applications |
|---|---|---|
Flexible Polyurethane (FPU 50) | High impact resistance, flexibility, and durability in dynamic environments | Snap-fit parts, enclosures, and cushioning components |
Rigid Polyurethane (RPU 70) | Mechanical strength and thermal stability | Structural components |
Rigid Polyurethane (RPU 130) | Mechanical strength and thermal stability | Structural components |
Flexible polyurethane is best for snap-fit parts. It lets joints bend and snap back many times. Rigid polyurethane is better for parts that must stay strong under heavy loads. When you pick materials, think about how much force your joint will face. Vacuum casting lets you use both flexible and rigid types. This helps you choose the best one for your project.
Strain, Creep, and Stress Relaxation
You also need to think about how materials change over time. Polyurethane can stretch and go back to its shape. But if you leave it bent for a long time, it can change. This is called creep. If a snap-fit stays bent, it might not spring back. Stress relaxation means the force holding the joint gets weaker over time. You should test your snap-fit joints. See how much strain they can take before they creep or relax.
Vacuum casting makes parts that act like real ones. You can use these parts to test your snap-fit in real life. Flexible polyurethane resists creep and recovers well after bending. Rigid polyurethane does not recover as well. You should not use rigid polyurethane for snap-fit features that need to bend a lot. Always check the datasheet for your materials. Run tests to see how they work in your vacuum casting snap fit design.
Tip: Bend your snap-fit joints many times to test them. Look for signs of bending that does not go away or a weak grip. This helps you pick the right material and avoid problems later.
Tolerance and Feature Considerations
You must pay close attention to tolerances when you design snap-fits. Polyurethane shrinks a little as it cools. This can make your parts a bit smaller than you planned. Always check the shrinkage rate for your materials. Adjust your design to match. If your snap-fit is too tight, it will not fit. If it is too loose, it will not hold.
For vacuum casting snap fit design, remember these points:
Use big curves and fillets on all snap-fit arms. This lowers stress and helps the part last longer.
Make snap-fit clips at least 5 mm wide. This gives enough strength for most uses.
Leave a small gap between parts that fit together. This helps the snap-fit work well, even if the parts shrink.
Do not use sharp corners or thin spots. These can crack or break during vacuum casting.
Vacuum casting lets you make many prototypes. You can test your tolerances and see how the materials act. If your snap-fit is too tight or loose, you can change your design and try again. Always use the right material for your needs. Remember, vacuum casting snap fit design lets you make changes before full production.
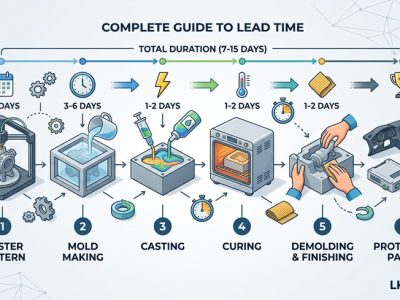
Vacuum Casting Design Guide
Design Workflow Steps
You can use a simple plan to design snap-fits for polyurethane cast parts. This plan helps you go from your idea to a finished part with fewer errors. First, decide what your snap-fit should do. Choose if you want a cantilever, annular, or torsional snap-fit. Think about how much force the joint needs to handle. Also, think about how often people will open or close it.
Then, pick the right polyurethane material. Flexible polyurethane is best for snap-fits that bend a lot. Rigid polyurethane is good for parts that must stay strong and stiff. Check the datasheet for each material. Look for things like flexibility, strength, and how well it resists wear.
After you pick your material, draw your snap-fit shape. Use curves and fillets to lower stress. Make sure the snap-fit arm is at least 5 mm wide. Leave a small gap between parts so they fit after shrinking. Do not use sharp corners or thin spots.
Next, make digital models with CAD software. Simulate how the snap-fit bends and snaps in place. Change the design if you see weak spots or too much bending. When you feel ready, make a prototype. Vacuum casting lets you make good prototypes fast. Test these prototypes for fit, function, and strength.
Last, check your results. If the snap-fit works, get your design ready for production. If you find problems, fix your design and try again. This plan helps you make strong snap-fits and lowers the chance of mistakes in production.
DFM Tips for Snap-Fits
Design for Manufacturing, or DFM, is important for the cost and quality of vacuum cast snap-fit parts. You should always think about DFM when you design. Good DFM helps you save money and make better parts. The table below shows how DFM helps your project:
Benefit | Description |
|---|---|
Lower Labor Costs | Fewer parts and simple moves mean faster assembly. |
Lower Material Costs | Fewer raw materials and bought parts. |
Reduced Overhead | Smaller inventory and less space needed. |
Higher Quality & Reliability | Fewer parts mean fewer places for mistakes. |
Faster Time-to-Market | Simple production and assembly go faster. |
You can use these DFM tips to help your vacuum casting design guide:
Try to use fewer than 10 parts in your assembly. This lowers labor and the chance of mistakes.
Focus on the main job of your part. Remove features that do not help.
Design snap-fits so you do not need tools to put them together. This makes assembly fast and saves money.
Use wide, tapered arms for snap-fits. This makes them stronger and less likely to break.
Add big fillets to all corners. This helps stop cracks during production.
Plan for shrinkage. Change your CAD models to match the size after casting.
Tip: Tool-free and quick assembly help you save time and money. You can build products faster and make fewer mistakes.
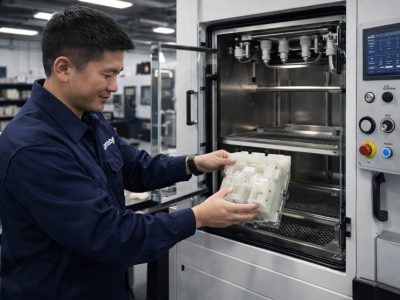
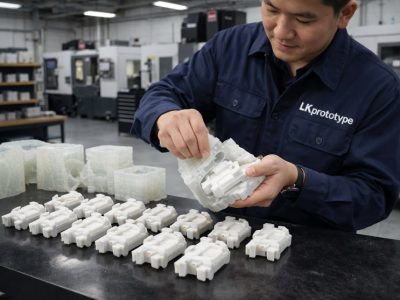
Prototyping and Testing
Prototyping and testing are important steps in the vacuum casting design guide. You should always make prototypes before you start full production. Prototypes let you check if your snap-fit joints work well. You can see if the parts snap together easily and stay tight. If you find problems, you can fix them before you spend a lot of money.
Vacuum casting gives you good prototypes that act like real parts. You can use these prototypes for testing. Bend the snap-fit arms many times to see if they go back to shape. Look for signs of creep or stress relaxation. Make sure the joint does not get loose after many uses.
Testing also helps you check for tool-free and quick assembly. Try putting the parts together by hand. See if you need tools or if the parts snap together easily. If you find problems, change your design and make new prototypes. This helps you avoid costly mistakes in production.
You should write down your test results. Record how many times the snap-fit works before it breaks. Note any changes in fit or strength. Use this information to make your design better. When you follow this vacuum casting design guide, you can make snap-fits that work well in production.
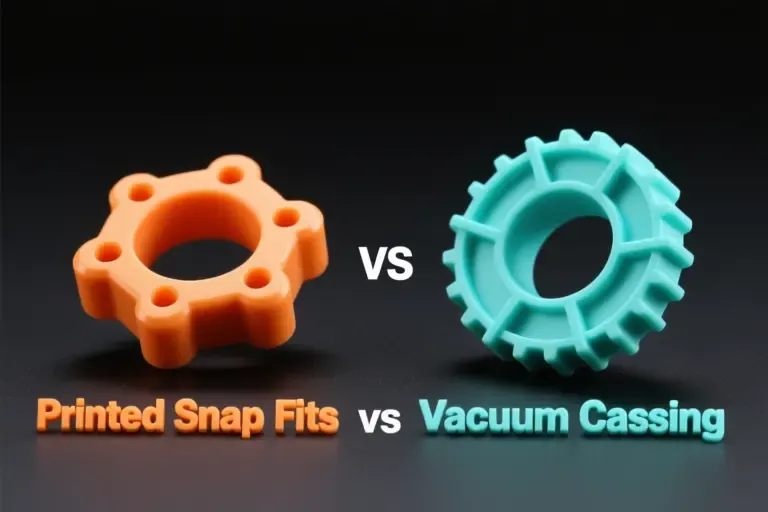
3D Printed Snap Fits vs. Vacuum Casting
Pros and Cons
You can pick 3d printed snap fits or vacuum casting. Each way has good and bad points. Vacuum casting makes parts with smooth surfaces. These parts look like finished products. You can use many kinds of polyurethane. Some are flexible, and some are rigid. This lets you make custom parts for different jobs. Vacuum casting is good for making a small number of parts. The price for each part goes down if you make more, like 10 to 50 pieces.
Vacuum casting has some problems too. You need to make a silicone mold first. This takes time and costs more at the start. Once you finish the mold, it is hard to change. Silicone molds wear out fast, so you cannot use them for lots of parts.
3d printed snap fits help you make test parts quickly. You can change your design fast and see how it works. This is good for trying new ideas. 3d printed snap fits are not as strong as vacuum cast parts. The final parts may not always be the same.
Here is a table that shows the main good and bad points of vacuum casting:
Pros of Vacuum Casting | Cons of Vacuum Casting |
|---|---|
High-Quality Finish | Initial Setup Cost |
Material Diversity | Fewer Iterations |
Economical for Low Volumes | Limited Material Options |
Low Tooling Durability |
Note: 3d printed snap fits are best for quick changes and testing. Vacuum casting is better for strong parts that need to last.
Application Scenarios
Think about what your project needs before you choose. If you want to make lots of test parts, pick 3d printed snap fits. You can change your design fast and fix problems early.
For finished products, vacuum casting is better. You get strong parts with smooth surfaces. These parts last longer and look nice. Custom cast parts are good for small batches. You can use them in products that need to work well and look good.
Snap fit manufacturing has some limits. Making snap fits for tricky shapes is hard. You need exact measurements for a good fit. After you make the parts, you cannot change them easily. Problems with fit or material can cost more and slow you down. The table below lists some common limits:
Limitation | Description |
|---|---|
Design Complexity | Making snap fits for complex shapes is hard. |
Precision Required | You need exact measurements for a good fit. |
Limited Adjustability | You cannot change the part easily after making it. |
Tolerance Issues | Small errors can cause big problems with fit. |
Complex Production Process | Making snap fits can take more time and cost. |
Material Limitations | You must balance strength and flexibility. |
Tip: Always test your snap fit design before making lots of parts. This helps you find problems early and pick the best way to make your parts.
You can make vacuum casting snap-fit designs work well by picking the right material and using smart shapes. Set the right tolerance so parts fit together. Add fillets to smooth out sharp edges. Make the snap fit arm wider and taper it for strength. You can add lugs to help hold parts better. Test your design with computer simulations and real prototypes. This helps you find weak spots and make the joint stronger. Use at least 1 mm thickness for the snap fit. Round the corners so they do not break. Always check your tolerances to make sure parts fit. Work with engineers and figure out how much force the joint needs. Follow these steps to avoid mistakes and keep your snap-fit joints strong. Keep learning new ways to make your designs better.
Testing Method | Benefits |
|---|---|
Simulation-Based Testing | Finds where stress builds up and shows where the joint might break. |
Physical Prototype Testing | Checks how the joint works in real life and helps lower stress by testing many times. |
Set the right tolerance for good fit.
Add fillets at the base to make it stronger.
Taper the snap fit arm for better strength.
Make the snap fit wider for more support.
Think about adding lugs to help hold parts.
Use at least 1 mm thickness for strength.
Round corners so they do not crack.
Check tolerances to make sure parts fit.
Work with engineers to make it better.
Figure out how much force the joint needs.
FAQ
What is the best type of snap-fit for polyurethane cast parts?
You should use cantilever snap-fits for most polyurethane cast parts. This type bends easily and snaps into place. Flexible polyurethane works well with this design. You get strong joints that last through many uses.
How do you prevent snap-fit joints from breaking?
You can add fillets to sharp corners and taper the snap-fit arms. Wide arms help spread the force. Always test your design with prototypes. You should check for weak spots before making many parts.
Can you reuse vacuum cast snap-fit parts?
Yes, you can reuse vacuum cast snap-fit parts. Flexible polyurethane lets you open and close joints many times. You should avoid using rigid polyurethane for parts that need to bend often.
What should you check before final production?
You should test prototypes for fit, strength, and durability. Check tolerances and make sure parts snap together easily. Record your results and fix any problems. This helps you avoid costly mistakes in production.