LKprototype
You need clear rules for vacuum casting rib boss design to achieve strong, high-quality parts. Follow these key guidelines for best results:
Keep rib thickness less than 60% of the wall thickness.
Limit rib height to less than three times the rib thickness.
Make boss wall thickness no more than 60% of the wall.
Use a minimum boss height and diameter of 1 mm.
Apply these vacuum casting guidelines to boost part strength, prevent warping, and improve manufacturability.
Key Takeaways
Make sure rib thickness is less than 60% of the wall thickness. This helps make the part stronger and stops it from bending. - Do not make rib height more than three times the rib thickness. This helps the mold fill better and stops problems. - Add ribs to bosses for more strength. This also helps the material move right during casting. - Use draft angles of at least 1 degree. This makes it easier to take out the part and keeps it good quality. - Keep wall thickness the same everywhere. This stops sink marks and helps your vacuum casting parts stay the right size.
Why Rib and Boss Design Matters in Vacuum Casting
Strength & Durability
It is important to design ribs and bosses well in vacuum casting. Good design helps parts stay strong and last longer. The right shapes make parts less likely to bend or break. If you follow the rules, you can avoid weak spots. This keeps your parts steady and safe. The table below shows how each design choice changes how strong your part is:
Design Element | Specification | Impact on Performance |
|---|---|---|
Boss Height | Minimum 1mm | Stops shrinking and sinking |
Boss Diameter | Minimum 1mm | Keeps the part strong |
Boss Wall Thickness | ≤ 60% of nominal thickness | Less sinking |
Rib Thickness | < 60% of wall thickness | Less warping |
Rib Height | < 3 times thickness | Makes the part stronger |
If you keep ribs thin and not too tall, your parts will be stronger. This also helps stop warping in vacuum casting.
Mold Filling & Defect Prevention
Smart rib and boss design helps you avoid problems in vacuum casting. If ribs are too thick, air can get trapped. Thick and thin areas together can make the mold fill badly. This can leave holes or weak spots inside your part. Sink marks are dents that happen when thick spots cool slower than thin ones. Here are some common mold problems:
Sink marks show up near ribs and bosses when the outside cools faster.
Thick ribs or stacked ribs can make sink marks worse.
Walls that are not even can trap air and stop the mold from filling.
Bad shapes can cause holes inside the part.
You can stop these problems by keeping ribs between half and 60% of the wall thickness. Do not use thick or stacked ribs.
Dimensional Accuracy
Vacuum casting can make parts with lots of detail. But you need good rib and boss design for the right size and shape. If you do not follow the rules, parts can shrink or bend as they cool. Keep wall thickness even and do not change thickness suddenly. This helps the mold fill well and lowers the chance of mistakes. If you use these tips, your vacuum casting parts will fit and work as you want.
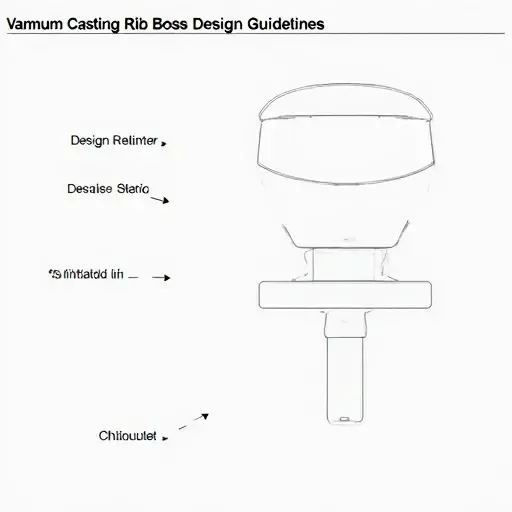
Vacuum Casting Rib Boss Design Guidelines
Rib Thickness & Height Limits
You should always keep rib thickness between 40% and 60% of the wall thickness. This range helps you avoid molding problems and keeps your parts strong. If you make ribs too thick, you will increase weight, waste material, and face higher costs. Rib height should not go over three times the rib thickness. Taller ribs can cause molding difficulties and may not fill properly during vacuum casting. Use a fillet radius at the rib base that is at least 25% of the wall thickness. This radius strengthens the rib and reduces stress.
Tip: Ribs spaced at least two times their thickness apart will help distribute weight and improve part stiffness.
Rib Placement & Orientation
Proper rib placement and orientation are key to strong vacuum casting rib boss design. Place ribs so they support the main structure and run in the direction of expected loads. Keep ribs spaced at least two times their thickness apart. This spacing helps you avoid stress concentrations and warping. Always maintain a uniform wall thickness of 1 to 1.5 mm to prevent sink marks and ensure even cooling. Use ribs to add stiffness instead of thickening the walls.
Draft Angles for Ribs
Draft angles make it easier to remove parts from the mold. For ribs, use a draft angle between 0.25 and 0.5 degrees on both sides. If your part has a textured surface, add an extra degree to the draft. A minimum draft angle of 1 degree is best for easy demolding. Consistent draft angles protect the mold and improve part quality.
Common Rib Defects
If you do not follow design guidelines for vacuum casting, you may see defects like sink marks, warping, or air traps. Thick or stacked ribs can cause sink marks, which are dents that form when the outer surface cools faster than the inside. Uneven wall thickness can trap air and create voids. You can avoid these problems by keeping ribs thin, spaced apart, and using proper draft angles.
Boss Wall Thickness & Support
Boss wall thickness should be about 60% of the adjoining wall thickness. This ratio helps you avoid sink marks and voids. The minimum recommended boss height is 1 mm. For best results, use a bottom radius of 0.25 to 0.5 times the wall thickness at the base of the boss. If you need thinner walls, reinforce them with ribs. Add vent grooves near the base to prevent air traps.
Design Element | Recommended Thickness | Additional Notes |
|---|---|---|
Rib | 40-60% of wall thickness | Height ≤ 3x thickness |
Boss | 40-60% of wall thickness | Base radius 0.25-0.5x wall thickness; reinforce with ribs |
Boss Reinforcement with Ribs
You should always support bosses with ribs in your vacuum casting rib boss design. Ribs around bosses help transfer loads and improve strength. This support also helps the molten material fill the mold better, reducing the risk of defects. Ribs on bosses make the part stronger and more reliable, especially where bolts or fasteners attach.
Draft Angles for Bosses
Draft angles on bosses are important for easy ejection and high-quality parts. Use a draft angle of 1 to 3 degrees on the outer diameter and at least 0.25 degrees inside the boss. Make sure the draft is consistent along the entire height. For deeper bosses, use a slightly larger draft angle. Proper draft angles help maintain material flow and cooling, which lowers the risk of sink marks and voids.
Sink Mark & Void Prevention
To prevent sink marks and voids, keep wall thickness uniform and avoid thick areas. Limit boss and rib thickness to 40-60% of the wall thickness. Add fillets and ribs to reduce the chance of sink marks. Adjust gate size and location to improve packing and cooling. Use high-viscosity materials and make sure they are dry before casting. These steps help you avoid common defects and improve the quality of your vacuum casting parts.
Note: Always follow the design guidelines for vacuum casting to minimize the limitations of vacuum casting, such as sink marks, voids, and warping. Good vacuum casting rib boss design ensures strong, accurate, and defect-free parts.
Vacuum Casting Design Guide: Material & Process Factors
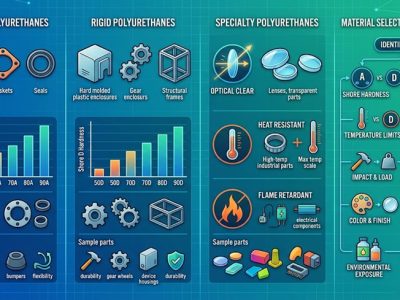
Material Selection Impact
When you use vacuum casting, the material you pick matters. Some resins like ABS-like ones are strong and easy to use. PP-like materials are bendy, so parts can flex without snapping. PC-like resins are tough and can take hard hits. TPU materials are soft and can bend a lot.
Each material changes how you make ribs and bosses. Hard materials need ribs that are a bit thicker for support. Softer materials do better with thinner ribs. If a rib goes from one material to another, make it thinner at the end. This keeps the part strong and stops it from breaking. Always round the corners where two materials meet. This helps stop cracks and makes the part last longer.
Vacuum casting lets you try more designs than some other ways. You can add tricky shapes, change wall thickness, or make undercuts. This helps you make special parts, like ones that snap together or bend.
Process Parameters & Feature Design
The vacuum casting design guide says process settings are important. When you cast parts, you need to watch wall thickness. Ribs should be about 60% to 80% as thick as the wall. This keeps your parts strong and safe. Cooling the mold is also important. If you cool it too fast, the part can bend or get dents.
Here is a table that shows which process settings matter most:
Design Parameter | Description |
|---|---|
Wall Thickness Ratios | Needed to keep bosses strong and working well. |
Cooling Considerations | Changes how good the part is and affects rib and boss design. |
You should also think about how thick or thin the resin is. Thin resin fills small ribs and bosses better. The mold’s temperature changes how the resin moves and cools. Taking out air bubbles helps you avoid holes in your part.
Tip: Add small vents to ribs that might trap air when casting. This helps you get parts without defects.
The vacuum casting design guide lets you use different wall thicknesses and tricky shapes. You can make cool features that are hard to do with other methods. Always follow the guide to get the best parts from vacuum casting.
Practical Tips & Common Mistakes in Vacuum Casting
Actionable Design Tips
You can make good prototypes with vacuum casting. Keep wall thickness the same everywhere. This helps stop sink marks and warping. Make ribs thin and not very tall. Thin ribs make parts strong but not heavy. Use a draft angle on ribs and bosses. This helps you take parts out of the mold.
Here are some easy tips for better parts:
Use long ribs instead of many small bosses.
Connect lugs and bosses to help with machining.
Support tall bosses with ribs or gussets.
Add a fillet at the base to lower stress.
Space ribs at least two times their thickness apart.
Put small vents near ribs to let air out.
Good design in plastic parts is very important. It helps parts stay strong and work well. It also makes them look better. If you follow these rules, you can make better boss designs. Your parts will be higher quality and easier to make.
Pitfalls to Avoid
You can stop mistakes in vacuum casting by checking your design first. Look out for these problems:
Insufficient Draft Angle: Always use enough draft to help take out the part.
Inadequate Support for Bosses: Use ribs or gussets so bosses do not bend or break.
Ignoring Cooling Time: Give enough time for cooling to keep parts strong.
Poor Material Flow: Make sure resin can move around bosses and ribs easily.
Do not use thick bosses. Thick bosses can cause sink marks and cool slowly.
Do not make ribs too thin. Thin ribs may not fill well and can break.
Do not use sharp corners. Sharp corners can crack and cause stress.
If you use these tips, your vacuum casting parts will be better. Your prototypes will have fewer problems and last longer.
You can achieve the best quality in vacuum casting by following clear design rules. Keep rib thickness and boss walls within the recommended limits. Use proper draft angles and support bosses with ribs. Always check for even wall thickness. This checklist helps you avoid defects and improve quality:
Keep rib thickness below 60% of the wall.
Limit rib height.
Support bosses with ribs.
Use draft angles.
Maintain even walls.
When you follow these steps, you boost quality and make vacuum casting the right choice. If your design needs more strength or detail, consider CNC or injection molding for higher quality.
FAQ — Vacuum Casting Rib & Boss Design
1. Can vacuum casting reproduce very fine ribs?
Yes, vacuum casting can reproduce fine ribs, but only within certain limits. Silicone molds are flexible, so extremely thin or tall ribs may deform or trap air during casting. In practice, ribs below 0.5–0.6 mm are difficult to cast reliably, and long micro-ribs may not fill completely without proper venting. For the best results, ribs should maintain a balanced ratio of thickness–height and include smooth radii at the base.
2. What is the minimum rib thickness?
For most urethane casting materials (ABS-like, PP-like, PC-like), the recommended minimum rib thickness is:
- 0.6–0.8 × the nominal wall thickness
- Absolute minimum: 0.5 mm (only for very short ribs)
- Recommended minimum: 0.8–1.0 mm for consistent molding
Thinner ribs risk mold tear, incomplete filling, air entrapment, and dimensional instability.
3. How tall can a boss be?
Boss height depends on the diameter and wall thickness. Silicone molds can deform if a boss is too tall. A practical guideline is:
- Maximum height = 2.5–3 × the boss outer diameter
- Very tall bosses require support ribs
- Hollow bosses perform better than solid ones
- Bosses thicker than the surrounding wall may create sink marks
For best reliability, keep boss walls thin and reinforce with ribs rather than increasing height alone.
4. Can I add threads inside a boss?
Yes, but with limitations. Vacuum casting can reproduce coarse threads and larger pitch features, but not sharp, fine internal threads.
- Internal threads > M6 are usually castable
- Very fine or deep threads may not release cleanly from silicone molds
- For high-strength threads, inserts are recommended (brass or stainless steel)
- For prototypes, “cosmetic threads” can be molded, but functional threads should use threaded inserts
If durability or torque resistance is required, avoid casting the thread directly.
5. Is vacuum casting good for structural parts?
Vacuum casting is suitable for light- to medium-strength prototypes, but it is not a substitute for final injection-molded structural parts.
Advantages:
- Stronger than 3D-printed prototypes
- Can simulate ABS, PP, PC, TPU, etc.
- Good for enclosures, housings, consumer product prototypes
Limitations:
- Urethane materials are not as strong as real engineering plastics
- Long-term durability and UV resistance are weaker
- Not suitable for high-load or continuously stressed parts
Vacuum casting is ideal for fit testing, design validation, and short-run functional testing, but not for high-strength structural components.