LKprototype
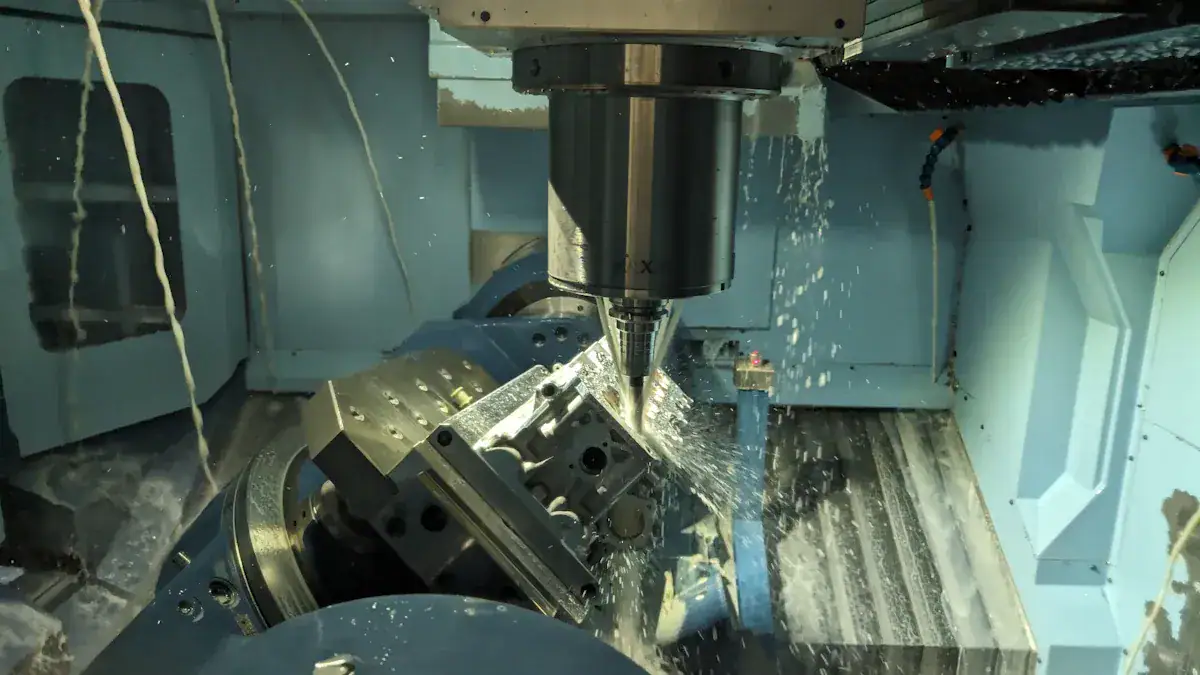
Accuracy and speed are very important when working with bronze. This metal is strong, resists rust, and conducts heat well. These traits make it great for making tough parts. However, cutting bronze requires careful work to achieve good results. CNC machining bronze helps cut this material with high accuracy and detail. It utilizes automated steps and smart cutting settings to save material and maintain consistent quality. Whether creating machine parts or art pieces, CNC machining bronze is a dependable method for working with this versatile metal.
Key Takeaways
Pick the right bronze type for your project. Each type has special features that affect how it is machined.
Get your workpiece ready carefully. Keeping it clean and steady makes machining more accurate and reduces mistakes.
Use the correct cutting tools. Choose carbide or PCD tools because they last longer and stay sharp for neat cuts.
Change cutting speeds and feed rates after research. This helps make smooth surfaces and keeps tools working longer.
Check tools often for damage and replace them if needed. Taking care of tools saves time and money over time.
Preparation Steps for CNC Machining Bronze
Picking the Right Bronze Alloy
Choosing the right bronze alloy is very important. Each type has special features that affect how it can be machined. For example, nickel-aluminum bronze is strong and resists rust, making it great for boats. Alloys with more tin are harder and last longer, as studies show. Match the alloy to your project needs for the best results.
The table below shows findings from recent bronze alloy studies:
Study | Findings | What It Means |
|---|---|---|
Adding tin made it 69% harder and 28.4% stronger. | Better machining due to stronger properties. | |
2024 Study on Medium-Entropy Bronze Alloys | Tin-rich alloys lasted longer and resisted wear better. | Worked better than regular alloys in tough jobs. |
Getting the Workpiece Ready
Preparing the workpiece helps avoid mistakes and improves accuracy. First, make the design simple to save time and money. Use fewer setups to reduce errors. Focus on key measurements and adjust tolerances to make machining easier.
Secure the workpiece tightly to stop it from bending. Clean it well to remove dirt for smooth machining. These steps save time, improve precision, and reduce waste.
Picking the Right Cutting Tools
Using the right cutting tools is key for machining bronze. Carbide tools last long and resist wear, while HSS tools are cheaper. Keep tools sharp and in good shape for clean cuts.
Studies show PCD tools last 50% longer, cutting costs and boosting productivity. Tools with positive rake angles need less force and give smoother finishes. Adjust speeds and feed rates to 100-300 SFM for the best results.
Coolants are also important. Use water-based or oil-based coolants to lower heat and friction for smoother machining.
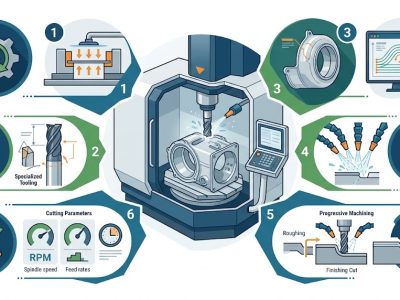
CNC Setup and Operation for Bronze
Setting Up the CNC Machine
Setting up the CNC machine correctly helps with accuracy and speed. First, adjust the machine to fit your workpiece size. Enter the design details carefully into the machine's software. CNC machines are great for cutting, drilling, and shaping with precision.
Tip: CNC machines save time and reduce mistakes. They can make 10 parts faster than doing it by hand. This makes them perfect for working with bronze, ensuring better quality and uniform results.
Improving Cutting Speeds and Feeds
Picking the right cutting speeds and feed rates is important. It helps make smooth surfaces and keeps tools from wearing out. Research shows that feed rate matters more than speed for bronze. Studies using Taguchi's method prove this for better finishes.
The table below shows how cutting speeds affect bronze machining:
Cutting Speed (vc) | Feed Rate (f) | Chip Spread Ratio (Kb) | Surface Results (Sp, Sv, Sz) |
|---|---|---|---|
50-100 m/min | 0.05-0.075 mm/rev | 14% less spread | Lower Sp and Sv values |
225-250 m/min | 0.05-0.075 mm/rev | 2-32% more spread | Sz increased from 10 to 35% |
Change your machine settings based on these results for the best outcome.
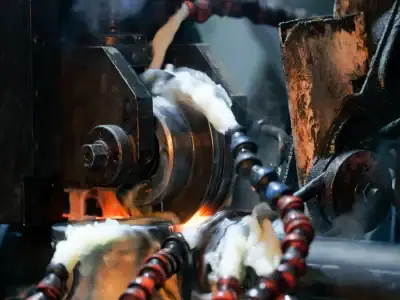
Using Lubrication and Cooling
Lubrication and cooling are very important when machining bronze. They stop heat, reduce friction, and make tools last longer. Soluble oil works well for both cooling and lubrication.
Coolant Type | Use in Machining Bronze |
|---|---|
Soluble Oil | Great for cooling and lubrication |
Mineral Oil | Has 30% lard, used for special tasks |
Note: Always apply coolant directly where the cutting happens. This keeps the process smooth and prevents overheating.
Overcoming Challenges in CNC Machining Bronze
Managing Tool Wear
Tool wear happens often when cutting bronze. Use strong tools like carbide or PCD. These tools stay sharp longer and resist damage. Check tools often for dull edges or cracks. Replace damaged tools quickly to keep cuts clean.
Lower cutting speeds to reduce friction and tool wear. Set feed rates carefully to avoid too much pressure. Use lubrication to cool tools and lower friction during machining.
Tip: Make a tool check schedule. This keeps tools working well and saves time.
Controlling Chip Formation
Bronze makes long chips that can block the cutting area. Use tools designed to break chips into smaller pieces. This makes cleanup easier.
Increase the feed rate to create shorter chips. Tools with positive rake angles also help chips flow better.
Blow away chips with air or use coolant to clear them. This stops chips from harming the tool or workpiece.
Addressing Heat and Material Properties
Bronze heats up fast, which can cause problems. Apply coolant directly to the cutting spot to manage heat. Water-based coolants are good for light work. Oil-based coolants are better for tough jobs.
Different bronze alloys have different hardness levels. Softer ones may bend under pressure. Harder ones can wear out tools faster. Adjust cutting speeds and settings based on the alloy type. For harder alloys, use slower speeds to avoid overheating.
Note: Test your setup on a sample piece first. This helps you adjust settings for the best results.
Finishing and Inspection of CNC Machined Bronze Parts
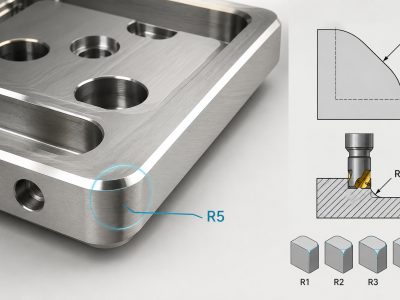
Getting Smooth Surface Finishes
To make bronze parts look smooth, use careful machining. Set the cutting speed to 1200 rpm. Keep the feed rate at 0.06 mm/rev and the depth of cut at 1.25 mm. These settings help create even surfaces.
For extra smoothness, try methods like abrasive blasting or polishing. You can also use electrochemical polishing for a shiny finish. Advanced techniques like micro machining are great for detailed designs.
Ra Value (μm) | Surface Type | Common Uses |
|---|---|---|
12.5 – 6.3 | Rough | Strong structural parts |
6.3 – 3.2 | Semi-rough | General machine parts |
3.2 – 1.6 | Medium | Car parts |
1.6 – 0.8 | Semi-fine | Bearings |
0.8 – 0.2 | Fine | Medical tools, airplanes |
0.2 – 0.1 | Mirror | Optical tools |
Diamond turning or burnishing can also make surfaces smoother. These methods improve hardness without removing material.
Checking Dimensions for Accuracy
Making sure bronze parts are the right size is important. Use tools like laser scanners or CMMs to measure them. These tools check if the parts match the design.
Statistical process control (SPC) is another way to ensure quality. It uses data to track and improve the machining process.
Measurement Tool | What It Does |
|---|---|
Measures parts with tools like CMMs and lasers. | |
Statistical Process Control | Tracks machining data to keep quality steady. |
Check parts during and after machining to catch mistakes early. This saves time and materials.
Cleaning and Polishing the Parts
Cleaning and polishing are the last steps. Use brushes or pads to clean off dirt. For deeper cleaning, use chemicals like dilute hydrochloric acid. These remove rust and protect the bronze.
Polishing makes the parts shiny and strong. Use water-based or oil-based compounds for a smooth finish. Electroplating adds a protective layer to prevent wear.
Tip: Test cleaning solutions on a small spot first. This avoids damage to the bronze.
By following these steps, you can make bronze parts that are accurate, smooth, and look great.
To machine bronze well, follow clear steps. First, pick the right alloy and prepare your material properly. Set up your CNC machine carefully for accurate work. Adjust cutting speeds to get smooth surfaces. Solve problems like tool wear and chip buildup by using strong tools and cooling methods. Check your parts often for size and finish them neatly for top-quality results.
Pro Tip: Make a tool care plan. This keeps tools working longer and saves money over time.
Start Your Next Project with LKprototype
LKprototype company simplifies procurement for custom manufacturing, Suitable for making your products or prototypes with a variety of materials, such as metal or plastic, silicone rubber, from 3D Printing to CNC Machined Parts and Vacuum Casting , with a focus on speed and efficiency. Our platform provides instant quotes. With LKprototype, You can connect with the team to communicate your project to ensure quality and on-time delivery.
Start with an instant quote and experience how our technology and expertise can make custom part procurement faster and easier.
FAQ
What is the best bronze alloy for CNC machining?
The best alloy depends on your project needs. Nickel-aluminum bronze is strong and resists rust. Tin-rich alloys are better for wear resistance. Choose the alloy that fits your project for the best results.
How do you prevent tool wear when machining bronze?
Use strong tools like carbide or PCD for longer use. Keep tools sharp and apply lubrication to reduce friction. Lower cutting speeds and check tools often to avoid damage.
Why is lubrication important in CNC machining bronze?
Lubrication helps reduce heat and friction while cutting. It protects tools from damage and makes smoother cuts. Use water-based coolants for light jobs or oil-based ones for harder tasks.
How can you achieve a smooth finish on bronze parts?
Set the cutting speed to 1200 rpm for smooth results. Keep the feed rate at 0.06 mm/rev for even surfaces. Use polishing methods like blasting or electrochemical polishing for a shiny finish.
What tools can you use to check dimensional accuracy?
Use tools like laser scanners or CMMs to measure parts. These tools help ensure the parts match the design exactly.