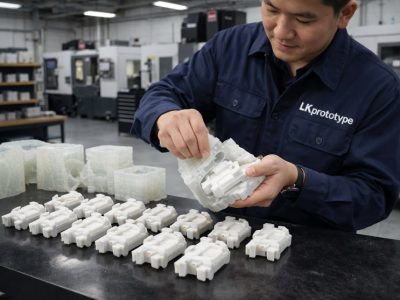
LKprototype
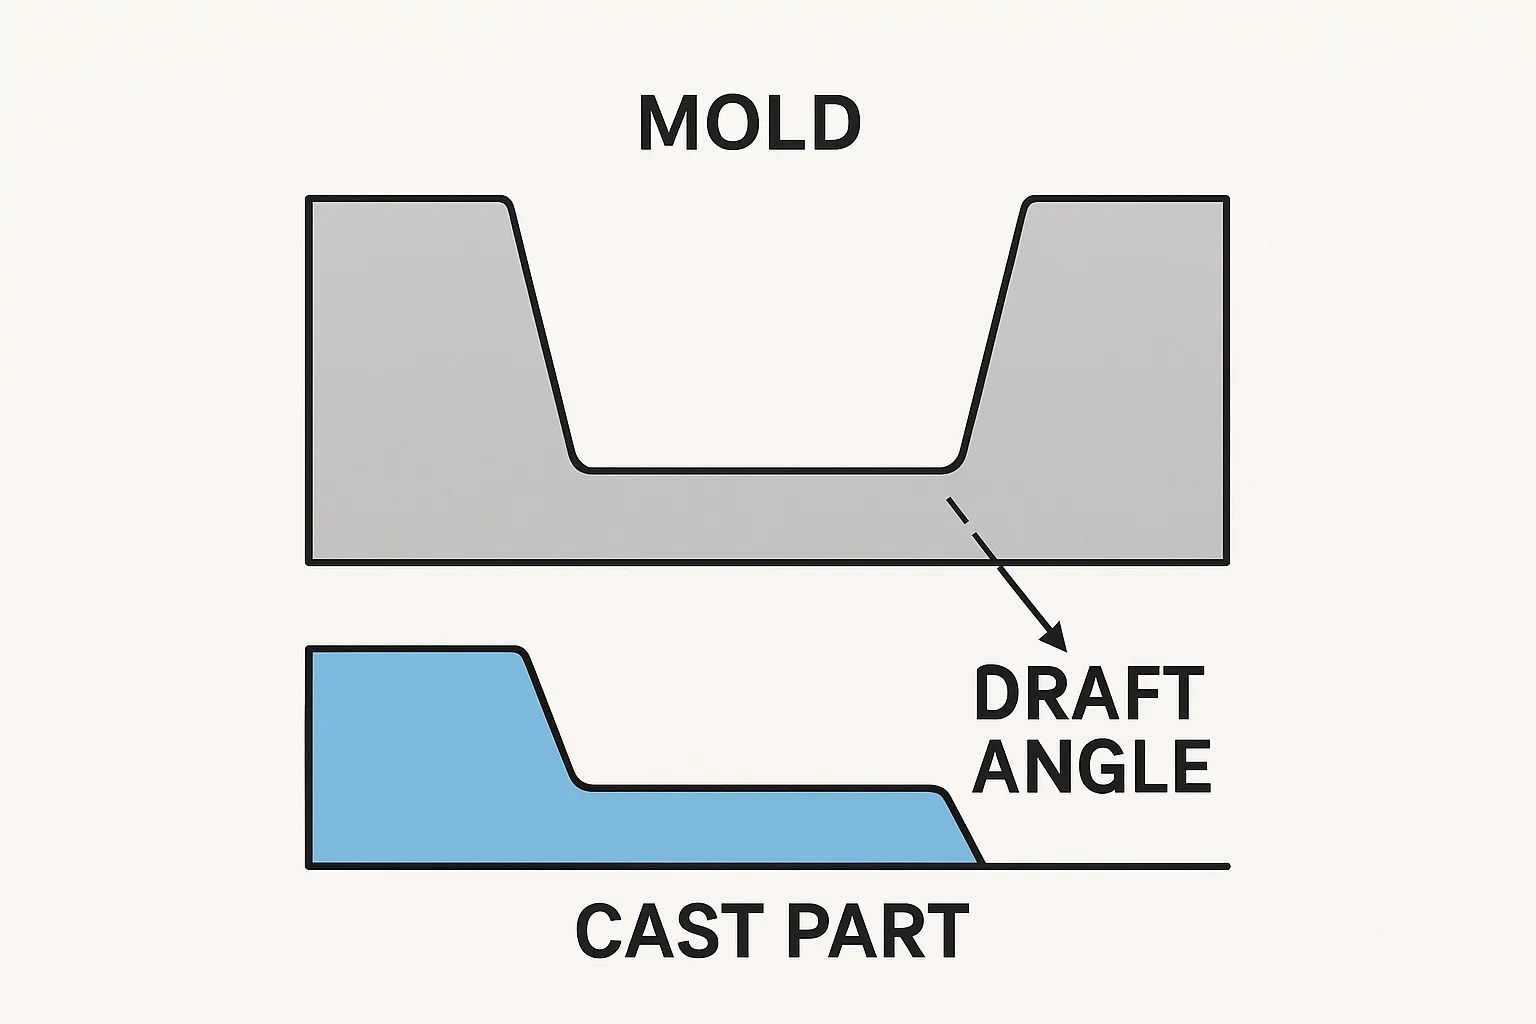
You should use a 1-2 degree vacuum casting draft angle for most parts. This small angle helps you remove parts from the mold without damage. When you add a draft angle, you make it easier to pull the part out and avoid sticking. This protects the silicone mold and keeps the part quality high. In vacuum casting, even a small draft of 1-2 degrees can make a big difference in how well your parts turn out.
Key Takeaways
Use a draft angle of 1-2 degrees for most vacuum cast parts. This helps the part come out of the mold easily.
Change the draft angle if the part is more complex. Parts that are deeper or have texture may need 2-5 degrees. This helps the mold release the part better.
Think about material shrinkage when you pick a draft angle. Materials that shrink a lot need bigger angles. This stops the part from sticking to the mold.
Add draft angles to your design at the start. This helps you avoid problems when you take the part out. It also makes the part better.
Talk to a mold maker if your design is complicated. They can help you choose the right draft angle for the best results.
Vacuum Casting Draft Angle Basics
What Is A Draft Angle?
When you design a part for vacuum casting, you need to think about how the part will come out of the mold. A draft angle is a slight slope added to the vertical walls of your part. This slope helps you remove the part from the silicone mold without causing damage. If you look at a draft angle from the side, you will see that the wall is not perfectly straight up and down. Instead, it leans out just a little. This small change makes a big difference during demolding.
You usually measure a draft angle in degrees. For most vacuum casting projects, you want to use a vacuum casting draft angle of 1 to 2 degrees. This angle is enough to help with mold release but does not change the look or function of your part.
Why Draft Angles Matter In Vacuum Casting
Draft angles play a key role in vacuum casting. They make it easier to remove your part from the mold. Without a draft angle, the part can stick to the mold. This can cause damage to both the part and the silicone mold. You want to avoid tearing the mold because it can only make a limited number of parts.
Here are some important points about draft angles in vacuum casting:
Draft angles help you demold parts easily.
They protect both your part and the silicone mold from damage.
Most vertical walls need a draft angle between 1 and 3 degrees.
When you use the right draft angle, you get better part quality and longer mold life. You also save time because you do not have to struggle with stuck parts. In vacuum casting, even a small draft angle can make your project go much smoother.
Recommended Draft Angles For Vacuum Casting
Standard Range: 1-2 Degrees
You should start with a vacuum casting draft angle of 1 to 2 degrees for most projects. This range works well for many part designs and helps you remove parts from silicone molds without damage. Silicone molds are flexible, so you do not need as much draft as you would for metal molds in injection molding. You can sometimes use zero-draft angles for simple shapes, but adding a small draft angle makes the process smoother and protects your mold.
Tip: Always add at least a 1-degree draft angle to vertical walls. This small slope helps you avoid sticking and tearing during demolding.
Adjustments For Textured Or Deep Parts
You may need to adjust the vacuum casting draft angle if your part has deep walls or a textured surface. Deep or complex shapes make it harder to pull the part out of the mold. Textured surfaces also increase friction, which can cause sticking.
Increase the draft angle for deep or tall walls.
Use a larger draft angle for rough or textured surfaces.
Add more taper if your part has complex features or undercuts.
A higher draft angle makes it easier to extract vacuum cast parts from the mold. If your part has a deep or rough surface, you should consider a draft angle greater than 2 degrees. This adjustment helps you avoid damage and keeps your mold in good condition.
Material Shrinkage And Draft Needs
Material shrinkage affects how you set your vacuum casting draft angle. When plastic cools, it shrinks. In male molds, the plastic shrinks onto the mold, so you need a larger draft angle to help with removal. In female molds, the plastic shrinks away from the mold, so you can use a smaller draft angle, but a small draft is still helpful.
High-shrinkage materials need larger draft angles to prevent sticking.
Low-shrinkage materials allow for smaller draft angles.
The type of mold (male or female) changes how much draft you need.
Always consider part geometry and material when setting your draft angle.
You should match the draft angle to the material and mold type. This step helps you avoid problems during demolding and keeps your parts looking good.
Recommended Draft Angles Table
Here is a quick guide to help you choose the right draft angle for different scenarios:
Scenario | Recommended Draft Angle |
|---|---|
Smooth, shallow walls | 1-2 degrees |
Deep or tall walls | 2-3 degrees |
Textured surfaces | 2-5 degrees |
High-shrinkage materials | 2-3 degrees |
Low-shrinkage materials | 1-2 degrees |
Male mold | 2-3 degrees |
Female mold | 0-1 degrees |
Note: These are general guidelines. You should always test your design and adjust the draft angle as needed.
Exceptions: The V-Process And Zero-Draft Angles
Vacuum casting gives you more flexibility than injection molding. Silicone molds can sometimes handle zero-draft angles, especially for simple shapes. The V-Process is a special method where you may not need any draft angle at all. However, adding a small draft angle is still a good idea for most projects. It helps you avoid sticking and makes the process easier.
If you use injection molding, you must add draft angles to all features. Vacuum casting lets you work with undercuts and zero-draft angles more easily, but you should still add a draft angle whenever possible.
Vacuum Casting Design Guide: Factors Affecting Draft Angle

Part Geometry And Wall Depth
When you make a part for vacuum casting, you must check each shape and size. Deep or tall walls are harder to pull out of the mold. If your part has a cavity that is 25 mm deep, use at least a 1-degree draft angle. Add one more degree for every extra inch of depth. Big or tricky shapes need more draft to stop friction and sticking. Simple shapes can use smaller draft angles. Complex designs need more taper so you do not break the part when you take it out.
Here is a table that shows what changes the draft angle in vacuum casting:
Factor | Description |
|---|---|
Part Depth | Deeper parts need more draft to come out easily. |
Wall Thickness | Thicker walls might need different draft angles to pop out right. |
Material Selection | Different materials shrink and act in special ways. |
Surface Texture | The finish you pick changes the draft you need to get the part out. |
Ejection Assistance | Draft angles help parts come out without breaking. |
Surface Finish Considerations
Surface finish is important in vacuum casting design guide choices. If you want a rough or bumpy surface, you need a bigger draft angle. Textured finishes make more friction between the part and the mold. This makes it harder to take the part out without breaking it. Smooth surfaces let you use smaller draft angles. Always pick the finish early in your design. This helps you choose the right draft angle and keeps your parts looking nice.
Material Selection Impact
Materials change how you pick your draft angle in vacuum casting. Some vacuum casting materials shrink more than others. High-shrinkage materials need bigger draft angles so they do not stick. Low-shrinkage materials let you use smaller draft angles. Match the draft angle to the material you pick. This helps you stop scratches and warping. Draft angles also let air get between the mold and the part, so it comes out easier.
Tip: Always add draft angles to all big faces and vertical walls. This keeps your mold safe and your parts strong.
Here are some easy tips for your vacuum casting design guide:
Use a draft angle of 1-2 degrees for most vertical walls.
Make the draft bigger for deep, tricky, or bumpy parts.
Pick materials that fit your design.
Add draft angles to every big face to stop damage and help your mold last longer.
Vacuum Casting Process: Practical Tips & Common Mistakes
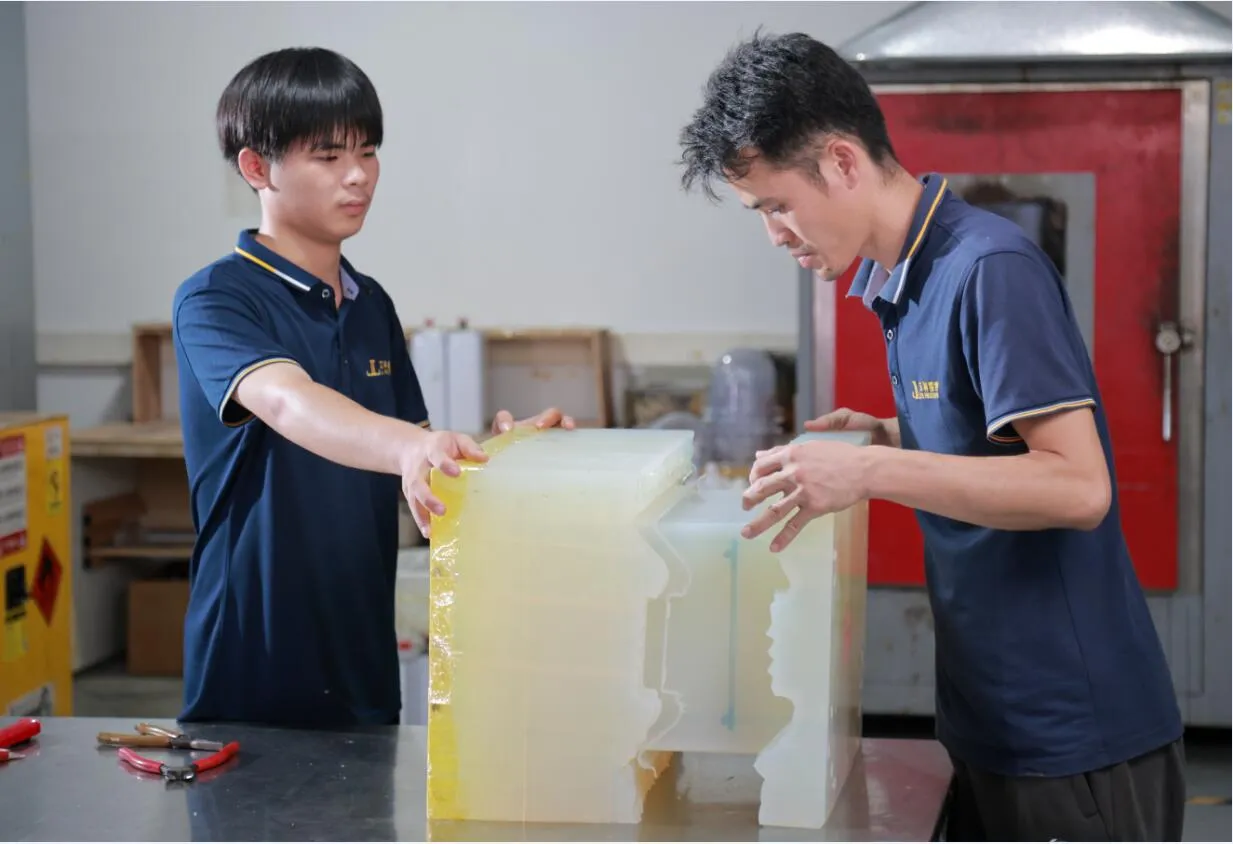
Tips For Optimal Mold Release
You can improve the vacuum casting process by planning for easy mold release. Always design your master pattern with slight draft angles, usually 1-2 degrees, on all vertical faces. This small change helps you remove parts smoothly and keeps your silicone molds in good shape. When you work with your manufacturing partner, discuss where to place the mold parting lines. Good planning here can reduce visible marks on your high-quality prototypes.
Tip: Use vacuum casting design tips early in your project to avoid problems later. This step saves time and helps you get low-volume parts with a short lead time.
Avoiding Insufficient Or Excessive Draft
Choosing the right draft angle is important for the vacuum casting process. If you use too little draft, you may face these problems:
Parts stick to the mold, making removal hard.
Ejector pins may not work well, risking part damage.
High suction forces can warp your part and lower its quality.
Too much draft can also cause issues. You might see changes in the surface finish or even part distortion. Use this table to see how draft angle affects your results:
Impact of Draft Angle | Description |
|---|---|
Part Ejection | Not enough draft makes parts hard to remove and can damage them. |
Surface Finish | Too much draft can make the finish less even. |
Part Integrity | Poor draft choices wear out molds faster and hurt part quality. |
Draft Angle And Mold Longevity
Draft angle selection affects how long your mold lasts. A good draft angle lets you remove parts without sticking. This reduces friction and stress on the mold. When you use the right draft, you lower the risk of damage and keep your vacuum casting process running smoothly. If you skip this step, you may need to replace molds more often, which increases costs and slows down production.
Remember: Follow vacuum casting design tips to balance part function and manufacturability. This approach helps you get the best results from vacuum casting and keeps your molds working longer.
When you design for vacuum casting, always use a draft angle of 1-2 degrees for most parts. For smooth mold release, you may need 3-5 degrees, especially with deep or complex shapes. Adjust the draft based on part complexity, material, and surface finish. If you skip draft angles, you risk warping and damaging both the part and the mold. For complex projects, talk with a mold maker or engineer.
Checklist for choosing the right draft angle:
Start with 1-2 degrees for simple parts.
Increase draft for deep, textured, or flexible parts.
Match draft to your material type.
Never ignore draft angles to avoid defects.
FAQ
What happens if you skip draft angles in your design?
You may find it hard to remove parts from the mold. This can damage both the part and the mold. Always add a draft angle to avoid these problems.
Can you use zero draft angles for simple parts?
You can sometimes use zero draft angles for very simple shapes. However, adding even a small draft angle helps you remove parts more easily and keeps your mold in good shape.
How do you choose the right draft angle for textured surfaces?
For textured surfaces, increase the draft angle. Rough textures create more friction. A larger draft angle helps you remove the part without damage.
Does vacuum casting work with all types of plastic?
Vacuum casting works with many plastics. You can use it for both rigid and flexible materials. Always check if your chosen plastic fits your project needs.