LKprototype
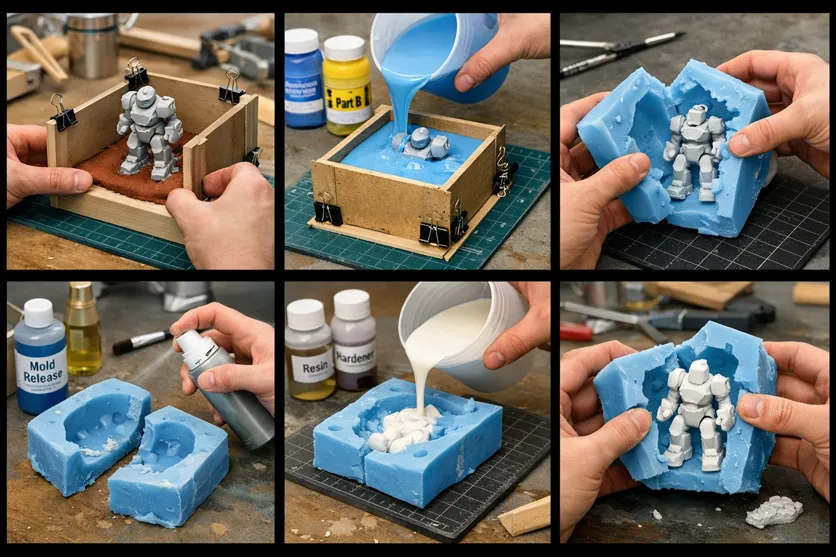
You use silicone mold making to make prototypes that look like your designs. Silicone molds are very flexible and show small details better than most other ways. When you compare how accurate they are, you see their size stays the same. This is clear in the table below:
Prototyping Method | Dimensional Stability | Surface Roughness | Durability in Repeated Casting Cycles |
|---|---|---|---|
SLA | Low | 1–5 µm | Medium |
SLS | High | 1–3 µm | High |
FDM | Medium | 10–25 µm | Low |
You get the best results if you pick the right materials. You need to follow each step in the process. You should use methods that work well.
Key Takeaways
Silicone mold making helps you make prototypes fast. It lets you test and change designs quickly. You can see small details in your prototype.
Pick the right RTV silicone for your project. Think about how hard you want it to be. Also, check how it cures.
Use the correct tools and methods. Vacuum degassing removes air bubbles. This makes your mold better.
Always use a release agent so molds do not stick. This helps you take out molds easily. It keeps the molds strong.
Follow safety rules when working with silicone. Wear gloves and goggles to protect yourself.
What Is Silicone Mold Making
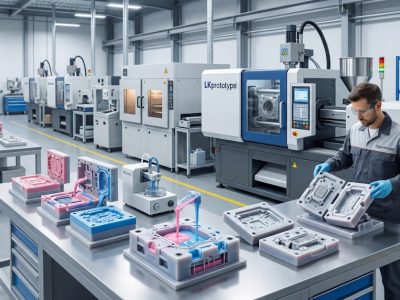
Overview of Silicone Mold Making for Prototypes
Silicone mold making helps you make molds for prototypes. This process lets you copy your design fast and try new ideas. First, you get your master model ready. You put the masters in clay to make one side of the mold. Next, you pour silicone over the clay and masters. You wait for the silicone to harden. Then, you take everything out of the mold housing. You clean off the clay. You put the mold and masters back in the housing. You spray a release agent so the mold does not stick. You pour silicone again for the second mold. After it hardens, you take out your parts. Here are the main steps:
Put the masters in clay.
Pour silicone over them.
Take everything out of the housing.
Clean off the clay.
Put the mold and masters back in the housing.
Spray release agent.
Pour silicone for the second mold.
Wait for it to harden.
Take out your parts.
You get a soft mold that shows tiny details from your design. You can use these molds to make small groups of prototypes. You can change your design easily and update your molds without spending much money.
Tip: You can finish a silicone mold in hours or days. This speed helps you test and fix your design faster than other ways.
Advantages of Silicone Mold Making in Rapid Prototyping
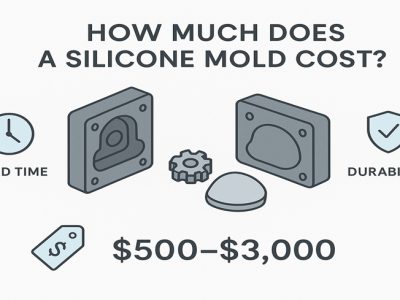
Silicone molds give you many good things for prototyping. You can make small amounts, usually between 10 and 50 units, without spending a lot. You can change your design fast because silicone molds are easy to fix. You get smoother surfaces and fewer mistakes in your prototypes. You can make shapes that other mold methods cannot do.
Advantage | Description |
|---|---|
Reduced Porosity and Defects | Stops air pockets, so parts are stronger. |
Superior Surface Finish | Makes surfaces smoother, so you need less finishing work. |
Complex Geometries | Lets you make tricky designs that other methods cannot do. |
Material Versatility | Works with many kinds of materials. |
Silicone mold making is fast, flexible, and gives good quality. You can test your design, make changes, and build prototypes faster than with injection molds. Injection molds take weeks to set up, but silicone molds let you start testing in days. You get more freedom to try new designs and make your prototypes better.
Materials Used in Silicone Mold Making
Types of RTV Silicone Compounds
You can pick from different kinds of silicone for molds. RTV silicone is the most popular for prototype molds. You can choose one-component or two-component RTV silicone. One-component RTV cures at room temperature and does not need mixing. Two-component RTV needs you to mix two parts before it cures. Both types are good for making prototypes and small batches. The table below shows how they are different:
Type | Description | Curing Process | Hardness Range (Shore A) | Applications |
|---|---|---|---|---|
One-component RTV | Cures at room temperature without mixing. | Room temperature | 15 to 40 | Molds for reproducing, automotive applications |
Two-component RTV | Requires mixing a base and a curative before use. | Room temperature | 15 to 40 | Rapid prototyping, smaller production runs |
RTV silicone is easy to use and cures fast. You can use it for over-molding at low temperatures. It is also good for making food-safe molds. Some RTV silicone uses platinum or tin-based catalysts. These help you make strong and bendy silicone molds for many designs.
Selecting the Right Silicone for Prototype Molds
You should think about a few things when picking silicone for your molds. The kind of silicone, its hardness, and its color can change how your mold works. If you want to make molds for food, use food-safe silicone rubber. The hardness of silicone changes how tough and bendy your molds are. If your silicone is too soft, your mold might bend or leak. If it is too hard, your mold can crack or lose details. Try to find a balance between hardness and flexibility for the best results.
Criteria | Description |
|---|---|
Type of Silicone | Choose between liquid silicone rubber (LSR) or high consistency rubber (HCR). |
Durometer | Consider the hardness of the silicone, which affects performance. |
Color | The color of the silicone can impact the aesthetics and functionality. |
Tip: When you design your mold, keep the walls the same thickness. Do not use sharp corners. This makes your silicone molds last longer and keeps your prototypes correct.
Tools and Equipment for Silicone Mold Making
You need good tools and materials to make silicone molds. Start with a digital scale to measure your silicone base. Mix the base and activator with a paint stick or paddle drill bit. Use a vacuum chamber to get rid of air bubbles in the silicone. Pour the silicone into your mold box slowly from the bottom. Let the silicone cure as the instructions say. After curing, take out the mold and clean any extra silicone. Good tools help you make accurate molds and better prototypes. Strong equipment helps you avoid problems when making molds. If you take care of your tools, your silicone molds will look nice and last longer.
Note: The main materials for silicone mold making are high-quality silicone, measuring tools, and a vacuum chamber. These help you make strong and detailed molds for any design.
Silicone Mold Making Process
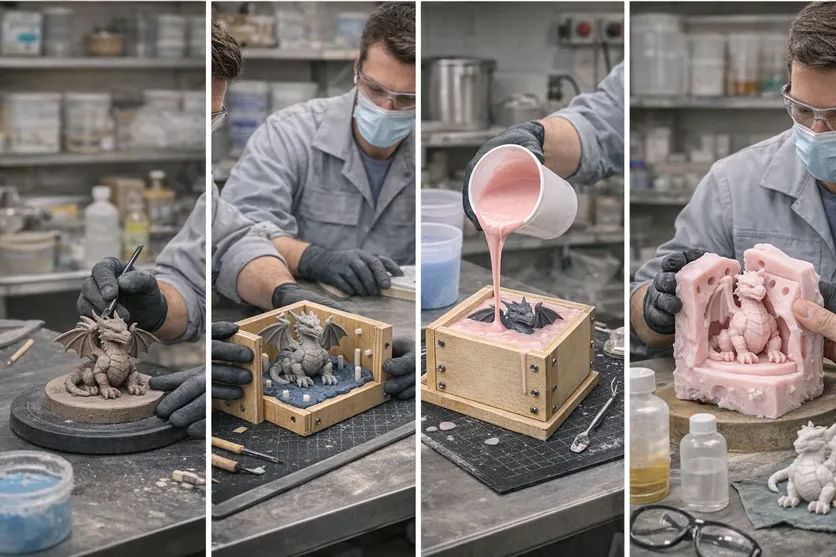
Mold Preparation and Master Model Setup
First, get your master model ready. This is important for a good mold. Here are the steps you should follow:
Clean your model. Make sure there is no dust or grease.
Stick your model to the bottom of the mold box with glue.
The mold box walls should be at least half an inch from your model on every side. This makes the mold thick enough.
Spray a mold release agent on your model. This keeps the silicone from sticking.
Always use a release agent. If you skip it, the silicone can ruin your model.
How your master model looks will change how your mold turns out. Look at the table below:
Aspect | Description |
|---|---|
Surface Finish Impact | The master model’s surface changes how smooth and detailed your mold is. |
Dimensional Accuracy | How you place your model can make the right size and shape. |
Artifacts from Printing | Printing in layers can leave marks that show up in your mold. |
Mixing and Degassing Silicone
You must measure the parts of the silicone carefully. Mix them until the color and texture look the same. For best results, use the double mix method. Pour the silicone into a clean cup and mix again for two or three minutes. Put the mixed silicone in a vacuum chamber. The vacuum pulls out air bubbles. This takes about five to fifteen minutes. No bubbles means your mold will look perfect.
Tip: A vacuum chamber sucks out trapped air. This makes your silicone mold look better and last longer.
Pouring Silicone and Mold Box Sealing
Build your mold box with strong stuff like cardboard, foam core, or acrylic. Seal all the edges with hot glue or silicone sealant. If you use cardboard, line it with tape so the silicone does not soak in. Make sure all seams are tight so nothing leaks. Pour the silicone slowly from high up, about eighteen inches, in a thin stream. This helps the silicone spread out and stops bubbles.
Use hot glue to hold the corners together.
Pour the silicone in a thin stream for better results.
If you use a wooden box, seal the inside with shellac or epoxy. This keeps water out and makes your mold box last longer. It also helps your silicone mold stay strong.
Curing and Demolding the Silicone Mold
After pouring, let the silicone cure as long as the instructions say. Most silicone cures at room temperature, but some need heat. Make sure the surface is clean and dry before you start. Mix the resin and catalyst well. Use a vacuum chamber to get rid of bubbles. Pour the mix and let it cure all the way. If you do not let it cure right, your mold can feel sticky or look wrong.
Key Point | Explanation |
|---|---|
Cure Properly | Let the mold cure for the right time and temperature so it is not sticky or bent. |
When the silicone is hard, take your design out slowly. Be gentle so you do not rip the mold. Now you have a strong and detailed silicone mold for making prototypes.
Silicone Mold Casting Methods
Silicone Mold Casting for Prototypes
There are many ways to make prototypes with silicone molds. These ways help you make parts fast and with good detail. Here are some common ways to use silicone for casting:
Liquid Silicone Rubber (LSR) molding lets you pour liquid silicone into molds. This makes parts that bend and are strong.
Compression molding uses pressure to shape silicone in a mold. It works well for flat or simple shapes.
RTV silicone casting works at room temperature. It is easy to use in small shops.
Gravity casting lets silicone fill the mold by its own weight.
Pressure casting uses air pressure to push silicone into every detail.
Rotational or centrifugal casting spins the mold. This spreads silicone evenly.
Pick the method that fits your project best. Each way gives you different results for your silicone parts.
Vacuum Casting with Silicone Molds
Vacuum casting makes your prototypes better when you use silicone molds. You put the mold in a vacuum chamber and take out the air before pouring resin. This way gives you better parts than regular casting. The table below shows how vacuum casting helps you:
Advantage | Description |
|---|---|
Elimination of Air Bubbles | Takes out trapped air, so your parts have no weak spots. |
Improved Surface Finish | Makes surfaces smooth, so you do not need much extra work. |
Consistent Mechanical Strength | Gives your parts even strength and shape. |
Enhanced Transparency | Keeps clear parts free from tiny bubbles. |
Vacuum casting with silicone molds helps you make parts that look and work like real products.
Typical Applications in Prototype Manufacturing
Silicone molds are used in many ways to make prototypes. These molds help you test ideas and make small groups of parts. Here are some ways to use silicone molds:
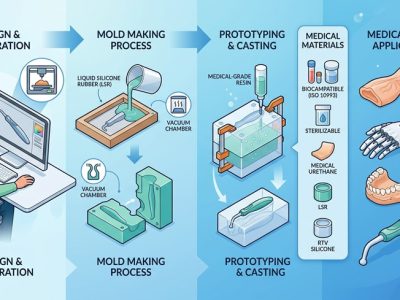
Rapid prototyping lets you make models fast for testing in things like medical tools and cars.
Casting production helps you make detailed copies for art and industry.
Creating custom parts lets you make special pieces for healthcare and airplanes.
Testing material compatibility lets you see how different materials work in real life.
Short production runs let you make a few parts without spending a lot.
Silicone molds give you speed and flexibility. You can try new designs, test materials, and make good prototypes with less work.
Achieving High Quality Silicone Molds
Preventing Air Bubbles in Silicone Molds
You want your silicone molds to look nice and last long. Air bubbles can mess up the details and make molds weak. You can follow these steps to stop air bubbles and keep your molds strong: Pour enough silicone to cover your model. Tilt the mold box so the silicone covers every part. Use compressed air at about 30 PSI to blow away bubbles during the first pour. Pour from one spot and keep the height the same. This helps the silicone move slowly and stops air from getting trapped. Use a vacuum chamber to pull out air bubbles before pouring. Pour slowly from above and tap the mold box. This helps bubbles float up and pop. These steps help you make smooth silicone molds with sharp details.
Improving Mold Detail and Accuracy
You need your molds to be accurate for good prototypes. The details and accuracy decide if your parts fit and work right. If you keep tight tolerances, your parts will match your design. If you miss details, your parts might not fit or work. Always check your master model for any problems before starting. Clean and get the surface ready so the silicone can copy every detail. Let the silicone cure all the way to keep the shape and size right. You get better results when you follow each step carefully.
Tip: Accurate molds help you test ideas and make changes before making the final product.
Surface Finish and Mold Quality Tips
The surface finish of your silicone molds changes how your prototypes look and feel. You can choose different finishes for your needs. The table below shows common surface finish types for silicone molds:
Surface Finish Type | Characteristics | Pros | Cons |
|---|---|---|---|
SPI Finish A-1 (Grit Diamond Buff) | High-gloss, optical clarity | Premium look, easy release | High cost, takes time to polish |
SPI Finish B-2 (Satin / Grit Paper) | Semi-gloss, moderate cost | Balanced feel, easy demolding | Less shine, may show flaws |
SPI Finish C-3 (Matte / Grit Stone) | Matte, cost-effective | Hides flaws, good for grip | Needs more work, texture may vary |
VDI 3400 Dry Blast Finishes | Matte, good grip | Hides lines, good for touch | Can wear out molds faster |
Mold-Tech / Custom Etching | Unique textures | Stands out, good for branding | Takes longer, more complex tooling |
You can also use these ways to make your silicone molds better: Screen printing works well for flat spots and adds pictures. Pad printing lets you put designs on curved or bumpy areas. Laser etching makes sharp patterns on the silicone. Epoxy coating gives a shiny finish and protects the mold. Spray painting adds color and helps stop scratches. Let your silicone cure all the way before using the mold. This keeps the surface smooth and strong. Clean your molds after each use to keep them working well. Good silicone molds give you better prototypes and save you time.
Advanced Silicone Mold Making Techniques
Vacuum Degassing for Bubble Free Molds
You want your prototypes to look smooth and nice. Air bubbles can mess up the surface and make parts weak. Vacuum degassing helps get rid of trapped air before the silicone hardens. First, mix the silicone well. Then, put it in a vacuum chamber. The vacuum pulls out bubbles made during mixing. You will see the silicone rise and bubble, then go back down. This step gives you a mold with no bubbles and sharp details. Using vacuum degassing every time gives you better results.
Tip: Always use vacuum degassing after mixing. This step stops hidden bubbles that can make weak spots.
Using Release Agents Effectively
Release agents help you take the silicone off the master model or mold box. Spray or brush a thin layer on all places that touch the silicone. This layer keeps the silicone from sticking. Make sure you cover every corner and edge. If you miss a spot, the silicone might stick or tear. You can use spray release agents, petroleum jelly, or special waxes for molds. Pick a release agent that works with your silicone type. Clean your model before you put on the release agent for best results.
Spray release agents are fast for big areas.
Brush-on agents work well for small or detailed spots.
Note: Too much release agent can leave marks on your mold. Use a thin, even layer for the best finish.
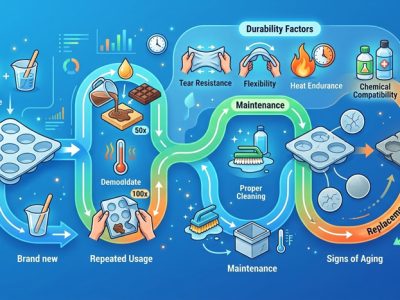
Improving Silicone Mold Durability
You want your silicone molds to last for many uses. There are some advanced ways to make them stronger. Multi-material molding lets you add extra support where the mold needs it most. The rest of the mold stays flexible. Additives and fillers mixed into the silicone help the mold last longer and wear less. You can also use a hard frame around the silicone mold. This keeps the mold from bending or losing its shape.
Surface treatments help too. You can change the surface to make it less sticky and easier to clean. Silanization puts a special layer on the silicone surface. This layer protects the mold and helps it last longer.
Technique | Description |
|---|---|
Surface Modification | Changes the surface to stop sticking and make cleaning easier. |
Silanization | Adds a protective layer to the silicone so the mold lasts longer. |
Try these ways to get more uses from each silicone mold. You save time and money when your molds last longer.
Best Practices for Silicone Mold Making
Safety and Personal Protection
You need to keep yourself safe when using silicone molds. Some things can bother your skin or eyes. Always put on nitrile gloves to protect your hands. Wear safety goggles so nothing gets in your eyes. Use a mask or open a window to breathe clean air. Cover your table with plastic to catch any spills. The table below shows how you can stay safe:
Hazard | Protection |
|---|---|
Skin Contact | Nitrile Gloves |
Eye Splatter | Safety Goggles |
Fumes | Ventilation or Mask |
Spills | Plastic Table Covers |
Tip: Put on all your safety gear before you mix or pour silicone.
Safe Handling of Silicone Materials
You should be careful with all materials to make good silicone molds. Always wear gloves, glasses, and a mask. Work in a place with fresh air. Cover your work area with plastic or paper to stop spills from making a mess. Use a flat table so your silicone pours evenly. A digital scale helps you measure the silicone and catalyst right. Mix the silicone well and do what the instructions say. Wait for the silicone to cure all the way for the best results.
Wear your safety gear every time you work.
Keep your work area clean and dry.
Throw away used stuff the right way.
Storage and Maintenance of Silicone Molds
You can help your silicone molds last longer if you store and clean them right. Wash your molds with warm water and soap, then dry them before you put them away. Keep your molds in a cool, dark spot away from sunlight and heat. Do not fold or stack your molds too tight because this can hurt them. Stay away from sharp or metal tools that can scratch the silicone. The table below gives more tips:
Practice Type | Recommendation |
|---|---|
Baking Best Practices | Keep the heat 10-20°C lower than the highest safe temperature for silicone molds. |
Washing Best Practices | Wash with warm water and soap, and dry all the way before you store them. |
Storage Actions to Avoid | Do not fold molds or use sharp tools that can cut or scratch the silicone. |
Note: Taking good care of your molds helps them stay strong and ready for your next project.
You can get good at silicone mold making if you follow each step. Pick the best silicone for your project. Clean your mold before you start. Use release agents so your molds do not stick. Always measure and mix the silicone the right way. Wear gloves and goggles to stay safe. Store your silicone molds in a cool, dry spot. If you use these tips, your molds will be strong and show all the details. Keep practicing and you will get better every time you make a new mold.
FAQ
How long does it take for silicone molds to cure?
Most silicone molds cure in 4 to 24 hours at room temperature. You should always check the instructions on your silicone product for the best results.
Can you reuse silicone molds for different prototypes?
Yes, you can reuse silicone molds many times if you clean and store them well. Avoid sharp tools and strong chemicals to keep your molds in good shape.
What materials can you cast in silicone molds?
You can cast many materials in silicone molds, such as resin, plaster, wax, and some low-melt metals. Always check if your casting material works with your silicone type.
Why do air bubbles form in my silicone mold?
Air bubbles form when you mix silicone too fast or pour it too quickly. Use a vacuum chamber and pour slowly to reduce bubbles and get smoother molds.