LKprototype
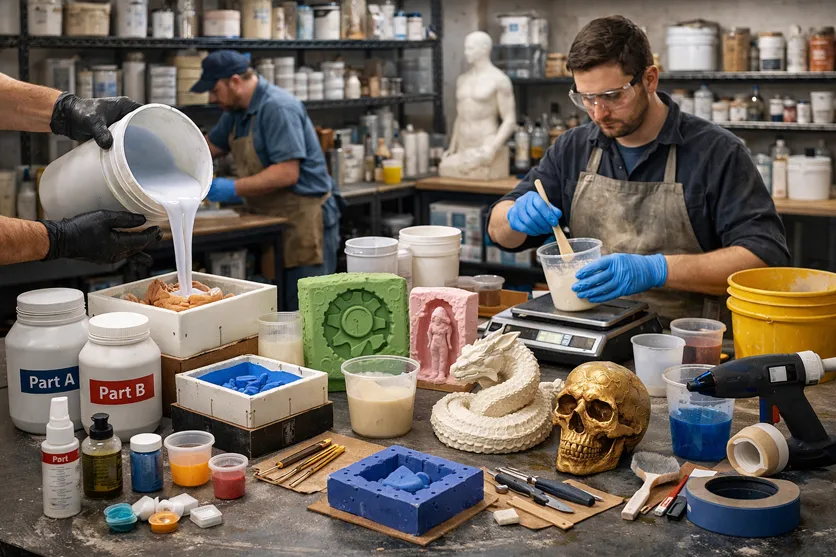
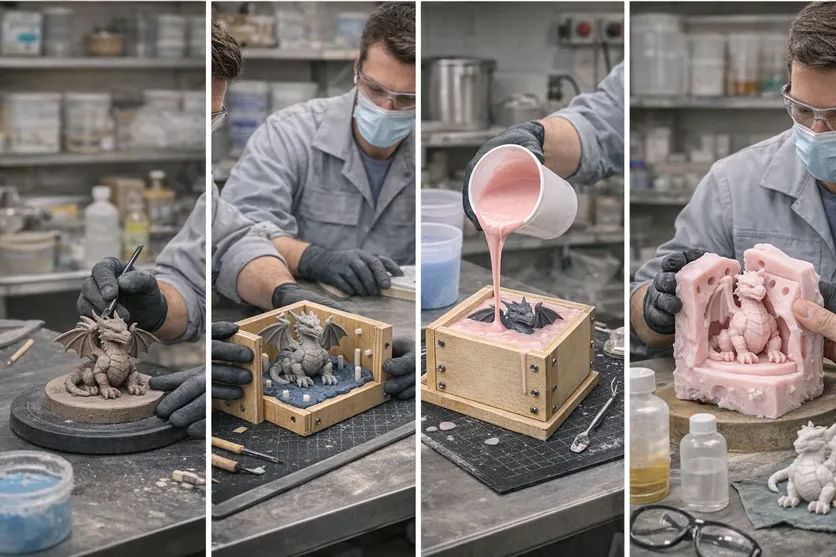
If you want to make a mold that shows every detail, you just need to pour RTV silicone over your original piece. Then let it cure. This material is flexible and strong. It stays tough even after many uses. Look at how RTV silicone compares to other materials:
Feature | RTV Silicone | Other Materials |
|---|---|---|
Flexibility | Superior elasticity | Limited flexibility |
Durability | Withstands many uses | Wears out quickly |
Shrinkage | Less than 0.1% | Higher shrinkage |
People use RTV silicone mold making for car parts and crafts. You can try it with almost any casting material.
Key Takeaways
RTV silicone molds bend easily and last a long time. They are great for showing small details in many projects.
You should follow steps in order: get your model ready, make a mold box, mix the silicone slowly, and keep the right temperature for the best outcome.
Always stay safe by using good airflow and wearing safety gear when you use silicone.
Wash your molds and put them away the right way. This helps them last longer and keeps them good for using again.
Try out different casting materials, but always check if they work well together. This stops problems like sticking or hurting the program.
What Is RTV Silicone Mold Making
Overview of RTV Silicone Mold Making
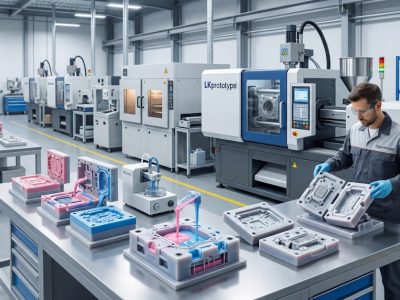
You might wonder what rtv silicone mold making actually means. This process lets you create a flexible mold by pouring liquid silicone over a master model. The silicone cures at room temperature, so you don’t need fancy equipment. You can use this method for art projects, car parts, or even prototypes.
Here’s how the process usually goes:
Choose quality materials. Reliable brands help your mold last longer.
Prepare your master model. Seal any porous spots so air doesn’t get trapped.
Build your mold box. Use clay or tape to seal the edges.
Position your model. Make sure air can escape when you pour the silicone.
Mix the rtv silicone. Follow the instructions and avoid trapping air.
Pour the silicone. Let it rest or use a vacuum chamber to remove bubbles.
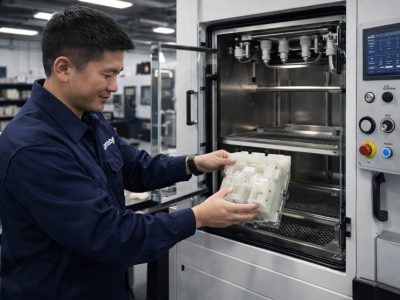
Control the environment. Keep the temperature and humidity steady for curing.
Handle the mold after curing. Trim carefully to keep the details sharp.
Clean up your tools right away.
Tip: If you pay attention to each step, you’ll get a mold that captures every detail and lasts through many uses.
Why RTV Silicone Is Used for Mold Making
You probably want to know why so many people choose silicone for mold making. The answer is simple. Silicone resists most casting materials like polyurethane, epoxy, and concrete. It doesn’t react with them, so your mold stays strong and your casts look clean.
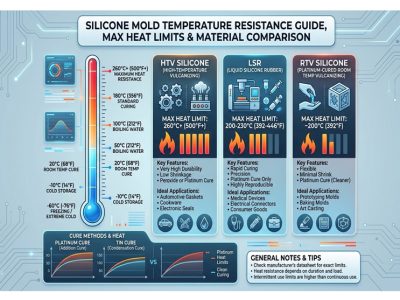
Silicone can handle extreme temperatures. It stays flexible from freezing cold to over 200°C. Some types even work above 300°C. You won’t see your mold break down or lose shape.
Another big advantage is that silicone keeps its size during curing. You get consistent results every time. That means less risk of mold failure and more reliable projects.
If you want a process that’s easy, reliable, and gives you professional results, rtv silicone mold making is the way to go.
Materials and Tools for RTV Silicone Mold Making
RTV Silicone Materials Used in Mold Making
You need to choose the best silicone for your mold. Most people pick liquid silicone rubber because it is easy to pour. It also shows every tiny detail. There are many brands you can buy. Some popular types are:
Sealants for regular jobs
Gasket makers for car repairs
Liquid silicone rubbers for making molds
These products are used in many fields, like cars, building, and crafts. You can even get food-safe silicone for baking molds. Many people buy these products because silicone is strong and useful.
Tools and Equipment for Silicone Mold Manufacturing
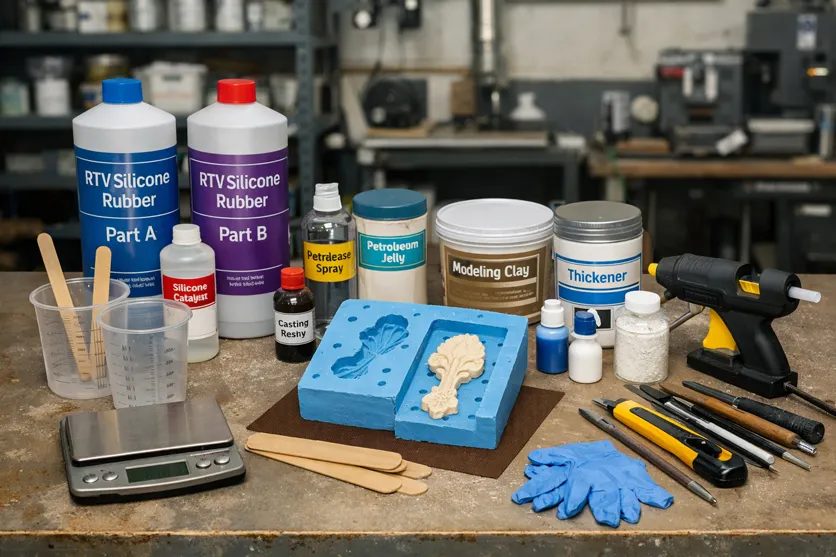
You do not need expensive tools to make molds. Here is a short list to help you start:
Mixing cups and sticks for stirring silicone
A digital scale to measure the right amount
Mold boxes made from plastic, wood, or LEGO bricks
Gloves and goggles to keep you safe
A vacuum chamber to take out air bubbles
If you want clear details, clean your master model with isopropyl alcohol. Use a little mold release so the silicone comes off easily.
Preparing a Safe and Clean Workspace
Safety is very important when you use silicone. Always remember these tips:
Safety Precaution | Description |
|---|---|
Ventilation | Work where there is fresh air. |
Protective Gear | Wear gloves and goggles to protect yourself. |
Curing Emissions | Some silicone makes fumes that can bother your eyes and nose. |
Keep Away from Children | Keep all materials away from kids until they are safe. |
Keep your work area clean and dry. Put the catalyst in a sealed box with a drying pack. Only mix what you will use, and measure it well. The best results happen if you work at about 22°C and keep the air dry. This helps your silicone mold cure the right way and last longer.
RTV Silicone Mold Making Process Step by Step
Preparing the Master Model
Start your rtv silicone mold making journey by getting your master model ready. You want your model to be clean and smooth. Any dust or bumps will show up in your final silicone mold. Here are some best practices:
Use a silicone-based release agent if your model is not made of silicone.
Pick a specialized barrier agent if you plan to cast silicone onto silicone.
Choose quality materials from trusted brands for better results.
Make sure your model is dry and free of oils.
Control the temperature and humidity in your workspace.
Tip: A well-prepared master model helps you capture every detail and makes demolding easier.
Building the Mold Box
You need a mold box to hold your model and the liquid silicone. Build your box just a little bigger than your master model. You can use plastic, wood, or even LEGO bricks. Seal the edges with clay or tape so the silicone does not leak out. Place your model in the center and make sure it will not move. This step sets you up for a clean pour and a strong mold.
Applying Mold Release Agent
Before you pour the silicone, apply a mold release agent. This step keeps the silicone from sticking to your model or the mold box. Here’s a quick look at common types:
Type of Mold Release Agent | Applications | Benefits |
|---|---|---|
Silicone Mold Release Agents | Plastic, Tires, Concrete, Die casting | Fast release, long mold life, clean finish |
Silicone-Free Mold Release Agents | Rubber, Plastics, Composite, Stone, Wood | Food-safe, good for electronics, easy clean |
Fast-Drying Agents | Quick releases, fast turnarounds | Saves time, ready for next step |
Silicone mold release agents work well for most jobs. They form a smooth layer and handle heat. Use a thin, even coat for best results.
Mixing and Pouring RTV Silicone
Now it’s time to mix your rtv silicone. Always follow the mix ratio from the manufacturer. Mix slowly to avoid trapping air. High-speed mixing can cause bubbles, so take your time. If you want fewer bubbles, try degassing the silicone in a vacuum chamber. Let the silicone rest for a few minutes before pouring if you do not have a vacuum. Pour the silicone slowly into one corner of the mold box. Let it flow over your model. This helps push out air and gives you a bubble-free finish. Some people use pressure casting to get even better results, especially for detailed parts.
Note: Degassing and pressure casting both help you avoid air bubbles and make your silicone mold stronger.
Curing and Demolding the Silicone Mold
After pouring, let the silicone cure. Most rtv silicone molds need about 24 hours to fully cure at room temperature. Here’s a quick guide:
Type of RTV Silicone | Skin-Over Time | Tack-Free Time | Full Cure Time (1/8" thickness) |
|---|---|---|---|
1-Part | 5–30 min | Up to 60 min | 24 hours |
2-Part | 5 min–hours | N/A | N/A |
Keep the mold box in a safe spot. Do not move it while the silicone sets. Once cured, gently remove the mold from the box. Take your time with demolding. A slow, careful touch keeps the details sharp and the mold in good shape. If you used pressure casting, you’ll notice even fewer bubbles and a smoother finish.
Best Practices for High Quality Silicone Molds
Capturing Fine Details in Silicone Molds
You want your silicone mold to show every small detail. Start by brushing a thin layer of silicone on your master model. This helps the silicone get into tiny spaces and corners.
I used a small round brush to gently paint a thin layer of silicone on the mold’s surface. This pushed silicone into the fine details and stopped air from getting trapped in corners and small spots. I made sure there were no gaps as I brushed the first layer. When the surface was covered, I poured the rest of the mixed silicone over the mold in a thin stream from above. Pouring slowly like this helps keep air out and lets bubbles rise before the silicone cures.
After brushing, pour the rest of the silicone slowly. This way, your rtv silicone molds will show every detail.
Avoiding Air Bubbles During Silicone Mold Making
Air bubbles can mess up your mold. You can use different ways to get bubble-free rtv silicone molds. Here are some common methods:
Method | Description |
|---|---|
Vacuum Chamber | Use a vacuum chamber to pull out air after mixing, usually at 25–29 inHg for 2–5 minutes. |
Resting | Let the mixed silicone sit for 5–10 minutes so bubbles can rise and pop. |
Slow Pouring | Pour the silicone slowly in a thin stream from one corner to stop bubbles. |
Guiding | Use a toothpick or needle tool to move silicone into tight spots and let bubbles out. |
Bottom-Up Pour | Try pouring from the bottom up to keep the surface smooth. |
You can also try degassing and pressure casting. These steps help get rid of trapped air and make smooth rtv silicone molds.
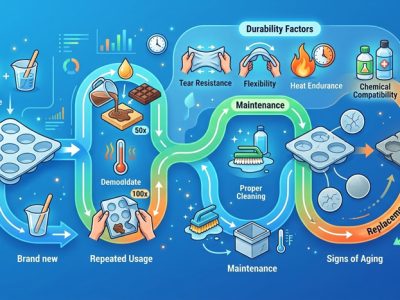
Improving Mold Durability and Lifespan
If you want your silicone molds to last longer, remember these things:
Factor | Description |
|---|---|
Type of Silicone | Different silicone types have special features that change how long they last. |
Storage Conditions | Store molds in clean, dry places away from heat and sunlight for best results. |
Mold Design | Complicated mold designs can wear out faster than simple ones. |
Contaminants | Dirt or other stuff can stop curing and make your mold not last as long. |
Tin-cured silicone molds shrink more as time goes by and usually last about a year.
Platinum-cured silicone molds can last for many years if you store them right.
Keep your molds clean and dry. Store them away from sunlight and heat. This helps your rtv silicone molds stay strong and last for many uses.
Common Mold Making Issues and Solutions
You might have problems when making silicone molds. Here are some common issues and how to fix them:
Issue | Cause | Solution |
|---|---|---|
Air Bubbles in the Mold | Air gets trapped during mixing or pouring. | Use vacuum degassing or pressure casting to get rid of bubbles. |
Incomplete Curing | Wrong catalyst ratio or bad room conditions. | Always follow the mixing ratios exactly. |
Tearing or Distortion | Wrong hardness or bad mold design. | Pick silicone with the right Shore hardness. |
Surface Defects or Sticky Residue | Dirty tools or wrong materials. | Use clean tools and high-quality silicone. |
Surface Imperfections | Dust, mold damage, or wrong release agents. | Keep your workspace clean and check molds often. |
Color Inconsistencies | Pigments not mixed well. | Mix pigments all the way and test before making a lot. |
Shrinkage and Warping | Changes in temperature or wrong silicone. | Keep the temperature steady while curing and pick the right silicone. |
If you use degassing and pressure casting, you can stop most of these problems. Always follow the instructions for your rtv and silicone products.
Applications of RTV Silicone Molds
Compatible Casting Materials
Silicone molds work with many casting materials. Some materials work better than others. Here are some examples: Polyurethane resin, Epoxy resin, Plaster, Wax, Concrete, and Low-melt metals. Not every silicone mold works with every resin. Sometimes, the surface stays sticky or does not cure right. Some molds can swell or break if you use the wrong material. Tin-cure silicone can react with platinum-cure silicone or some polyurethane resins. Always test a small amount before making a big batch. To avoid problems, use release agents like Ease Release 200 or PVA coatings. These make a barrier and help your mold last longer.
High Temperature and Moisture Applications
Silicone molds can handle heat and moisture better than most other materials. Look at this table:
Property | RTV Silicone (Platinum-Cured) | Other Materials (Latex, Polyurethane) |
|---|---|---|
Heat Resistance | High | Lower |
Flexibility | Excellent | Varies |
Moisture Resistance | Good | Limited |
Long-term Stability | High | Varies |
You can use silicone molds for projects that need heat or water. They stay flexible and strong. Tin-cured silicone molds might shrink or get weak, so use platinum-cured silicone for hard jobs. If you need to make engine parts, kitchen tools, or outdoor gear, silicone molds are a good choice.
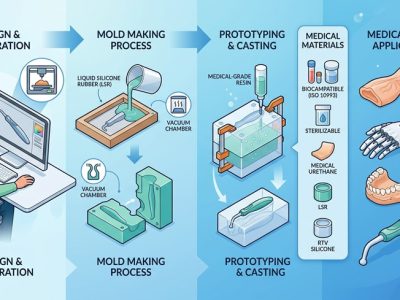
Using Silicone Molds for Prototype Manufacturing
If you want to make prototypes quickly, silicone molds help a lot. They give you high detail and accuracy. Silicone shows tiny textures and shapes with no shrinking. You can use the same mold many times if you take care of it. The flexible silicone lets you remove tricky parts without breaking them. Silicone works in cold and hot temperatures, from -50°C to over 200°C. It does not get ruined by most chemicals or solvents. You can make molds in just a few hours, not days. This makes prototyping and small production much faster.
Tip: If you want expert help with prototyping or vacuum casting, try LKprototype's service. They give good support and results for your silicone mold projects.
Silicone molds save money because you do not need pricey metal molds. You can use them for vacuum casting and fast production. This is great for inventors, engineers, and hobbyists.
Storage and Reuse of Silicone Molds
Proper Mold Cleaning and Storage
Taking care of your molds helps you get more casts and better results. After each use, rinse your molds with lukewarm water and a little mild soap. Hot water can weaken the material, so stick with warm or cool water. Let your molds air-dry flat or hang them up. Never wring or fold them, as this can cause damage. Always make sure your molds are completely dry before you put them away. This stops mildew and keeps your molds in good shape.
Here are some quick cleaning and storage tips:
Wash with mild soap and lukewarm water after every use.
Avoid hot water to protect the mold’s structure.
Air-dry molds flat or hang vertically.
Store in a cool, dark place, away from ozone sources.
Keep molds flat or loosely rolled, not folded.
You can also check this table for the best storage conditions:
Storage Condition | Recommendation |
|---|---|
Storage Temperature | Keep between 15–25°C (59–77°F) |
Moisture Control | Store in an airtight container |
Light Exposure | Protect from direct sunlight and UV radiation |
Seal Integrity | Ensure the cap is tightly closed after use |
Extending the Life of RTV Silicone Molds
You want your molds to last as long as possible. Good habits make a big difference. Store your molds in a cool, dry spot, away from sunlight and humidity. Always keep containers tightly sealed to stop evaporation. Let your molds dry all the way before you store them. This prevents mold growth and keeps the surface clean.
Try these tips to extend mold life:
Store molds flat or in their original shape to avoid warping.
Cover with acid-free paper or use sealed bins to keep out dust.
Clean thoroughly after each use and dry completely.
Apply a thin coat of commercial mold release spray if needed.
Follow the manufacturer’s instructions for mixing and curing.
If you have unopened silicone, keep it in a cool, dry place and use it within a year for best results. These steps help you get more casts and keep your molds working like new.
Now you know how to make RTV silicone molds. RTV silicone helps you get clear details. It is strong and bends without breaking. Here are some good things about using RTV silicone molds:
Advantages of RTV Silicone Molds |
|---|
Faster to make and costs less |
Needs little work after casting |
Works with many casting materials |
Try making new things and use good habits for the best results. Always clean your tools, mix the silicone well, and check if it cures right. If you have any questions or want to tell us what you made, leave a comment below! 👋
FAQ
How long does RTV silicone take to cure?
Most RTV silicone cures in about 24 hours at room temperature. Some fast-cure types set in just a few hours. Always check the label for exact times.
Can I reuse my silicone mold?
Yes, you can! If you clean and store your mold properly, you can use it many times. Just handle it gently to keep the details sharp.
What should I do if my mold has air bubbles?
Try using a vacuum chamber or pour the silicone slowly in a thin stream. You can also tap the mold box gently to help bubbles rise and pop.
Is RTV silicone safe for food molds?
Some RTV silicones are food-safe, but not all. Look for products labeled “food grade” if you want to make baking or chocolate molds. Always read the packaging.