LKprototype
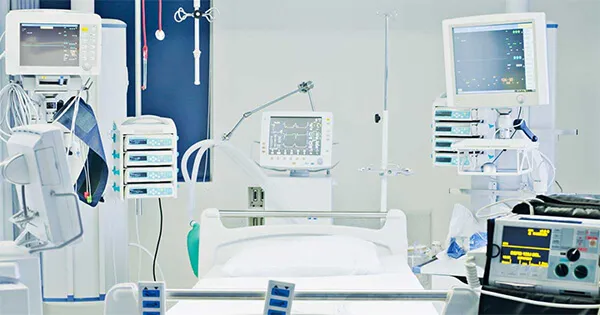
If you want to make your medical device idea a reality quickly and affordably, medical device prototypeing development is the way to go. Vacuum casting for medical devices offers a great solution for creating precise models. You don’t have to wait long or spend a lot of money. By using 3D-printed molds and patterns, you can test new designs rapidly and make changes easily. When planning medical device prototypeing development, consider how this process can help you achieve your project goals efficiently.
Key Takeaways
Vacuum casting helps make medical device prototypes faster. You can make many prototypes in a short time. This lets you test and get feedback quickly.
This method gives you very exact shapes. The surfaces are smooth and look like real products.
Vacuum casting saves money for small groups of items. You do not need to buy costly molds. This is good for new companies and small businesses.
Pick the best materials for your prototypes. Polyurethane resin and silicone have special features for different uses.
Always check if materials are safe for the body. This is very important for medical devices that touch skin or tissue.
Vacuum Casting Benefits for Medical Device Prototypeing Development

Fast Turnaround and Efficiency
You must work fast in medical device prototypeing development. Vacuum casting for medical devices helps you save time. This way, you make good prototypes without waiting for costly molds. You can try out ideas, get advice, and change things quickly. This matters because new medical devices need to be ready for the market soon.
Tip: You can fix your design many times before making lots of products.
Vacuum casting helps you develop faster in these ways:
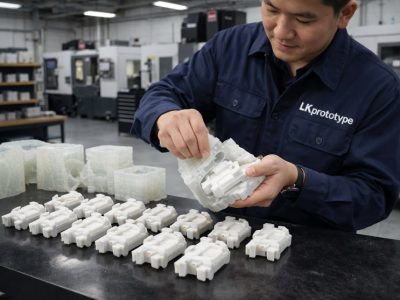
You can make a few medical device housings quickly. This helps you get opinions from users and experts.
Getting prototypes early lets you test your device in real life.
You skip the big costs and long waits for hard tooling.
The process makes your development cycle shorter and lowers risk.
If you need to keep up with fast production, vacuum casting helps you a lot. It lets you go from your first idea to a finished product ready for sale.
Precision and Surface Quality
Medical device prototypeing development needs parts that fit well and look nice. Vacuum casting gives you the exact shapes you need. The process uses a master model and a silicone mold to make detailed parts. Casting under vacuum takes out air bubbles, so your prototypes are smooth and shaped right.
Description | Details |
|---|---|
Typical Tolerances | +/- 0.010” or +/- 0.003” per inch, whichever is greater. |
Shrinkage | A typical shrinkage of +0.15% due to thermal expansion of the material. |
Surface Finish | Externally smoothed to achieve a satin or matte appearance. |
You can get accuracy of 0.05mm, which works well for most medical device parts. The smooth finish makes your prototypes look and feel like real products. Compared to other ways, vacuum casting gives you good results for less money.
Cost-Effectiveness for Short Runs
If you work at a startup or small business, you need to save money. Vacuum casting helps you spend less during medical device prototypeing development. You do not have to buy pricey injection molds. You can make a few parts for testing or early sales.
Vacuum casting helps you lower production costs.
You can get your prototypes faster with shorter wait times.
The process lets you meet different needs without extra cost.
Many companies pick vacuum casting because it saves money for small batches. For example, the ProEX Telehealth Hub and VisionFlex used vacuum casting to make good prototypes. They did not pay high costs for injection molding and moved quickly from making to selling.
If you want good quality, fast production, and low costs, vacuum casting is a smart choice for medical device prototypeing development.
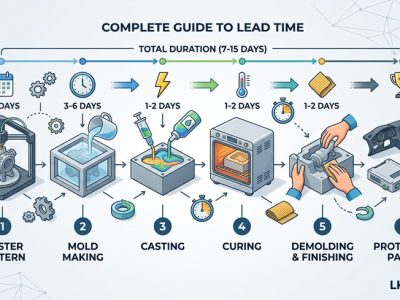
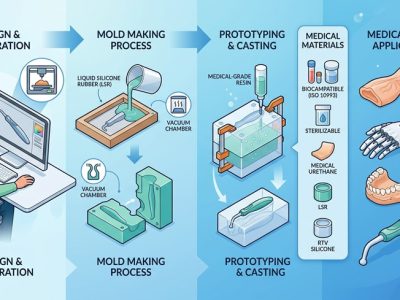
Vacuum Casting Process for Medical Devices
Step-by-Step Overview
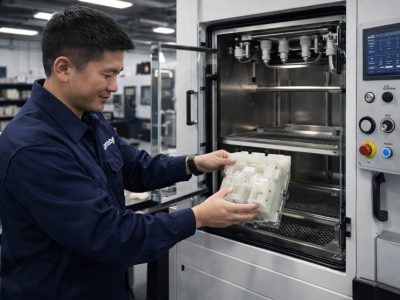
Vacuum casting helps you make good parts for medical device prototypes. This method lets you move fast from making a prototype to testing it. Here is how you do it:
First, you make a master model of your part. People often use CNC machining or 3D printing for this.
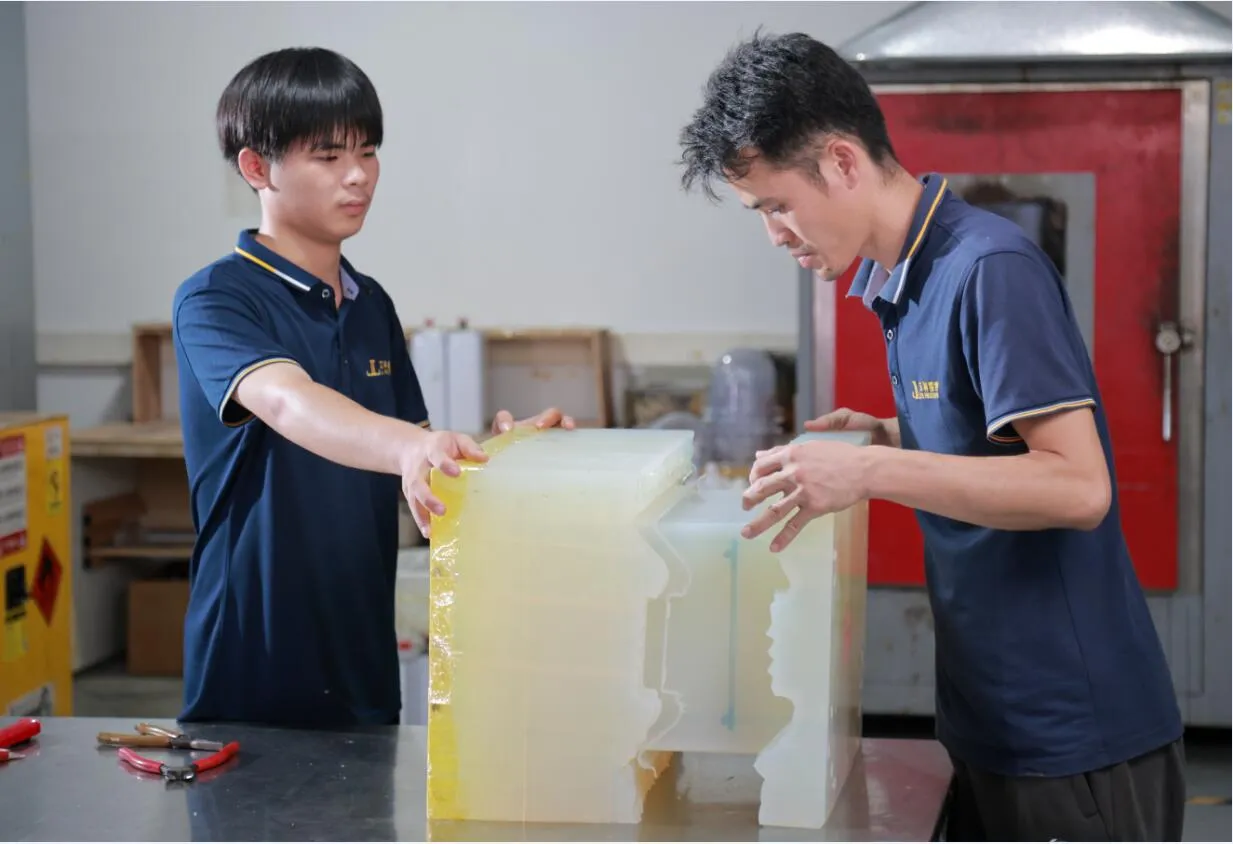
Next, you put the master model in a container. You pour liquid silicone over it. The silicone hardens and becomes a mold.
When the silicone is cured, you cut the mold open. You take out the master model. Now you have a cavity for casting.
You mix polyurethane resin and pour it into the mold. The mold goes into a vacuum chamber. This removes air bubbles.
The part cures in a heating chamber. When it is ready, you take it out and trim extra material.
This process gives you smooth parts and lets you make many copies fast. You can use it for testing and development before making lots of products.
Creating Detailed Geometries
Vacuum casting lets you make parts with complex shapes and fine details. You can create parts with tiny features that other methods cannot do well.
The process fills every part of the mold, even small spaces.
You get smooth parts with a nice surface finish.
It works well for designs with tight tolerances.
You can use it for device housings or parts that need to look good.
You can trust vacuum casting to make high-quality parts, even if your design is very detailed.
Quality Control in Prototyping
You should know about some problems with vacuum casting during development. Here are some common issues:
Challenge | Description |
|---|---|
Limited Material Selection | You mostly use polyurethane resins and silicone molds. |
Lower Heat and Chemical Resistance | Polyurethane resins do not handle high heat or strong chemicals well. |
Durability and Aging Issues | Parts may not last long because of UV and moisture. |
Not Suitable for Large-Scale Production | Best for small batches, not for mass production. |
Mold Lifespan and Wear | Silicone molds wear out after 20-30 uses. |
Shrinkage and Warping Issues | Parts can shrink or warp while curing. |
Lower Precision Compared to Injection Molding | Tolerances are good but not as tight as injection molding. |
Even with these problems, you can still make good parts for your prototype. Vacuum casting is a quick and cheap way to help you test and develop your medical device.
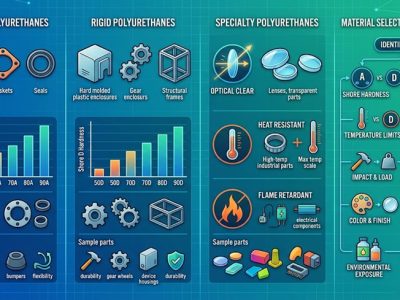
Material Options in Vacuum Casting for Medical Devices
Polyurethane Resin and Silicone
When you use vacuum casting, you can pick from many materials for medical device prototypes. Two common choices are Polyurethane resin and Silicone. Each one has special features to help with your project.
Polyurethane resin can be soft or hard. You can make parts that feel like rubber or plastic. Silicone can handle high heat and is safe for medical devices. You can use Silicone for parts that touch skin or need to resist heat.
Here is a table to help you see the differences:
Property | Polyurethane Resin | Silicone |
|---|---|---|
Flexibility | Can be very flexible or less flexible | Usually flexible, but not as much as polyurethane |
Durability | Very tough and resists scratches | Good, but not as tough as polyurethane |
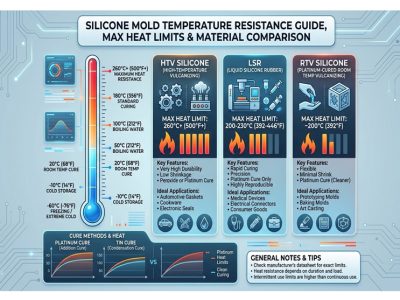
Temperature Resistance | Works up to 80°C, breaks down above that | Handles very high heat |
Biocompatibility | Depends on the type you choose | High, good for medical use |
Tip: Use Silicone for parts that touch skin or get hot. Use Polyurethane resin for strong and tough parts.
Material Properties and Suitability
You need to pick the best material for your medical device prototype. Polyurethane resins can act like many plastics. You can make parts that look and feel like ABS, polycarbonate, or rubber. Some resins are clear and look like glass. Others are strong and good for device housings.
Polyurethane resins are tough and resist scratches.
You can choose how hard or soft you want your part.
Silicone is great for high heat and is safe for people.
If you want flexible or see-through parts, use special Polyurethane resins. These materials help you test how your device works and looks. You get many choices for your project.
Biocompatibility Considerations
You must make sure your prototype is safe for people. Biocompatibility means the material does not hurt anyone. You need to check if the material is safe, does not cause allergies, and does not irritate skin. Many vacuum casting materials meet these rules.
Here is a table to show what to look for:
Standard Type | Description |
|---|---|
Non-toxic | Material should not release anything harmful. |
Non-allergenic | Material should not cause allergies when touching skin. |
Non-irritating | Material should not bother skin or tissues. |
ISO 13485 | A rule that helps make sure medical devices are made well. |
Vacuum casting materials often pass ISO 10993 tests. You can use these materials to test your device early. Injection molding materials may not always focus on being safe for people.
Material Type | Biocompatibility Certification | Usability Testing Capability |
|---|---|---|
Vacuum Casting | ISO 10993 | Good for early testing |
Injection Molding | Not always listed | May not focus on safety |
Note: Always check if your material is certified before using it for medical device prototypes.
Comparing Vacuum Casting to Other Medical Device Manufacturing Methods
Vacuum Casting vs. 3D Printing
You might wonder how vacuum casting and 3D printing are different. Both help you make parts fast, but they work in different ways. Vacuum casting uses molds to make many copies. 3D printing builds each part one layer at a time.
Here is a table that shows the main differences:
Aspect | 3D Printing | Vacuum Casting |
|---|---|---|
Cost | Costs more for a few parts; good for small batches | Costs less for more parts; molds can be used again |
Speed | Fast for one part; slow for many parts | Takes time to set up; fast for making many parts |
Material Options | Not many choices; some special materials available | Many choices; includes plastics, rubbers, and metal-like materials |
Vacuum casting gives you smoother parts and more material choices. You can use certified materials for testing, which is important for medical devices. 3D printing is good for making one quick part. Vacuum casting is better if you need several parts for testing.
Tip: Pick vacuum casting if you want many detailed prototypes with real material properties.
Vacuum Casting vs. CNC Machining
You might also want to know how vacuum casting and CNC machining compare. CNC machining cuts parts from solid blocks. Vacuum casting uses molds to make parts. Each way has good and bad points.
Method | Advantages | Disadvantages |
|---|---|---|
Vacuum Casting | Makes accurate parts for testing and looks | Costs more because you need molds and materials |
Gives smooth surfaces like finished products | Not as strong or heat-resistant as CNC parts | |
Many material choices (colors, textures, clear parts) | Molds wear out, so you can't make too many parts | |
Good for small batches with the same quality | You must be careful to avoid air bubbles and mistakes | |
CNC Machining | Very precise and tight measurements | Costs a lot for hard shapes |
Smooth surfaces for checking and testing | Slow for making tricky shapes | |
Works with many materials, even strong plastics | Hard designs need more setups and tools, which takes time and work | |
Makes steady, repeatable parts for small batches | May need extra work to finish tricky shapes |
Vacuum casting is best for making a few parts and saving money. CNC machining is great for one part or when you need very exact shapes.
Choosing the Right Prototyping Approach
You should pick the way that fits your project best. If you want quick results and low costs for a few parts, vacuum casting is a good choice. CNC machining gives you very exact and strong parts, but it costs more and takes longer for many pieces. 3D printing is fast for one part, but not for lots of parts.
Rules and safety standards also help you decide. You must follow these rules to make safe and reliable medical devices.
✅ Always choose the prototyping method that matches your project, budget, and safety rules.
Vacuum casting helps a lot when making medical device prototypes. You can save money and pick from many materials. You also get parts that are very accurate. The table below lists the main benefits:
Benefit | Description |
|---|---|
Cost-effectiveness | Uses cheaper tools and materials. |
Material versatility | Lets you use many kinds of resins. |
Accuracy and uniformity | Makes parts that are precise and even. |
Think about these things when you plan your project:
You need exact shapes for tricky designs.
You spend less money with small batches.
You get smooth parts and fast results.
You can test your design before making lots of products.
Pick a partner who knows what you need and helps you choose the best materials for your device.
FAQ
What is the vacuum casting process for medical device prototypes?
You make parts by pouring liquid into a mold. The process takes out air bubbles. This helps you get smooth and detailed parts. You can test your medical device quickly with this method.
How many times can I use the same mold in the vacuum casting process?
You can use the mold about 20 to 30 times. After each use, check the mold to see if it is still good. The process keeps the mold working for small batches.
Can I use different materials in the vacuum casting process?
You can pick from many materials for this process. Polyurethane resin and silicone are good choices. You choose the material that fits your device. The process lets you test how each material works.
Is the vacuum casting process safe for medical device prototypes?
You can trust this process for early testing. Many materials used in the process follow safety rules. Check for biocompatibility before using parts that touch skin or tissue.
How does the vacuum casting process compare to 3D printing?
This process makes smoother parts than 3D printing. You use it to make many copies with real material properties. 3D printing is good for one part, but this process helps you test more parts faster.