LKprototype
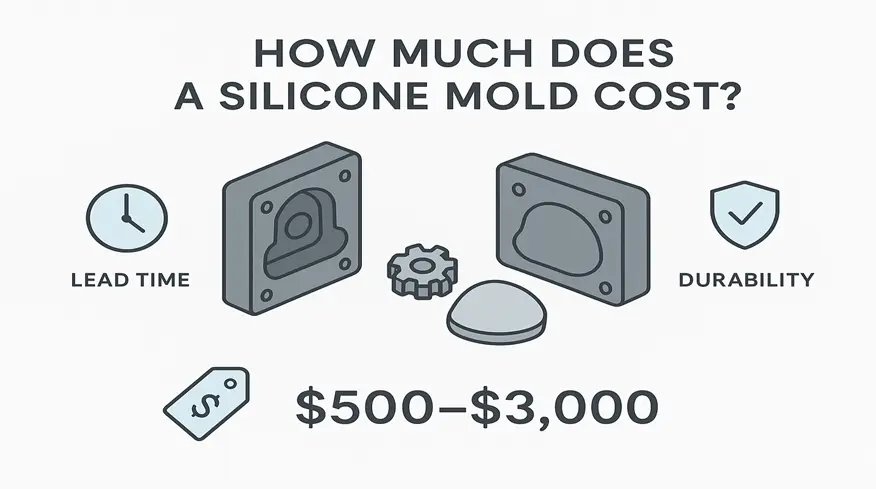
Introduction
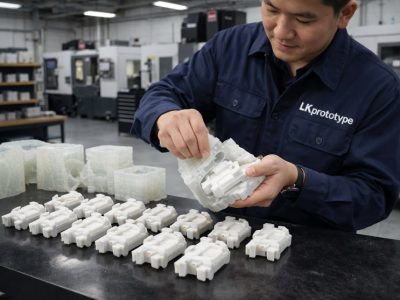
If you’re an engineer, product designer, or sourcing manager trying to validate a design or run a low-volume pilot, silicone tooling (often used for vacuum/urethane casting) can feel like the “fast middle ground” between one-off prototypes and full production tooling.
This guide is written for US-based teams who need a realistic way to estimate:
- What a silicone mold cost typically looks like (in USD)
- How many parts you’ll actually get from one mold (yield)
- What lead time to expect
- When silicone tooling is the right call—and when aluminum tooling or 3D-printed molds make more sense
How to use it: scan the TL;DR first, then use the “cost drivers” and comparison sections as your selection checklist.
TL;DR: Silicone mold cost at a glance
Typical cost range
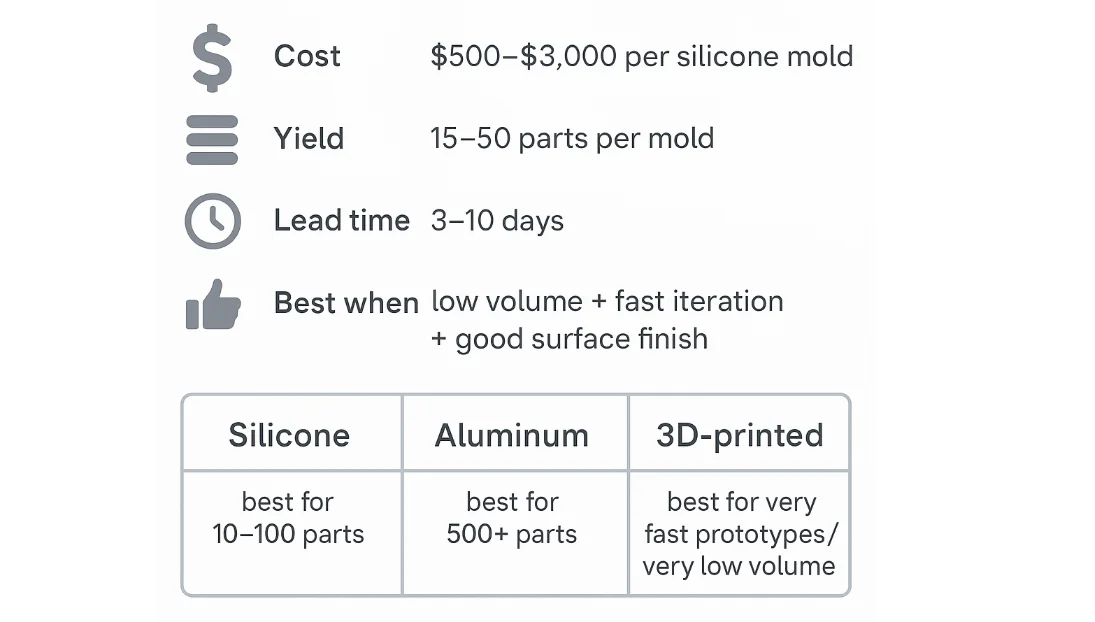
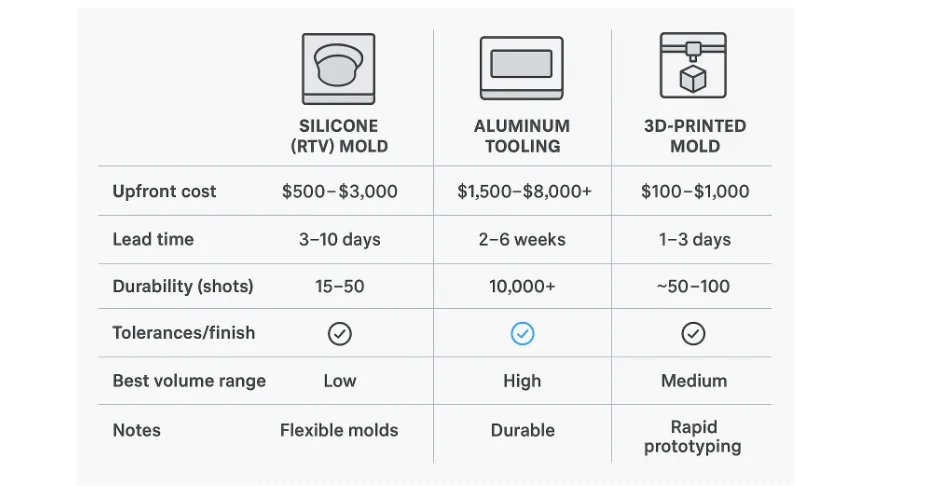
- A common working range for silicone molds used for vacuum/urethane casting is $500–$3,000 per mold.
- Many standard cases land lower (often $200–$1,000)—Formlabs cites $200–$1,000 for silicone molds in urethane/vacuum casting contexts in its Vacuum Casting (Urethane Casting) guide (2023).
(SEO note: If you’re also searching for vacuum casting mold cost or urethane casting silicone mold cost, most suppliers roll the master, mold build, and casting labor into the quote—so confirm what’s included.)
Key Takeaway: Treat the quote as “mold + master + setup,” not just “a block of silicone.” The master pattern quality and part geometry are usually the swing factors.
When silicone wins
Silicone tooling usually wins when you need:
- 10–100 parts quickly (prototype builds, EVT/DVT-like samples, early market pilots)
- Fast design iteration (changes are cheaper than re-cutting metal tooling)
- Good cosmetic surfaces for demos (assuming the master pattern is finished well)
- Complex geometry/undercuts that would complicate rigid tooling
When to consider aluminum or 3D-printed molds
- Consider aluminum tooling when you expect hundreds to thousands of parts, tighter tolerances, or you need durable tooling. Protolabs notes aluminum tools can run 10,000+ parts in many cases in its 3D-printed molds vs. aluminum tooling article.
- Consider 3D-printed molds when your priority is speed to first part and you’re OK with limited tool life and finish constraints. Protolabs also reports many printed molds are effective for ~100 shots in that same article.
What drives silicone mold cost
When teams get surprised by price, it’s usually because they’re thinking only about silicone material—not the pattern, gating, and labor that make the tool produce consistent parts.
Geometry & part size
Geometry drives cost in three ways:
- Material volume: bigger parts require more silicone, and bigger mold blocks take longer to build and cure.
- Parting strategy: undercuts, deep pockets, and tricky demolding features can force split molds, inserts, or additional hand work.
- Yield risk: complex geometry can increase defects (air traps, incomplete fill), which can increase the “true cost per good part.”
Practical heuristic: if the part needs multiple parting lines, has aggressive undercuts, or requires careful venting to avoid voids, expect the quote to move toward the top of the range.
Master pattern & finish quality
For silicone tooling, the “tooling quality ceiling” is often set by the master pattern.
Costs climb when the master needs:
- High cosmetic finish (gloss, texture control, paint-ready surfaces)
- Tight dimensional fidelity (post-print machining, hand finishing, or a CNC master)
- Multiple masters (e.g., families of parts or variants)
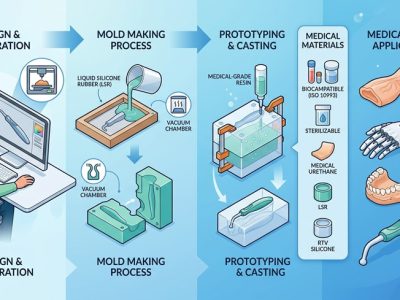
Formlabs notes that silicone tooling is used for vacuum/urethane casting with a master pattern and soft tooling, and it’s often chosen because it keeps tooling costs low while maintaining good quality for small runs (see Formlabs’ Vacuum Casting/Urethane Casting guide, 2023).
Silicone grade, gating, and labor
Even when material cost is modest, labor can dominate:
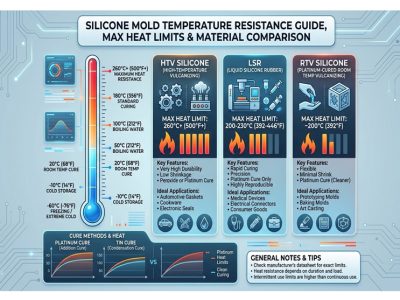
- Silicone selection: durometer, tear strength, heat resistance, and cure behavior affect demolding success and tool life.
- Gating and venting: better gating reduces voids and short shots, but takes more engineering time.
- Process control: vacuum degassing, careful pouring, and cure cycles add time but reduce scrap.
LKprototype’s silicone mold making guide highlights typical process steps like vacuum degassing and careful pouring to reduce bubbles—exactly the kind of labor that can separate a “cheap mold” from a usable one.
Yield, lead time, and tolerances
Cost alone is a weak decision metric. For most teams, the real question is: How many acceptable parts will I get by my deadline?
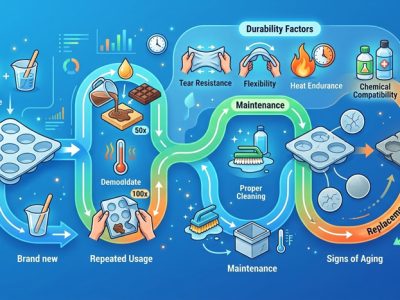
Mold life (shots per mold)
For RTV silicone molds used in vacuum/urethane casting, a practical expectation is often ~15–50 good parts per mold, with the exact number depending on geometry, resin aggressiveness, demolding stress, and finish requirements.
Formlabs reports a silicone mold can produce roughly 50 casts in vacuum/urethane casting contexts (see Formlabs’ Vacuum Casting/Urethane Casting guide, 2023).
Two yield realities to plan for:
- Quality falls off before “total failure.” You may still get parts, but dimensions and surface may drift.
- Cosmetic requirements reduce usable shots. If you need showroom-grade surfaces, you may retire the tool earlier.
Lead time expectations
Lead time depends heavily on whether a master exists.
A common breakdown looks like (and it drives your silicone mold lead time):
- Master pattern: hours to a few days (3D print + post-process, or CNC)
- Mold build + cure: typically a few days
- Casting and post-processing: days, depending on quantity and finish
Formlabs cites roughly ~10 days from master production to receiving cast products in a typical vacuum casting flow (see Formlabs’ Vacuum Casting/Urethane Casting guide, 2023).
Tolerance and surface finish notes
Silicone tooling can produce impressive detail, but it’s not injection molding.
Expectations that usually hold up in practice:
- Tolerances are more variable than aluminum/steel tooling because the mold is flexible and can distort slightly during demolding and over repeated casts.
- Surface finish mirrors the master. If the master is glossy and clean, parts can look excellent; if it shows print lines or sanding marks, you’ll replicate them.
- Thin features are risk multipliers. Thin walls, sharp corners, and deep ribs are more prone to tearing the mold or creating inconsistent fill.
Objective support note (non-promotional): LKprototype can provide brief DFM feedback and quote guidance for vacuum casting to align geometry, tolerances, and yield assumptions upfront.
Compare: silicone vs aluminum vs 3D-printed molds
Cost and lead time
If you’re choosing under schedule pressure, the “time-to-first-acceptable-parts” lens is usually clearer than tooling cost alone. This is where a silicone tooling vs aluminum tooling comparison is more useful than a single tooling price.
- Silicone molds: mid-range tooling cost, fast turnaround for low volumes because soft tooling is quicker to make and modify.
- Aluminum tooling: higher NRE and longer lead time (machining, sampling, tweaks), but better for sustained production.
- 3D-printed molds: often fastest to get a tool, but may require more secondary work and frequent replacements depending on polymer and geometry.
Durability and quality
Durability is where aluminum tooling separates.
- In injection molding contexts, Protolabs reports 3D-printed molds are often effective for ~100 shots, while aluminum tooling can run 10,000+ parts (see Protolabs’ 3D-printed molds vs. aluminum tooling article, 2021).
- For silicone tooling in vacuum/urethane casting, plan for dozens of parts per mold, not thousands.
Quality trade-offs to keep in mind:
- Aluminum tooling usually supports tighter, more repeatable tolerances and better long-run consistency.
- Silicone tooling can deliver excellent cosmetic surfaces at low volume when the master is strong—but repeatability over many cycles is limited.
- 3D-printed molds can be useful for quick validation, but surface quality and heat/durability constraints can become the limiting factors.
Breakeven by volume
Breakeven is project-specific, but these heuristics are useful for first-pass sourcing decisions:
- 0–10 parts: consider 3D printing parts directly (no tooling) or very simple soft tooling if material/finish demands it.
- 10–100 parts: silicone tooling is often the sweet spot—especially when change risk is high.
- 100–500 parts: depends. If revisions are likely, silicone tooling can still win; if design is stable, aluminum tooling may start to make economic sense.
- 500+ parts: aluminum tooling is typically easier to justify because you’re amortizing NRE over more units and gaining repeatability.
Pro Tip: If you’re uncertain, ask vendors to quote two paths: (1) silicone tooling for your first 30–50 units, and (2) aluminum tooling for the next 500+. The delta often clarifies the decision.
Conclusion
Silicone tooling is a practical way to buy speed and flexibility.
Key takeaways:
- Cost range: plan around $500–$3,000 per silicone mold, with many standard cases cited as $200–$1,000 depending on part size and complexity.
- What drives cost: geometry/part size, master pattern quality/finish, and gating/venting labor.
- Yield and lead time: expect ~15–50 parts per mold and days to ~10 days to first parts depending on master readiness.
- Where silicone fits best: low-volume builds where iteration speed matters; aluminum tooling becomes compelling as volumes climb and tolerances tighten.
Next steps for an accurate quote (and a smoother DFM loop): assemble your CAD, target quantity, resin/material needs, tolerance callouts, and surface-finish requirements before requesting pricing.